Replace Vacuum Pump
| Model | [ ] AON M2+ (CE) | [ ] AON M2+ (R-NZ) | [•] AON M2+ | [ ] AON-M2 2020 | [ ] AON-M2 |
| Category | [ ] Preventive | [•] Corrective |
Summary
The procedure that follows gives the instructions on how to replace the original vacuum pump on the AON M2+ machines with the vacuum pump upgrade.
The advantages of the vacuum pump upgrade are as follows:
- Reduced noise level
- Minimized maintenance
- Decreased machine vibration.
Estimated time: 30 minutes
Tools
| Qty | Description | Specification |
|---|---|---|
| 1 | Hex Key | 3 mm |
| 1 | Hex Key | 4 mm |
Parts Information
| Qty | Part Number | Description |
|---|---|---|
| N/A | N/A | N/A |
Personal Protective Equipment
| Qty | Description | Minimum Specification |
|---|---|---|
| 1 | Safety Eyewear | ANSI/ISEA Z87.1 |
Prepare the Machine
Make sure that there are no prints on the build surface. Remove print(s) before the procedure that follows is started. Failure to do so can cause a collision and cause damage to the machine component(s).
- Home XYZ.
- Use the Graphical User Interface (GUI) to power OFF the vacuum pump.
- Open the build chamber door.
- Push the E-stop button.
- Turn the power OFF with the ON/OFF switch found behind the machine.
- Disconnect the main power cord from the receptacle.
Dangerous voltages continue to be found in the electrical panel when the ON/OFF switch is set to OFF. Disconnect the main power cord from the machine while maintenance is done. Failure to do so can cause electric shock.
- Turn the vacuum circuit power OFF with the ON/OFF switch found on vacuum control box.
- Disconnect the power cord from the the vacuum circuit electrical enclosure.
- Wait until the build chamber, build platform, and hot ends are at room temperature.
Remove Vacuum Pump
Wait until all machine components are at room temperature before you continue. Some machine components can be hot if the machine was recently used. Failure to do so can cause injuries.
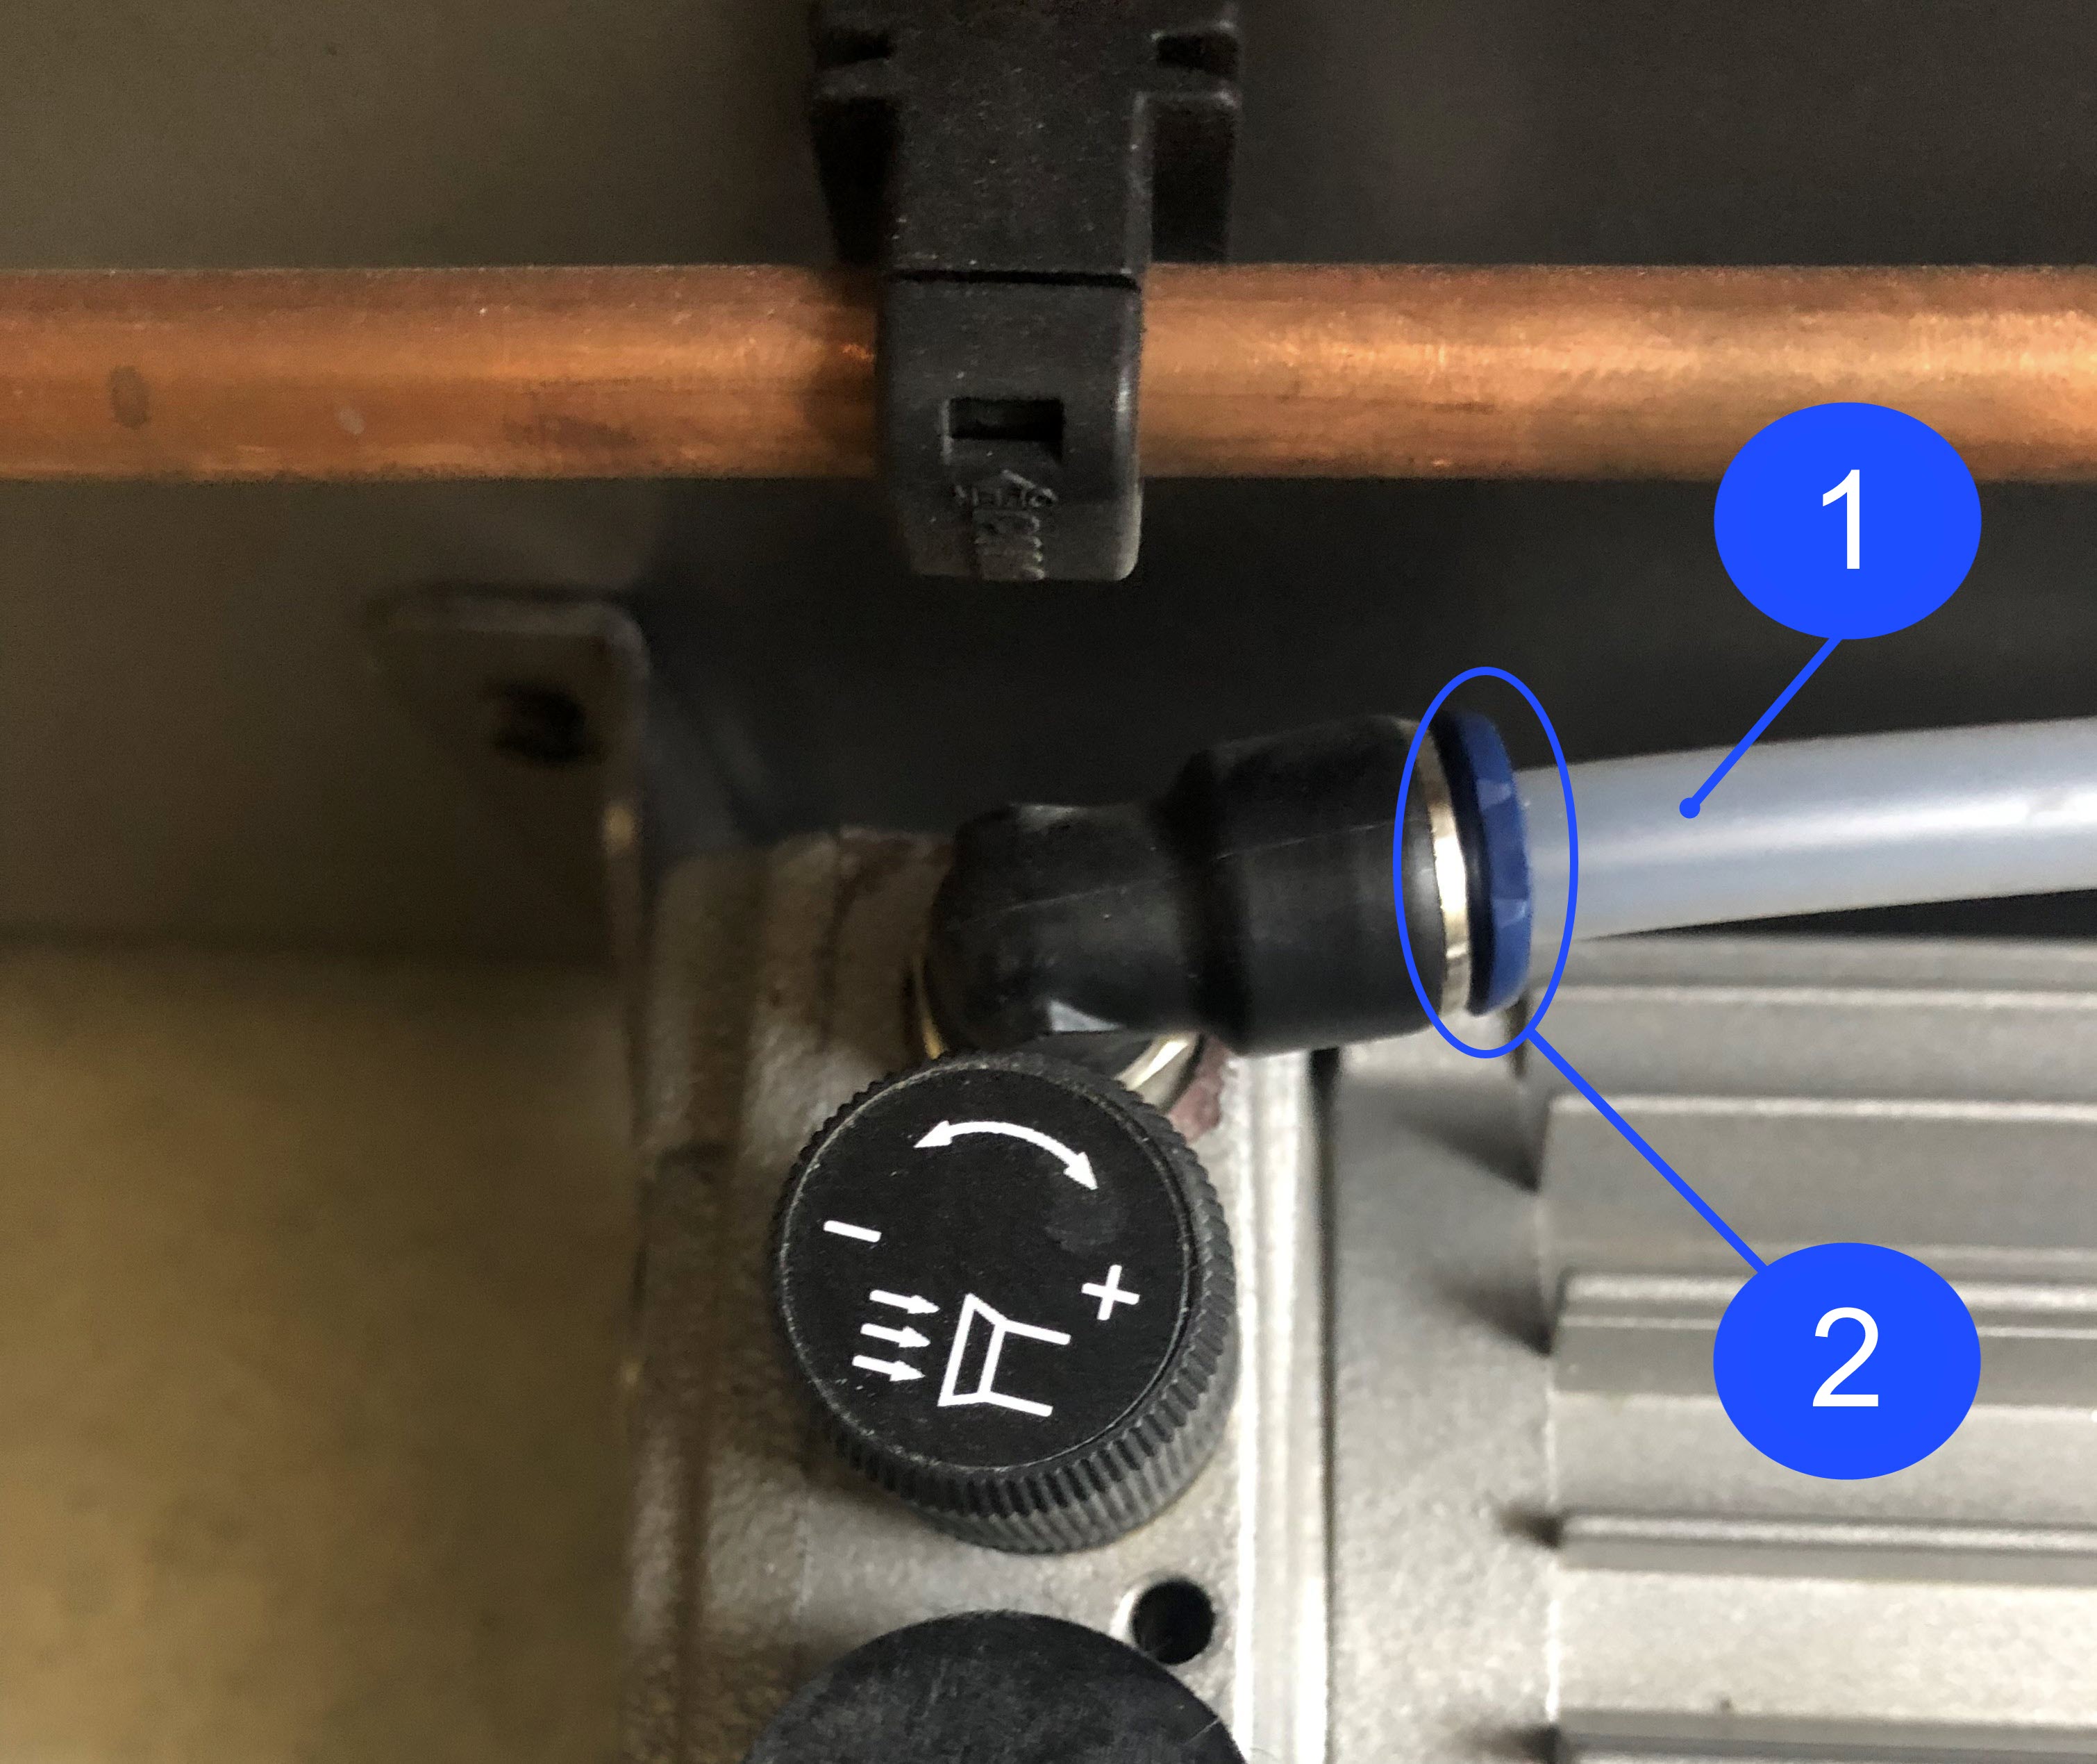
- Disconnect the vacuum tube (1) from the vacuum pump fitting (2) as follows:
- Compress the vacuum pump fitting (2) collar.
- With the vacuum pump fitting (2) collar compressed, pull out the vacuum tube (1).
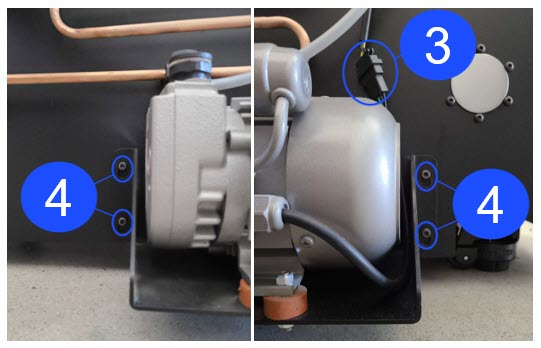
- Disconnect the vacuum pump wire harness (3).
- Use the 4 mm hex key to loosen the four screws (4) that hold the vacuum pump assembly onto the rear panel of the machine. Do not remove the four screws (4).
- Carefully lift and pull out the vacuum pump assembly.
Install New Vacuum Pump
The vacuum pump is mounted to the machine for ease of movement and shipping. It must be removed from the machine before printing.
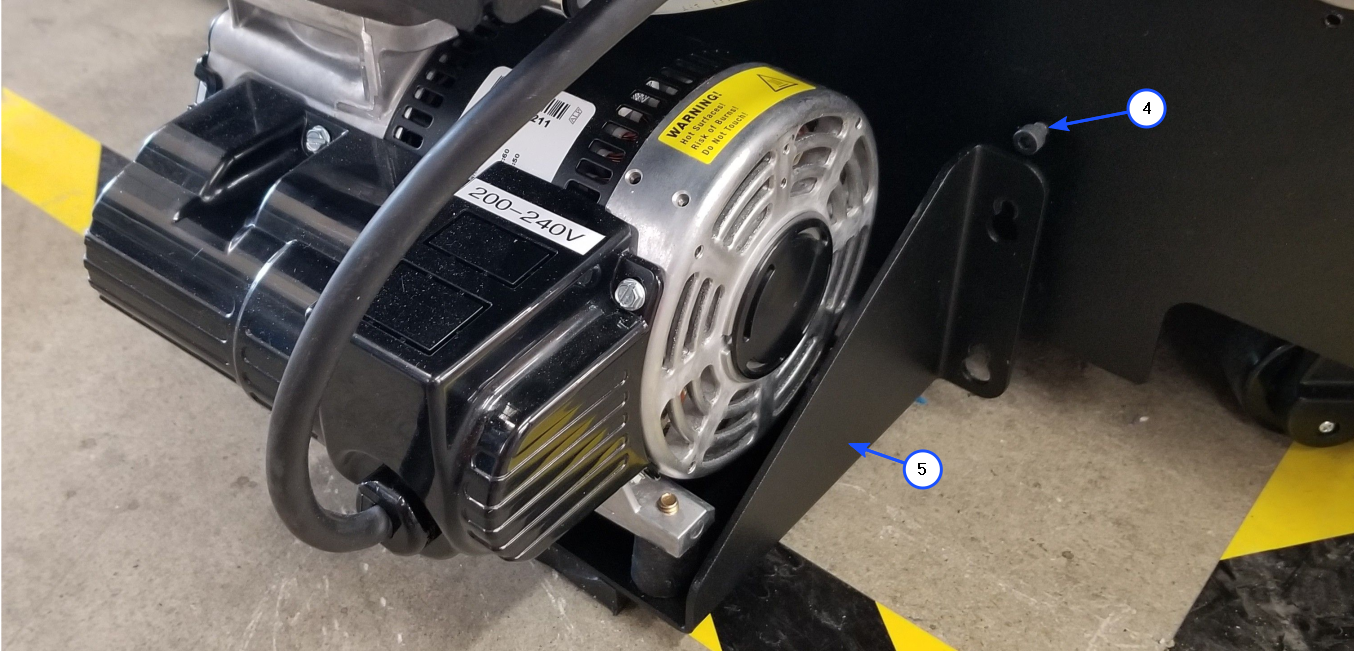
- Put the vacuum pump assembly (5) on the floor.
- Connect the vacuum pump wire harness (3).
- Connect the vacuum tube (1) into the vacuum pump fitting (2). Lightly pull on the vacuum tube (1) to make sure that it is correctly installed in the vacuum pump fitting (2).
Test and Return to Service
- Connect the main power cord to the receptacle.
- Connect the power cord to the the vacuum circuit electrical enclosure.
- Turn the power ON with the ON/OFF switch found on the rear panel of the machine.
- Turn the vacuum circuit power ON with the ON/OFF switch found on vacuum control box.
- Close the build chamber door.
- Release the E-stop button.
- Home XYZ.
- Use the Graphical User Interface (GUI) to power ON the vacuum pump.
- Make sure that the build sheet seals correctly onto the vacuum chuck. Refer to Install Build Sheet.