Quick Start
This SuperSlicer Quick Start guide contains the basics required for a first slice with the AON3D SuperSlicer. This covers how to start by importing a model, manipulating and controlling the model in the environment, selecting material, configuring process and printer, and exporting G-code.
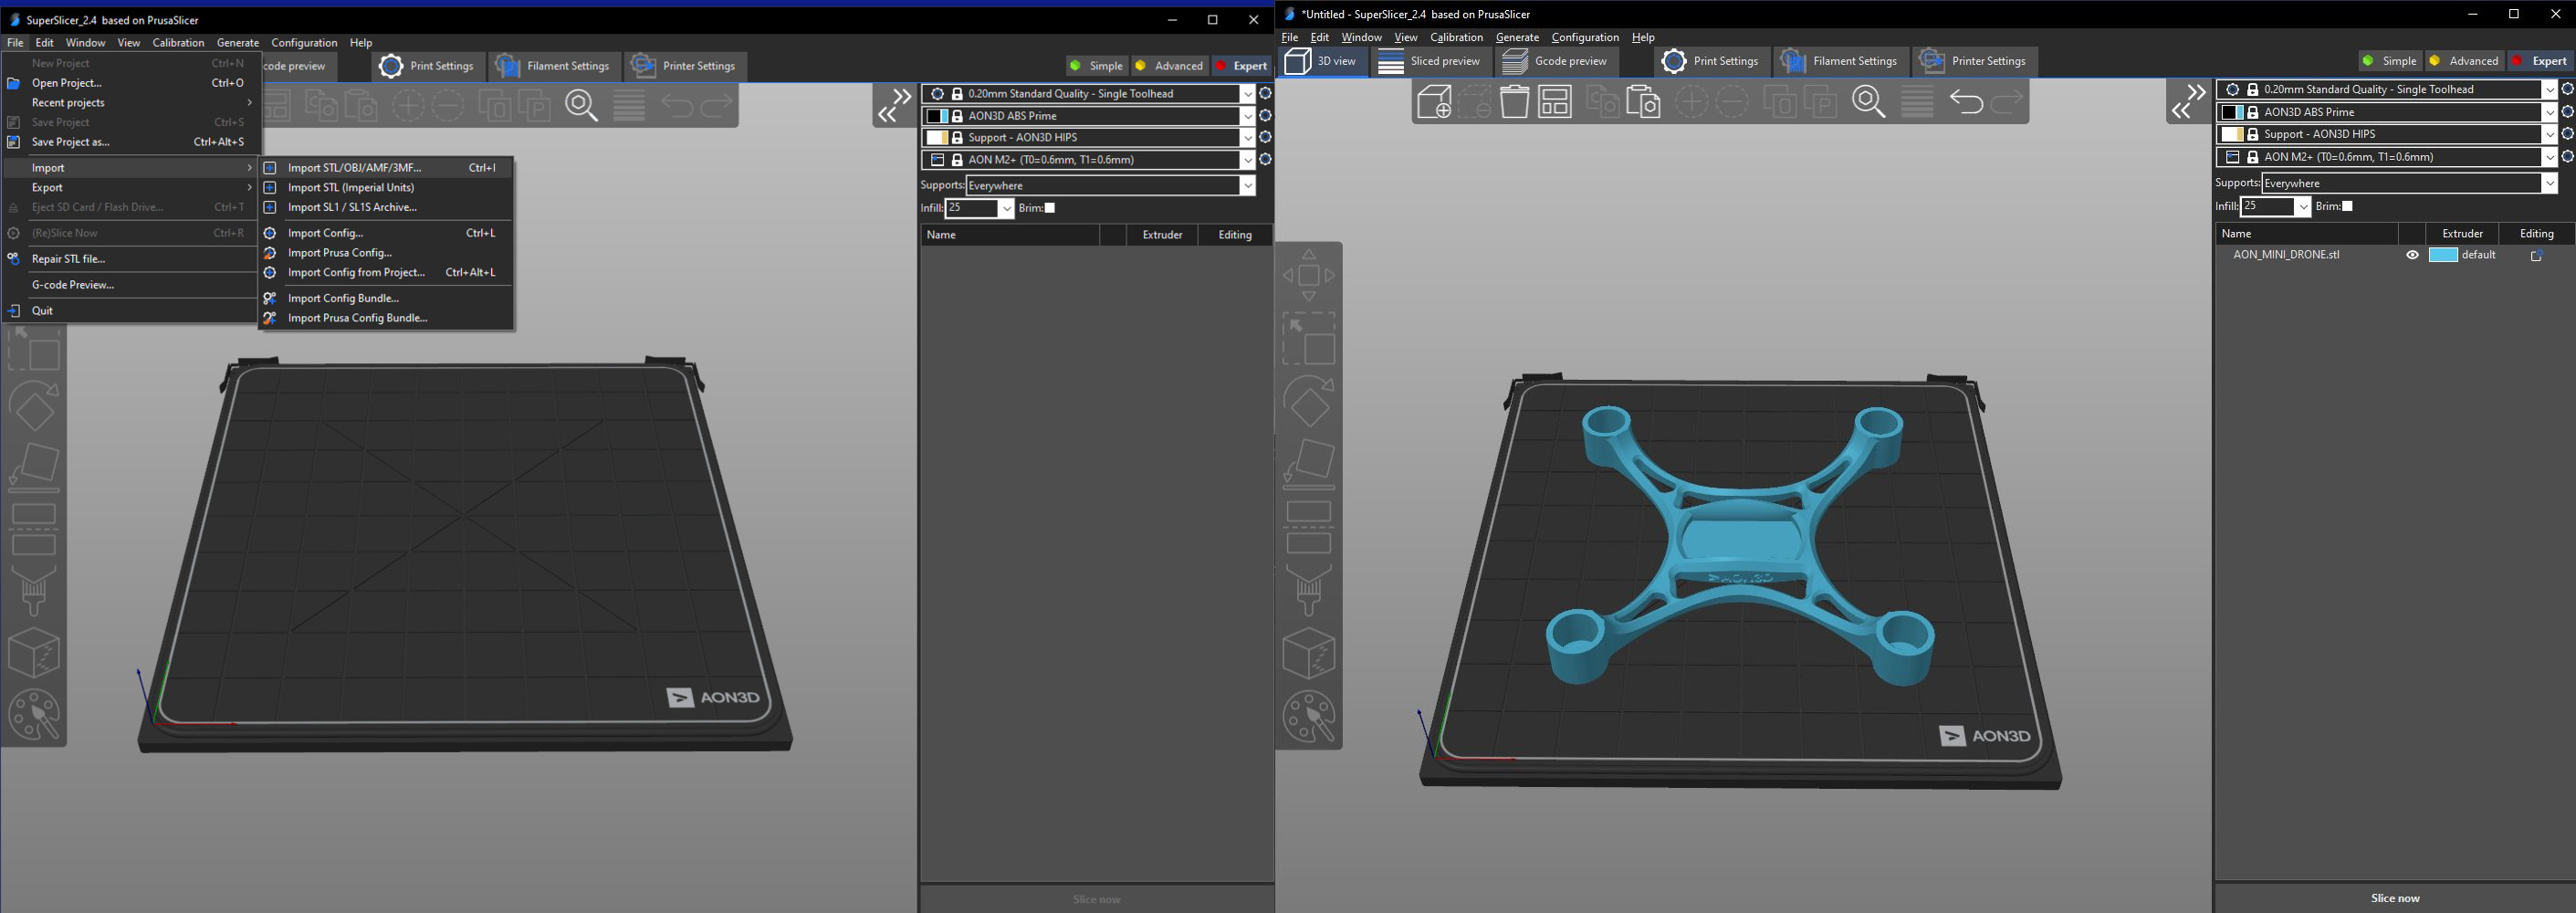
Import Model
To import a model, navigate to:
File > Import > Import STL/3mf
or drag and drop the model into the workspace.
Controls
Left mouse → Rotate
Right mouse → Pan
Zoom
Scroll wheel or I and O → Zoom in and out respectively
B Zoom on print bed
Z Zoom on selected objects, or all if none selected
View
0 Isometric view
1 Top-down view
2 Bottom-up view
3 Front view
4 Back view
5 Left view
6 Right view
Left Panel
Model Orientation
Select the model to see the corner contours, then type:
M to Move model on bed
S to Scale model
R to Rotate model
F to place on select face
C to Cut the model in Z direction
Seam and Support
L Paint-on supports: This is a frequently used feature when printing overhang structures. It allows to manually enforce (left mouse button) or block (right mouse button) supports on the model by painting on the model using a brush.
P Seam painting: Similar to supports, the user can manually enforce (left mouse button) or block (right mouse button) the seam on certain areas of the geometry.
Right Panel
Select Filament, Printer Configuration and Print Settings from the right panel. For each of these settings, a drop-down menu of all of our respective preset profiles is available.
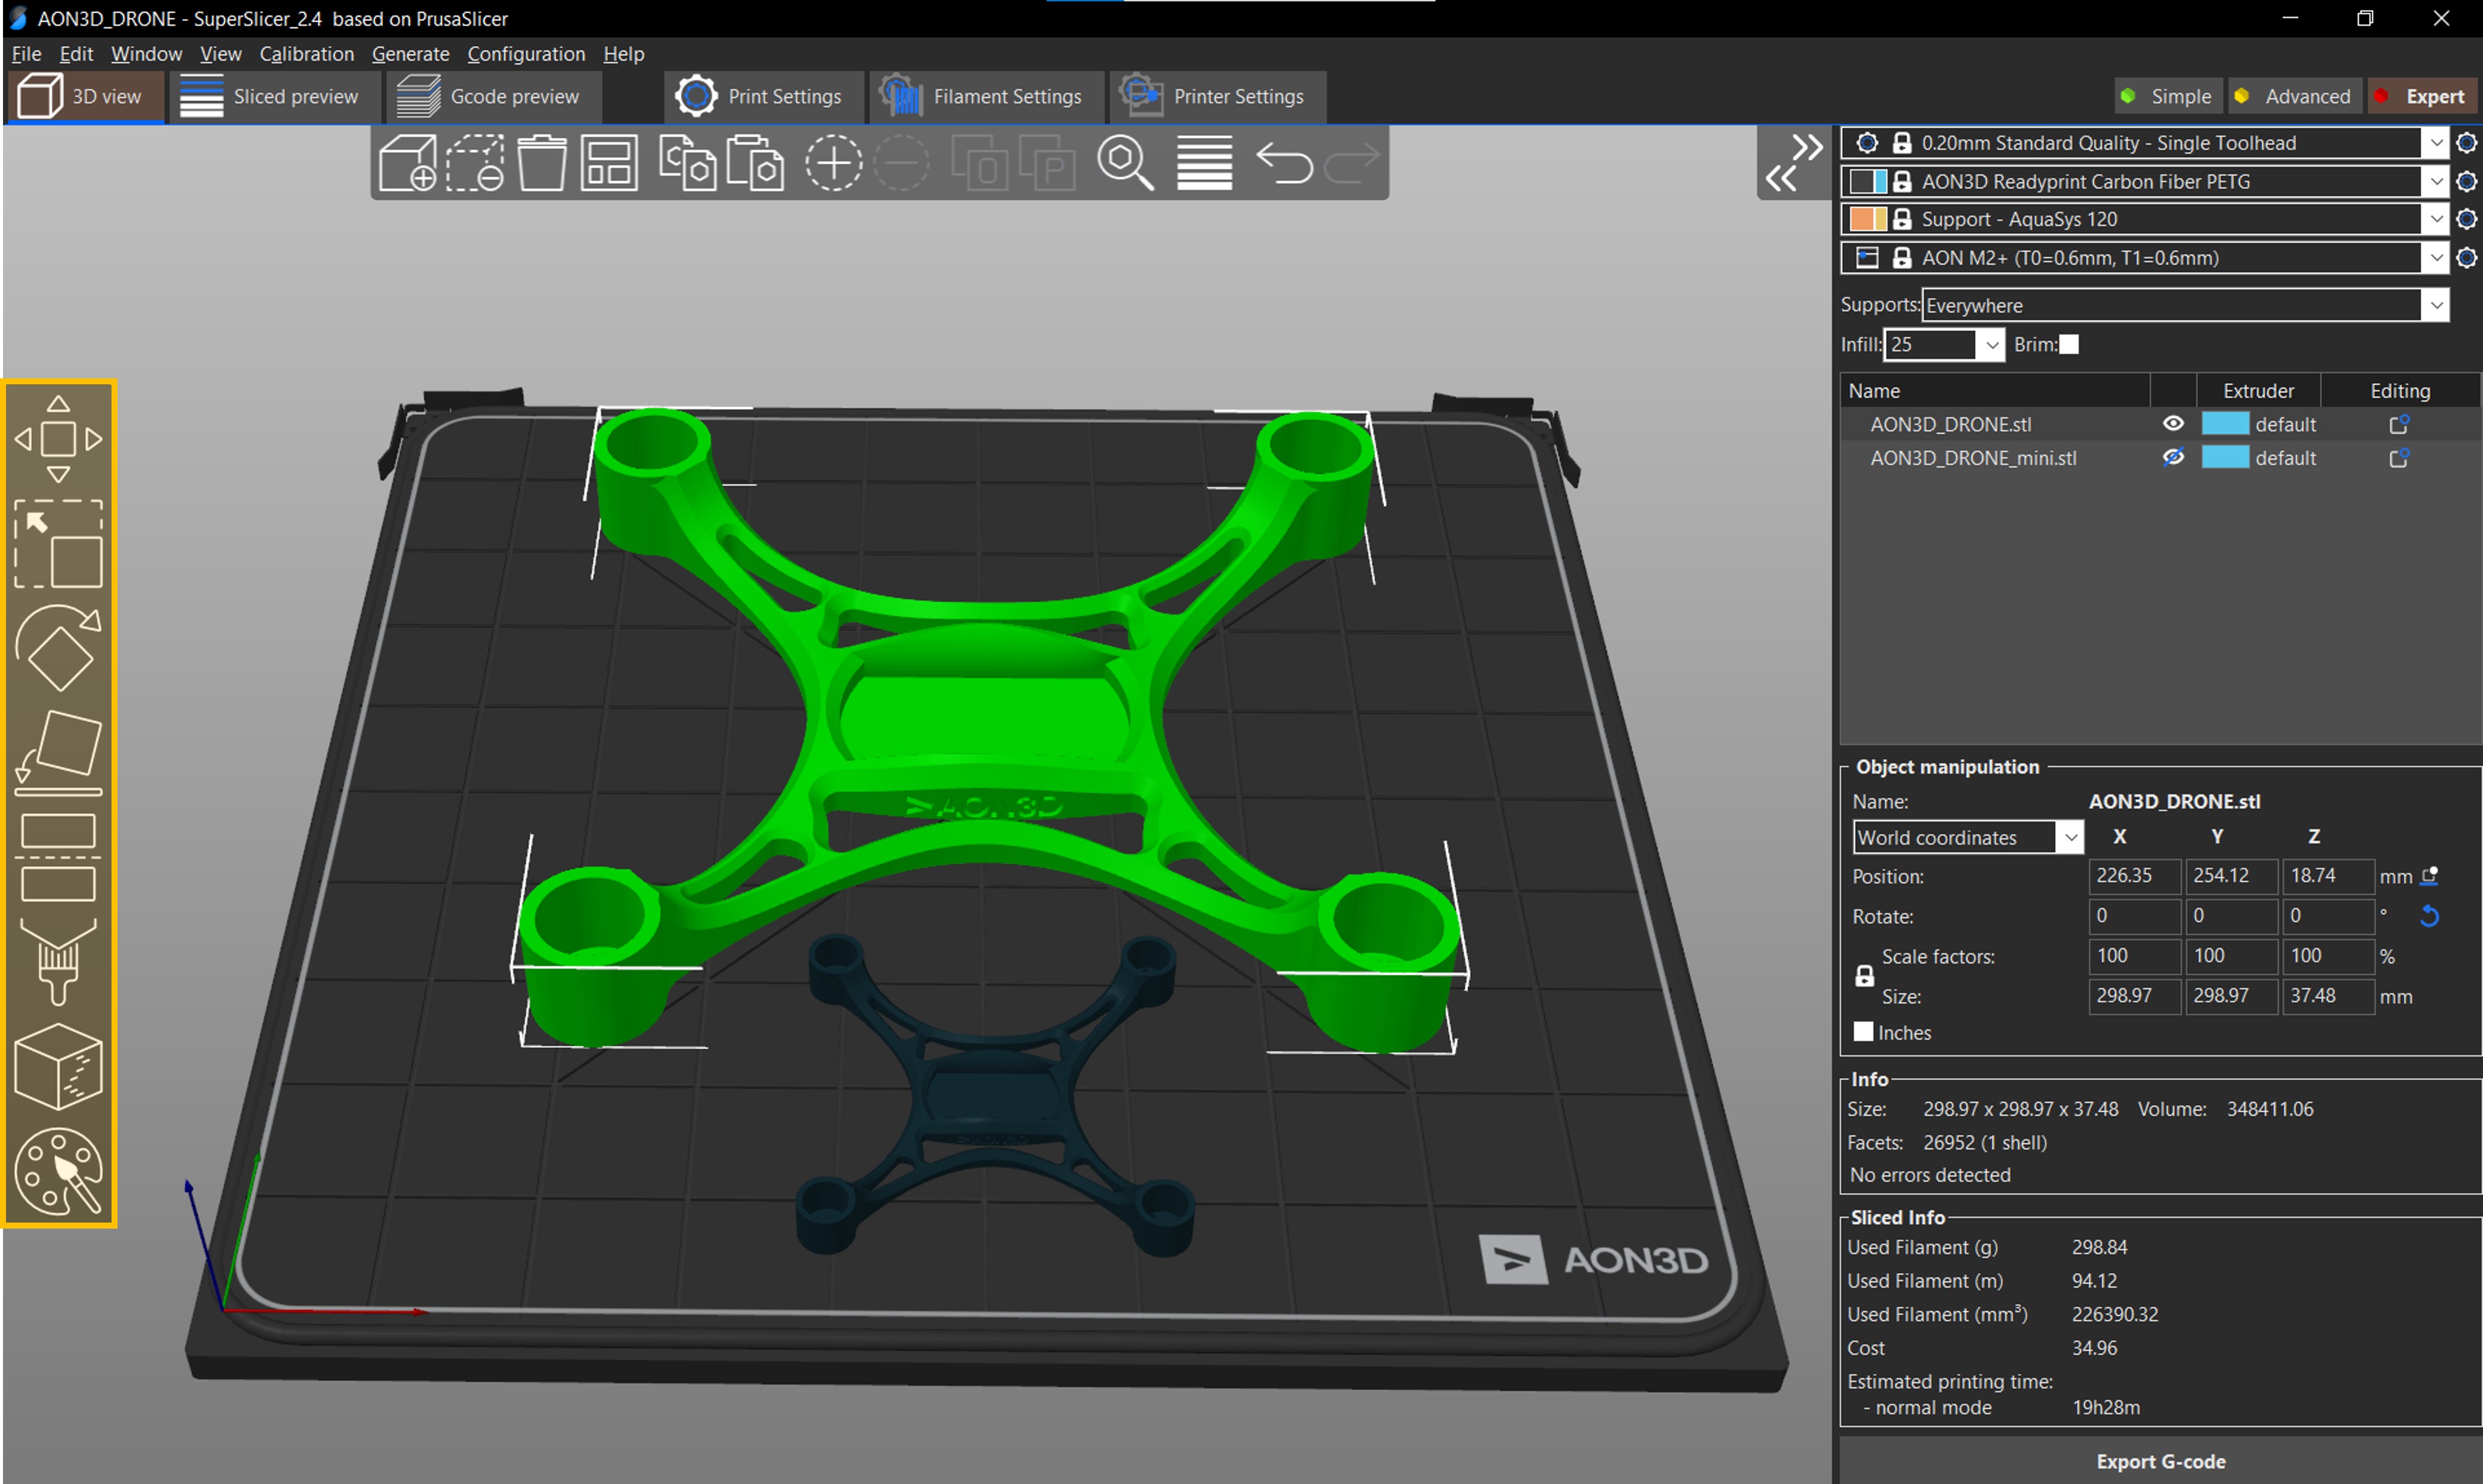
The right panel, which is the main panel, also includes details of the model and any modifications applied to the model through the slicer’s features, and the corresponding extruder T0 or T1. For example, if there are multiple parts, this is where they show up in a list.
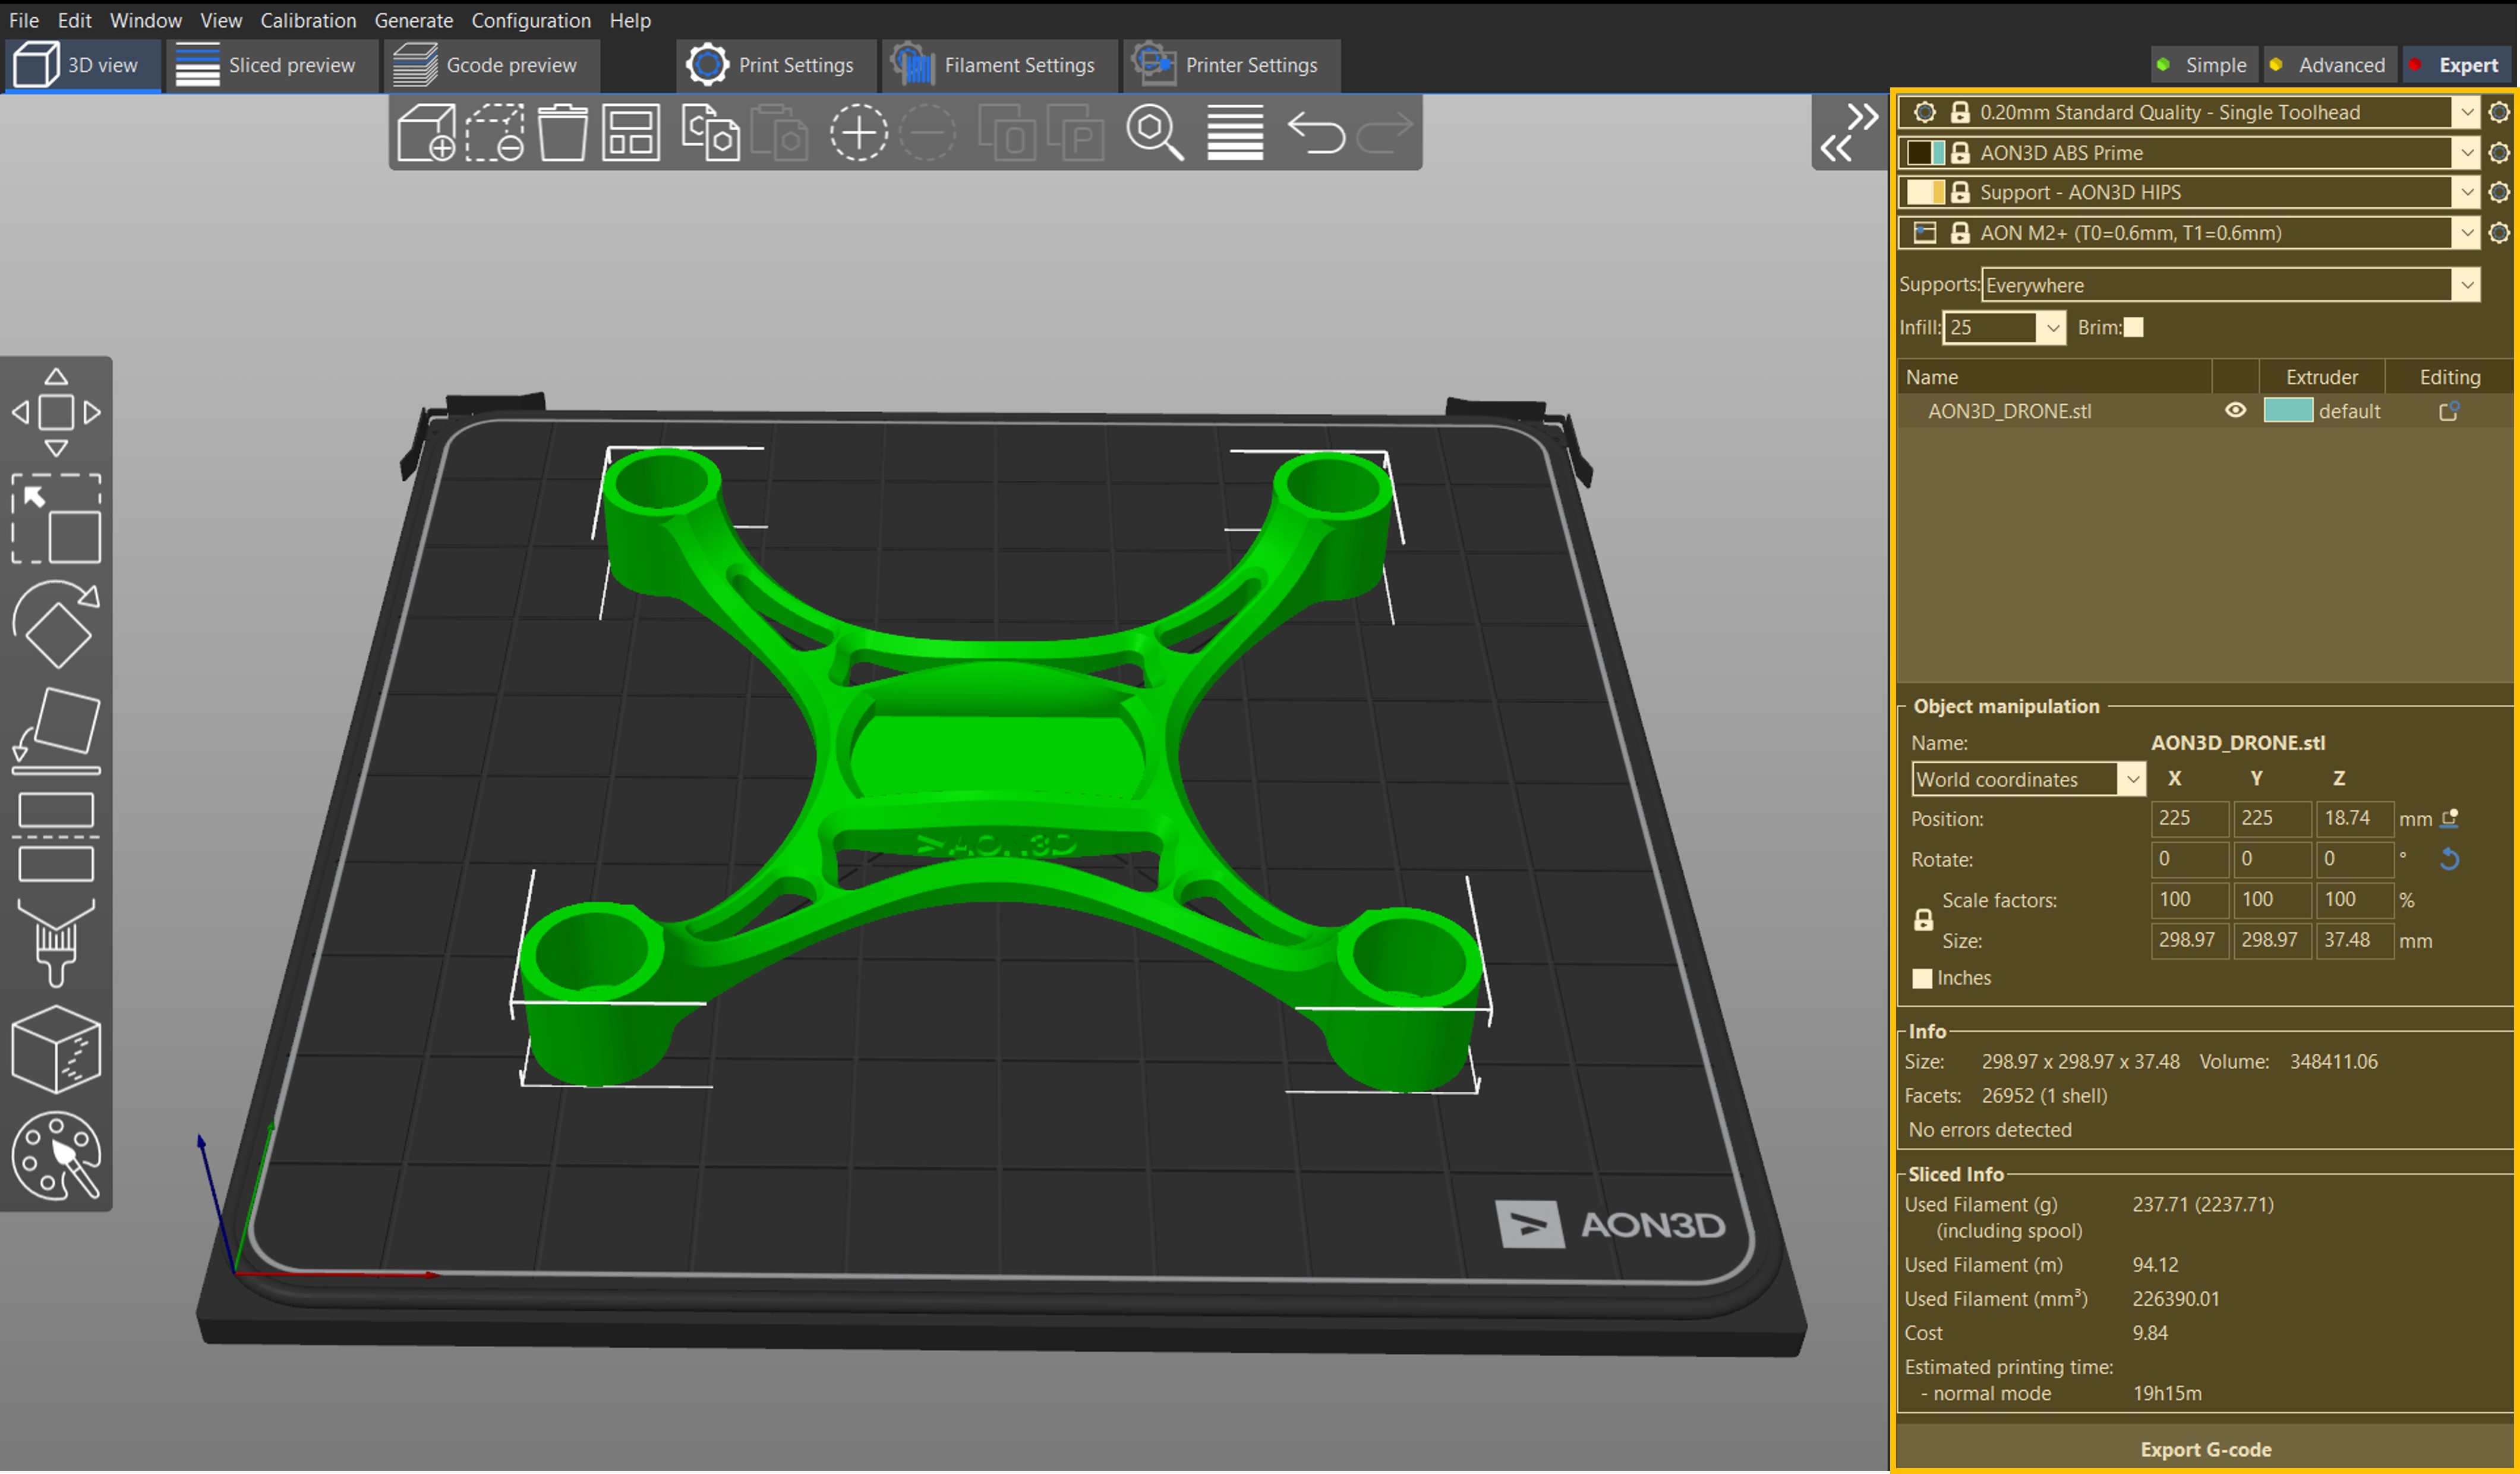
The bottom section of the right panel includes Object manipulation and Info menus, where the user can scale, position, and rotate the geometry, and see the size [mm] and volume [mm³] of the selected part Once a part is sliced, a Slice Info menu will appear which includes information such as amount of material (in g, m, and mm³), estimated cost and print time.
Select Print Quality
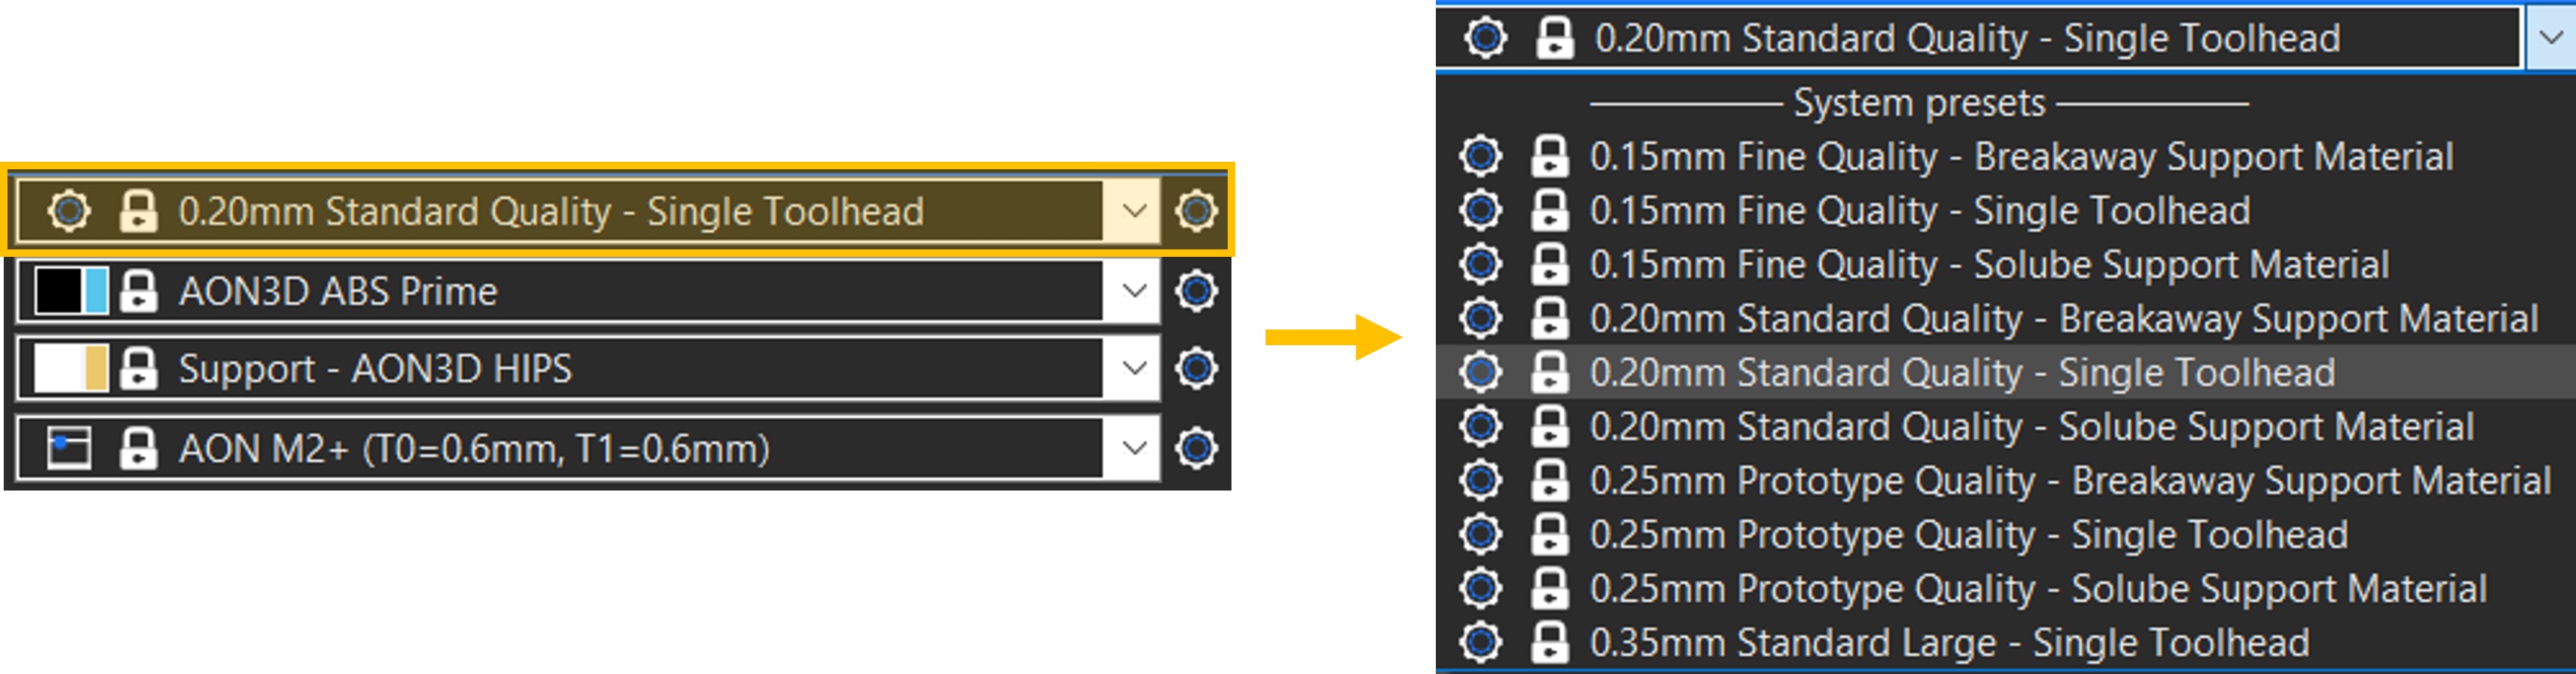
First option on the right panel menu, is referred to as the Print Settings. In the drop-down menu there are multiple presets that enforce certain quality levels, in the general term of layer height. 0.15 mm delivering the finest quality, and 0.35 mm delivering rapid prototyping quality for large nozzles. Smaller layer heights result in finer quality parts, but also take longer to print.
Not all layer heights are compatible with all nozzle sizes. The general rule of thumb is to select a layer height that is 50% or less of the nozzle’s diameter. For example, the maximum layer height for a 0.4mm nozzle should be 0.2mm to ensure adequate layer bonding and part quality.
Note that the presets are labeled according to their respective layer height and type of support, if any. For each quality category there are Single Toolhead, Breakaway Support Material and Soluble Support Material options.
Select an Option from the drop-down menu.
Select Material

Second and third options on the right panel menu, are referred to as the Filament Settings and correspond to toolheads T0 and T1 , respectively. The drop-down menu under each contains a list of filaments that have been validated with standard profiles including both model and support materials, by the AON3D Application Engineering team.
Select the desired material from the list. If one of the Single Toolhead options under Print Quality Settings is selected, disregard the other toolhead.
Select Printer Configuration

Last option on the list is the Printer Settings and is meant to reflect the toolheads configuration on the printer. So as an example, select the second option if the AON M2+ is loaded with a 0.4mm nozzle on T0 , and a 0.6mm nozzle on T1 .
Export G-code
Once all the settings above are selected, click on Slice now at the bottom of the right panel and wait for the slicer to finish slicing.
Export the G-code using the button on the bottom left which saves the G-code files with a standard format which includes the following information: date, name of the part, nozzle used and corresponding sizes, materials used, and print time estimate.
For information on how to save the .3mf file and the newly created profiles, please reference to Profile Management page.
Need help? Basic slicing support is available to all AON3D customers. For advanced support inquiries, an AON3D success plan may be required. Our Success plans help businesses get started fast, minimize downtime, and quickly become experts in industrial additive manufacturing.
Contact us at help@aon3d.com to get started or for Success Plan information.