Moving, Lifting, and Carrying the Machine
| Model | [•] AON M2+ (CE) | [•] AON M2+ (R-NZ) | [•] AON M2+ | [•] AON-M2 2020 | [•] AON-M2 |
| Category | [•] Installation | [ ] Operation | [ ] Maintenance |
Summary
The procedure that follows gives instructions on how to move, lift, and carry the AON3D machine.
The uncrated AON3D machine is not designed to be lifted or carried. If the machine needs to be lifted or carried, put the machine in the crate. Refer to Prepare Machine for Shipping
Dimensions
| Crated Dimensions (HxWxD) | 1600 mm x 1111 mm x 1194 mm (63 in. x 43.75 in. x 47 in. ) |
| Dimensions (HxWxD) | 1450 mm x 955 mm x 1150 mm (57.1 in. x 37.6 in. x 45.3 in. ) |
| Minimum Dimensions * (HxWxD) | 1340 mm x 955 mm x 805 mm (52.8 in. x 37.6 in. x 31.7 in. ) |
* Minimum clearance with build chamber door, main electronic enclosure, coolant pump, and vacuum pump (AON M2+) assembly removed.
The AON3D machine fits through most standard door frames found in North America, which are as follows:
| Frame | Metric | Imperial |
|---|---|---|
| Width | 91.5 cm | 36 in |
| Height | 203 cm | 80 in |
Machine Storage
The machine should be stored in its crate at a temperature of 15°C to 25°C (59°F to 77°F) and at a relative humidity of 30-70%, non-condensing.
Moving, Lifting, and Carrying the Crated Machine
Tools
| Qty | Description | Specification |
|---|---|---|
| 1 | Mallet | Hard Rubber |
| 1 | Phillips Screwdriver | No.2 |
| 2 | Wood Screws | 1 inch length, Phillips No.2 |
| A/R | Pallet Jack | N/A |
| A/R | Forklift | N/A |
Parts Information
| Qty | Description | Specification |
|---|---|---|
| 1 | Crate | Assembly |
Personal Protective Equipment
| Qty | Description | Minimum Specification |
|---|---|---|
| 1 | Safety Eyewear | ANSI/ISEA Z87.1 |
| 1 | Safety Footwear | EN ISO 20345 or ASTM F2413 |
| A/R | Nitrile Gloves | ISO 2859-1 or ASTM D6319 |
Prepare the Machine
- Crate the machine. Refer to Prepare Machine for Shipping.
Move, Lift, or Carry the Crated Machine
- Use pallet jack or forklift to move, lift, or carry the crated machine to its new designated work location.
Do not tilt the crated machine at an angle more than 30 degrees. If the machine is tilted at an angle more than 30 degrees can cause damage to machine component(s), which will void the AON3D warranty.
Test and Return to Service
- Unbox the machine. Refer to Unbox The Machine.
Moving the Machine
Tools
| Qty | Description | Specification |
|---|---|---|
| 1 | Spirit Level | N/A |
| 1 | Hex Key | 4 mm |
Parts Information
None required.
Personal Protective Equipment
| Qty | Description | Minimum Specification |
|---|---|---|
| 1 | Safety Eyewear | ANSI/ISEA Z87.1 |
| 1 | Safety Footwear | EN ISO 20345 or ASTM F2413 |
| A/R | Nitrile Gloves | ISO 2859-1 or ASTM D6319 |
Prepare the Machine
- Home XYZ.
- Press the E-stop button.
- Turn the power OFF with the ON/OFF switch found on the rear panel of the machine.
-
- For AON M2+ (CE) machines: Disconnect power to the machine from the local supply disconnecting device.
- For AON M2+ (R-NZ), AON M2+, AON-M2 2020 and AON-M2 machines: Disconnect the main power cord from the receptacle.
- Disconnect the power cord from the the vacuum circuit electrical enclosure (if applicable).
- Wait until the build chamber, build platform and hot ends are at room temperature.
Wait until all the machine components are at room temperature before you continue. Some machine components can be hot if the machine was recently used. Failure to do so can cause injuries.
Put the Vacuum Pump on the Machine
Only applicable to the AON M2+ (CE) and AON M2+ (R-NZ) machines. The vacuum pump is mounted to the machine for ease of movement and shipping. It must be put on the machine before moving.
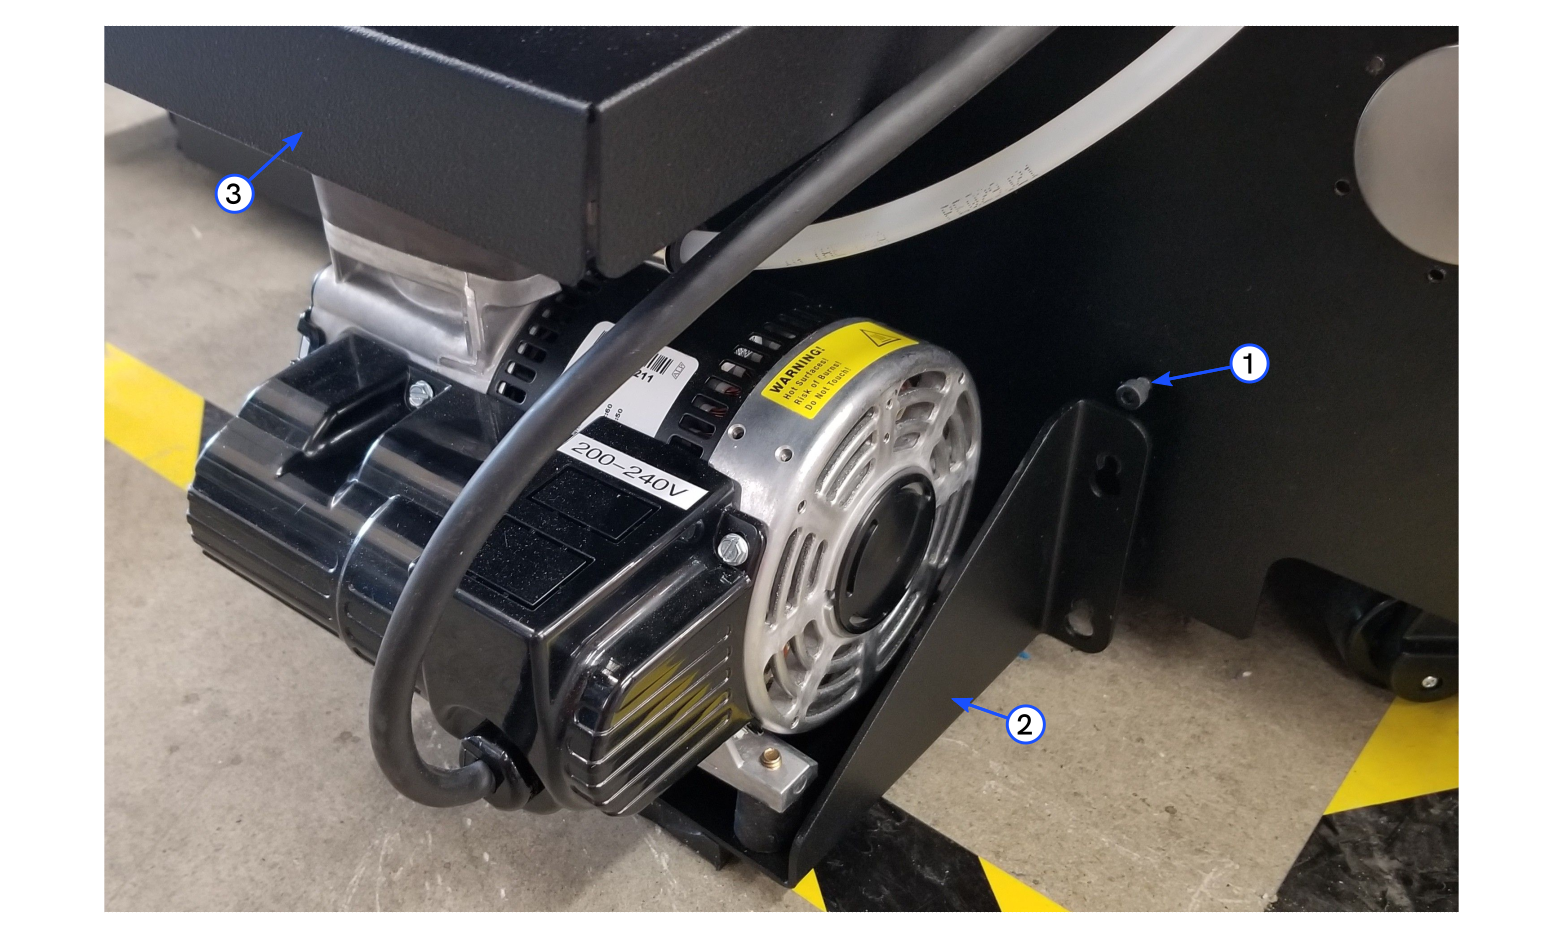
- Lift the vacuum pump assembly (2) from the floor and put it on the machine.
- Use the 4 mm hex key to tighten the four screws (1).
Move the Machine
- Turn the orange level nut counterclockwise on the four caster wheels to unlock the caster wheels.
- Move the machine to its new designated work location.
Level the Machine
The machine must be leveled before it can be connected and powered ON. Failure to level the machine correctly can cause damage to machine component(s), which will void the AON3D warranty.
If a spirit level is not available, an app for your smartphone can be used.
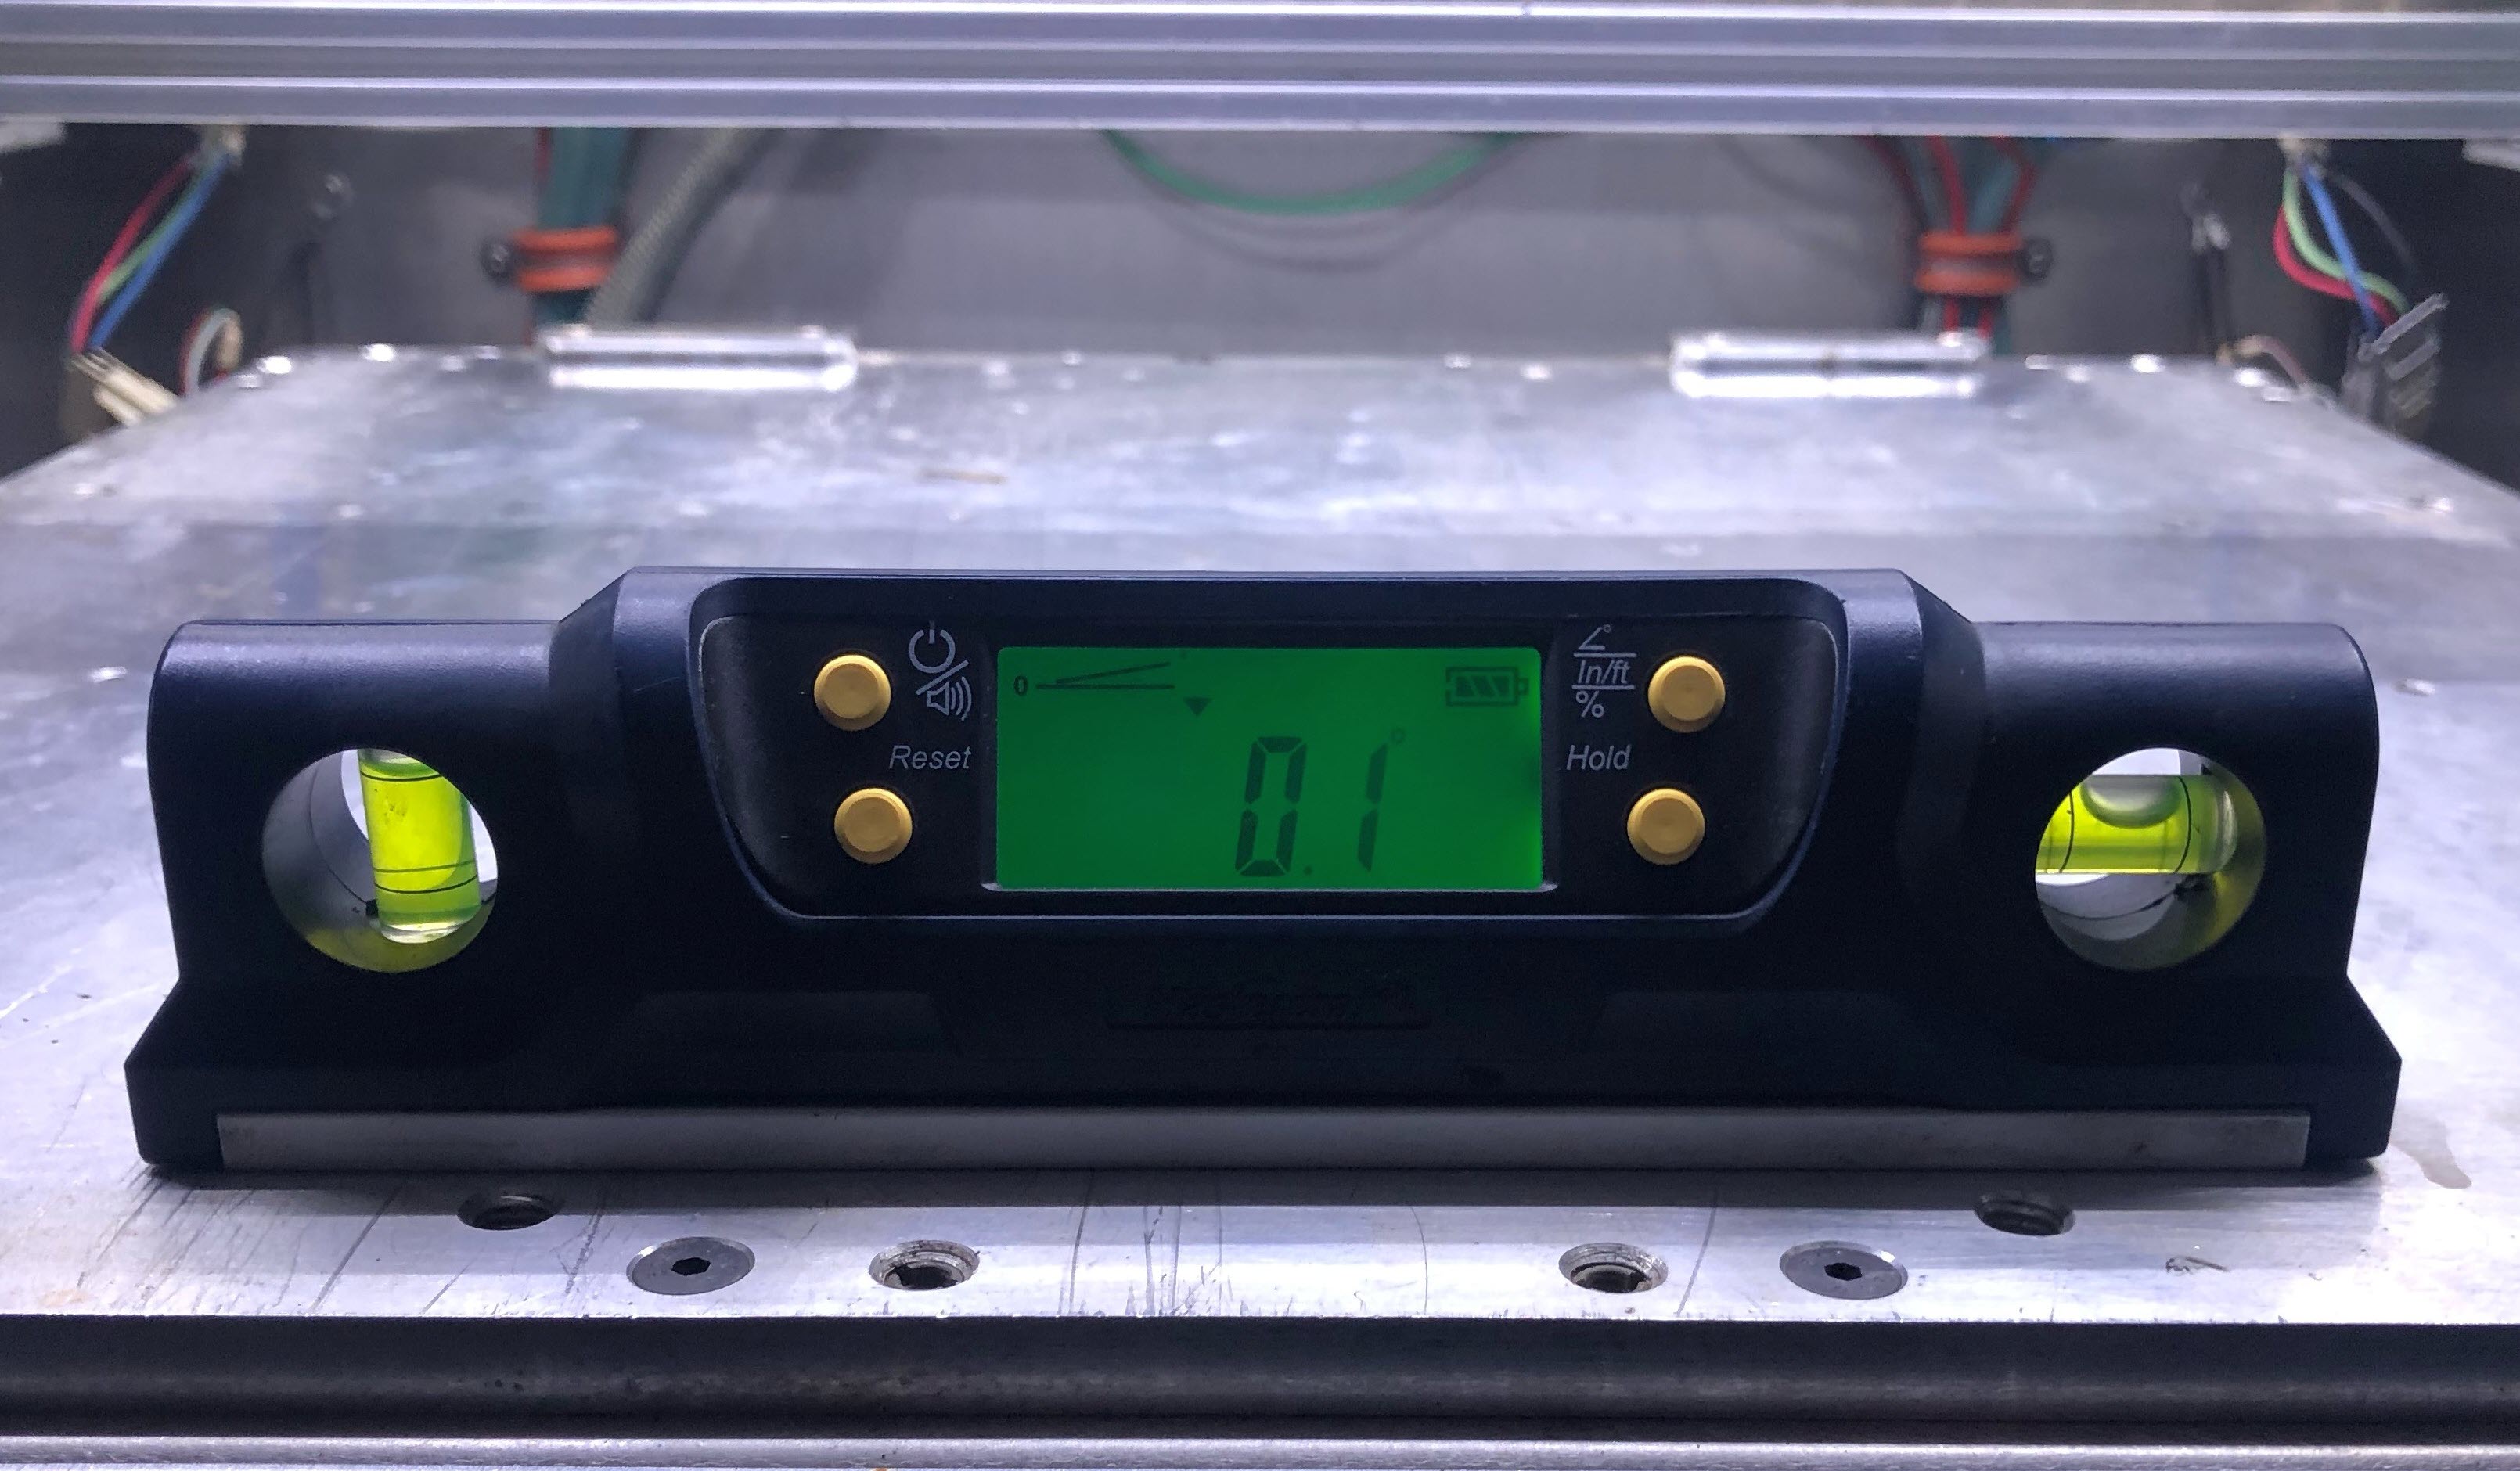
Level the X-Axis
- Open the build chamber door.
- Put the spirit level across the center of the bed, along the X-axis.
- Turn the individual orange caster nuts, in small increments, to level the machine along the X-axis.
- Do step 3, as necessary.
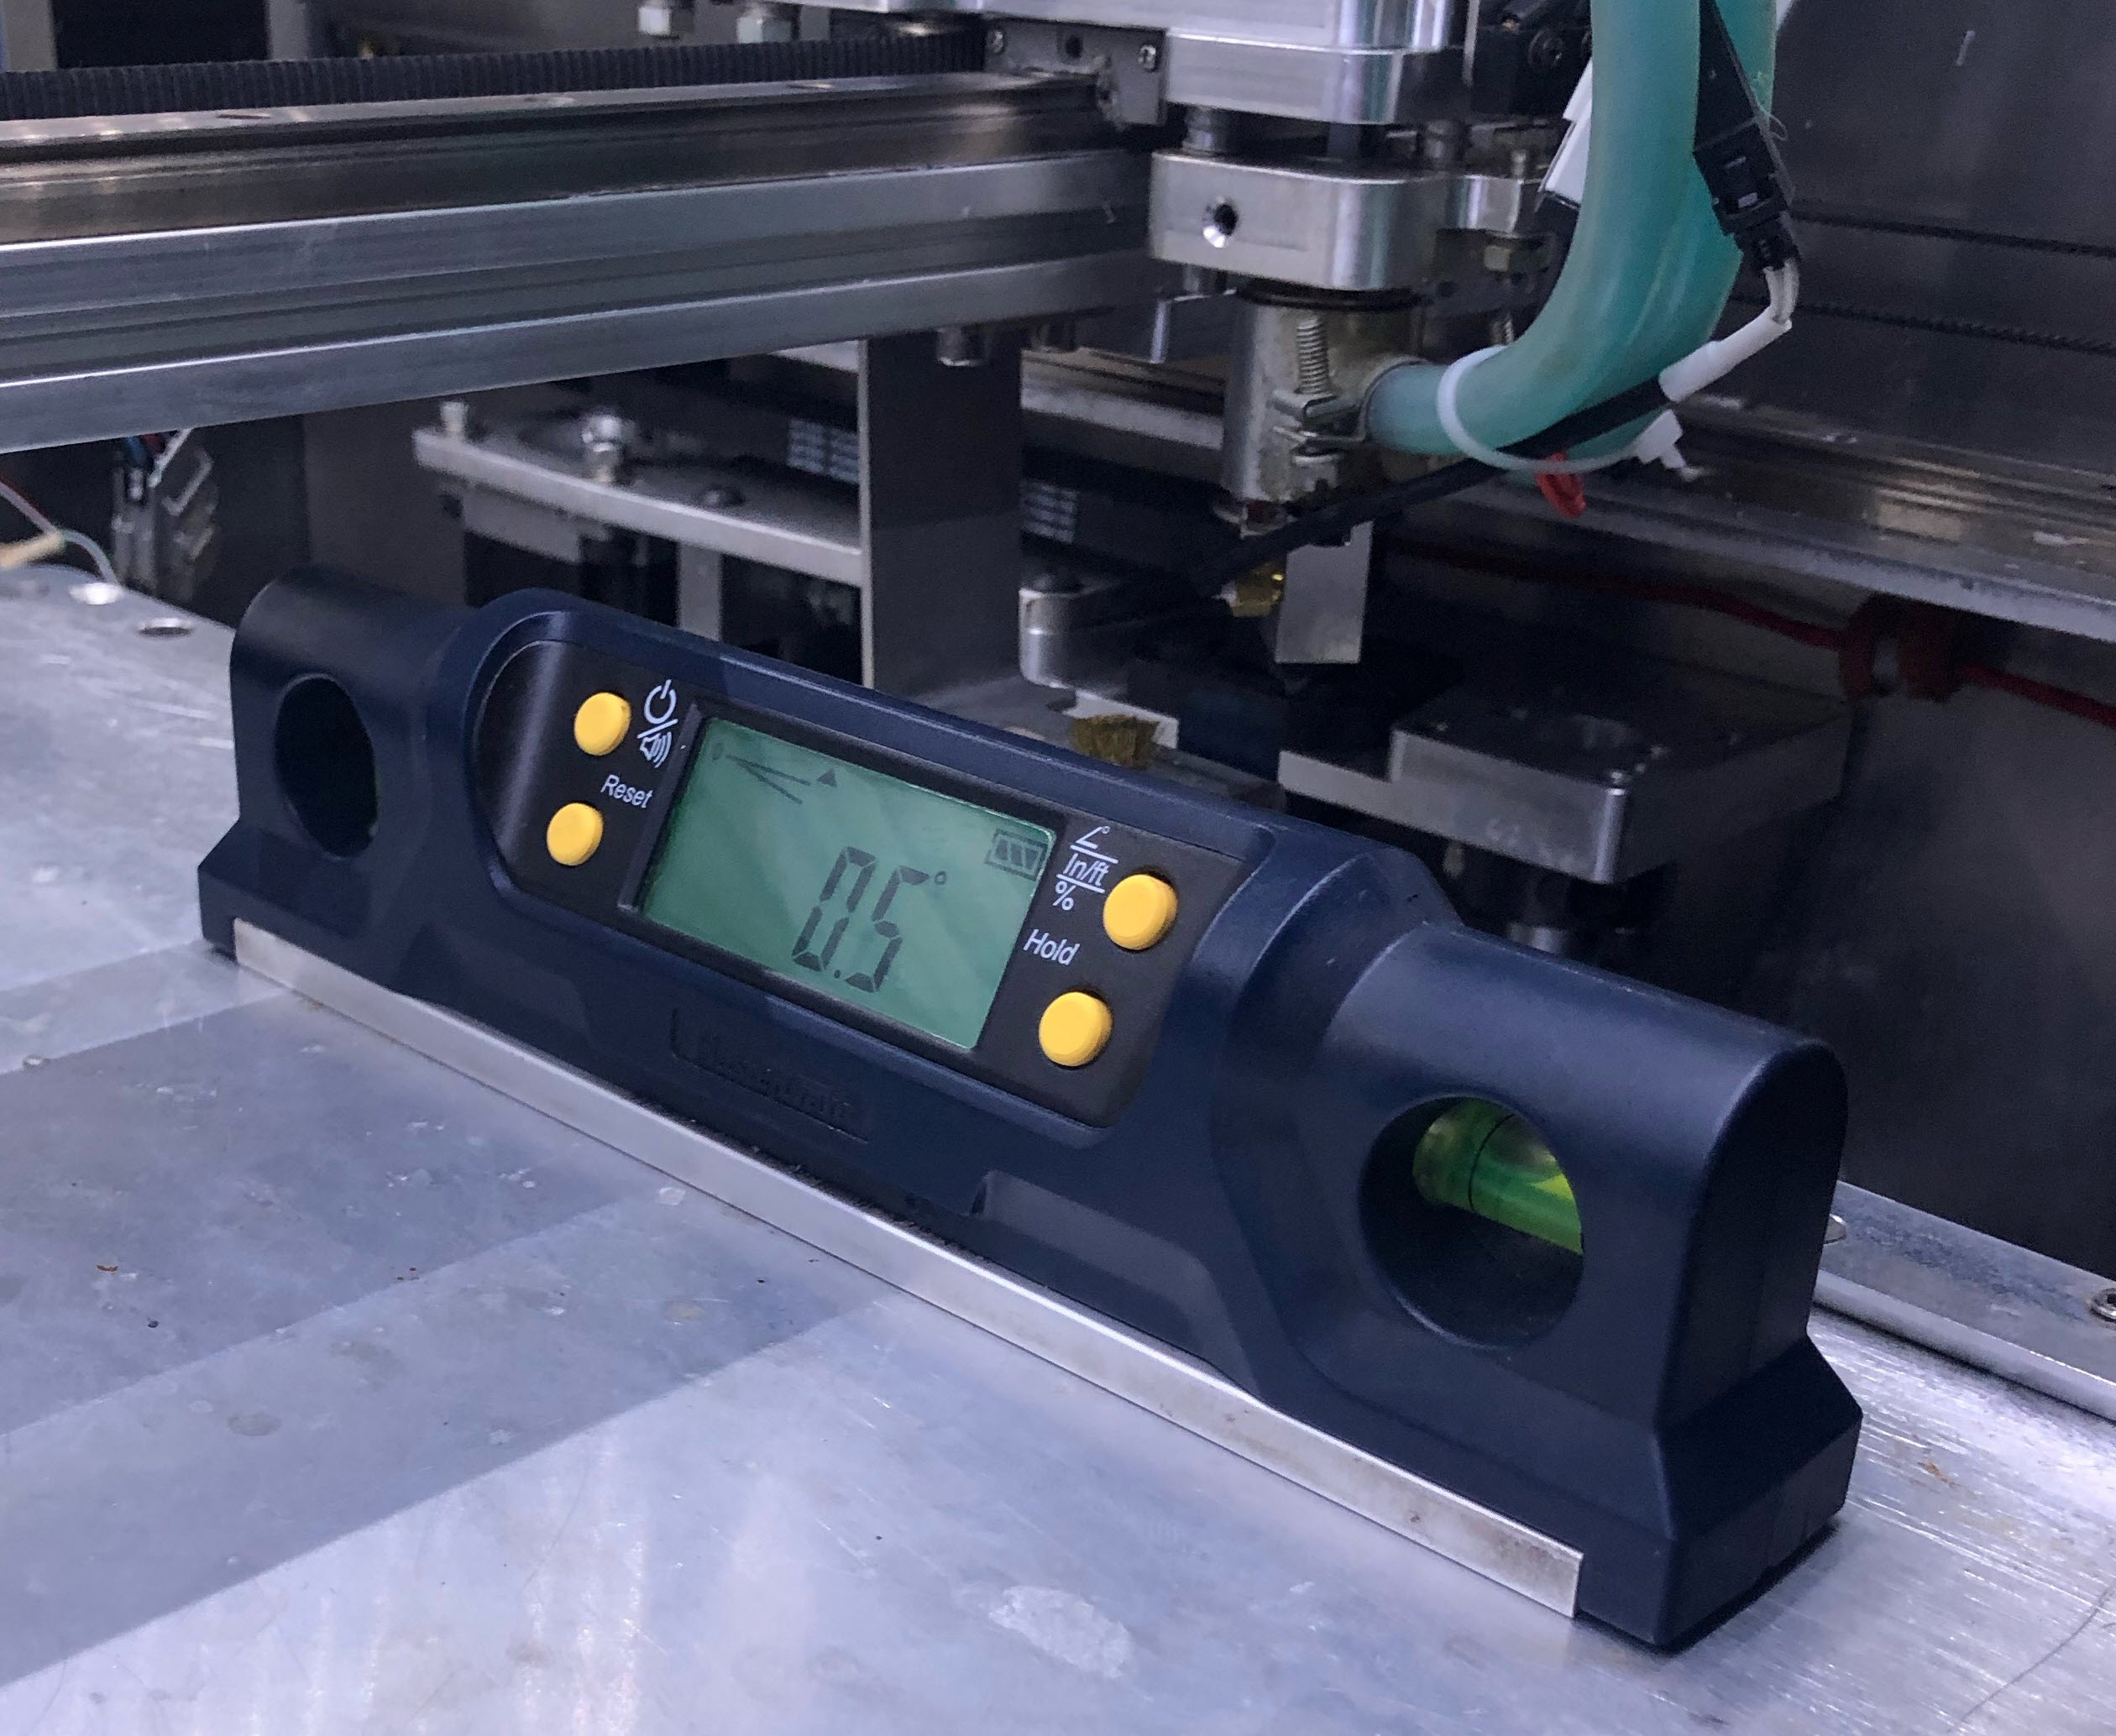
Level the Y-Axis
- Put the spirit level across the center of the bed, along the Y-axis.
- Turn the individual orange caster nuts, in small increments, to level the machine along the Y-axis.
- Do step 2, as necessary.
- Make sure that the X-axis is in level after the Y-axis has been leveled.
- Remove the spirit level from the build chamber.
- Remove all the shipping materials from the inside and outside of the machine. All packaging foam must be removed from the two toolheads, the X-axis gantry, and the two spool holders.
Put the Vacuum Pump on the Floor
Only applicable to the AON M2+ (CE) and AON M2+ (R-NZ) machines. The vacuum pump is mounted to the machine for ease of movement and shipping. It must be removed from the machine before printing.
- Use the 4 mm hex key to loosen the four screws (1).
- Lift the vacuum pump assembly (2) from the machine and put it on the floor.
- Make sure that the pump is under the awning (3).
Test and Return to Service
-
- For AON M2+ (CE) machines: Connect power to the machine from the local supply disconnecting device.
- For AON M2+ (R-NZ), AON M2+, AON-M2 2020 and AON-M2 machines: Connect the main power cord to the receptacle.
- Connect the power cord to the the vacuum circuit electrical enclosure (if applicable).
- Turn the power ON with the ON/OFF switch found on the rear panel of the machine.
- Make sure that the AON3D boot screen appears and that the Graphical User Interface (GUI) loads.
- Release the E-stop button.
- Home XYZ.