Fill the Cooling Circuit
| Model | [•] AON M2+ (CE) | [•] AON M2+ (R-NZ) | [•] AON M2+ | [•] AON-M2 2020 | [•] AON-M2 |
| Category | [•] Installation | [ ] Operation | [ ] Maintenance |
Summary
The procedure that follows gives instructions on how to fill and bleed the cooling circuit before the machine is first entered into service.
Estimated time: 45 minutes
The coolant pump configurations are different between the AON M2+ (CE), AON M2+ (R-NZ), AON M2+, AON-M2 2020, and the original AON-M2 model. Instructions for the different configurations are found on this page:
AON M2+ (CE), AON M2+ (R-NZ), AON M2+ and AON-M2 2020 Instructions
Tools
| Qty | Description | Specification |
|---|---|---|
| 1 | Screwdriver | Flathead, Large |
| 1 | Bucket | 3-liter capacity |
| 1 | Funnel | Small |
| A/R | Rags | Lint-free |
Parts Information
| Qty | Part Number | Description |
|---|---|---|
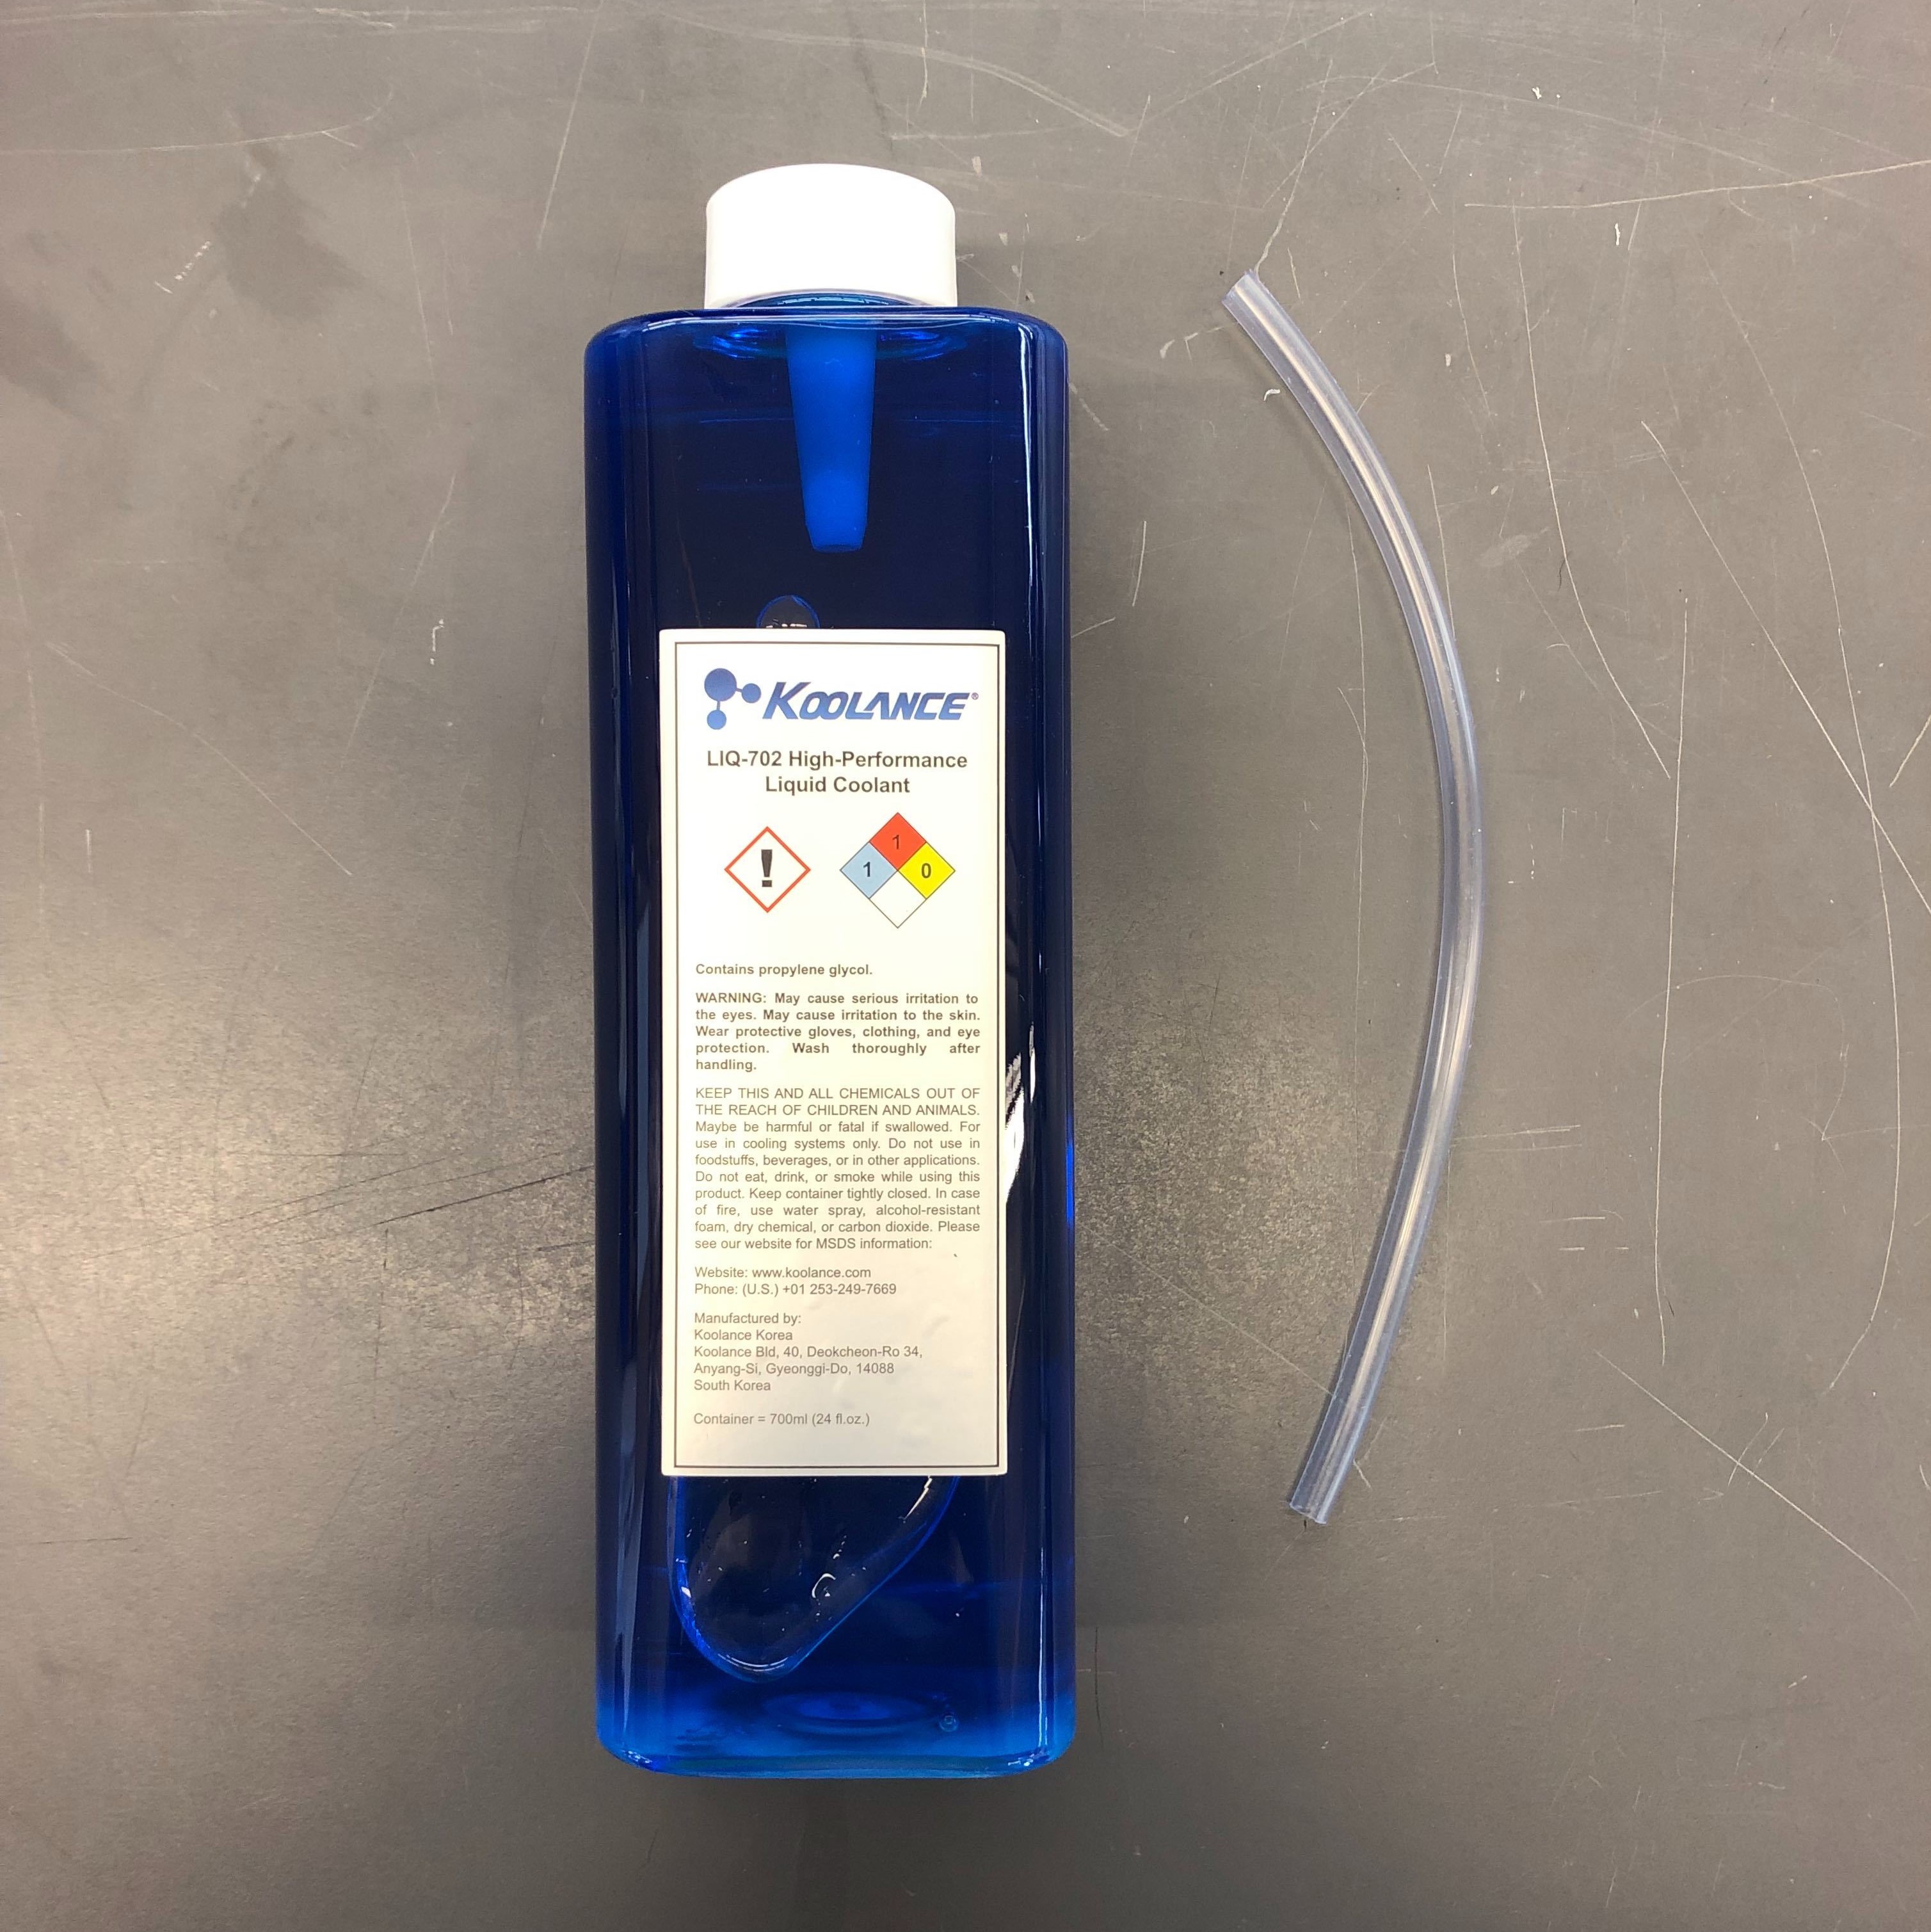
| A/R | A46067D6 | High-Performance Liquid Coolant, 700ml |
Reach out to our Customer Success team at help@aon3d.com for genuine AON3D replacement part(s).
Make sure to correctly flush the old coolant when a change in coolant types is performed. Refer to Drain and Replace Coolant.
AON3D uses coolants that can be different in color. All AON3D-approved coolants are interchangeable and are safe to use with AON machine component(s) and cooling circuit(s).
Personal Protective Equipment
| Qty | Description | Minimum Specification |
|---|---|---|
| 1 | Safety Eyewear | ANSI/ISEA Z87.1 |
| A/R | Nitrile Gloves | ISO 2859-1 or ASTM D6319 |
Prepare Coolant Bottles
The cooling circuit coolant capacity is approximately 1.5 liters (3.17 pints).
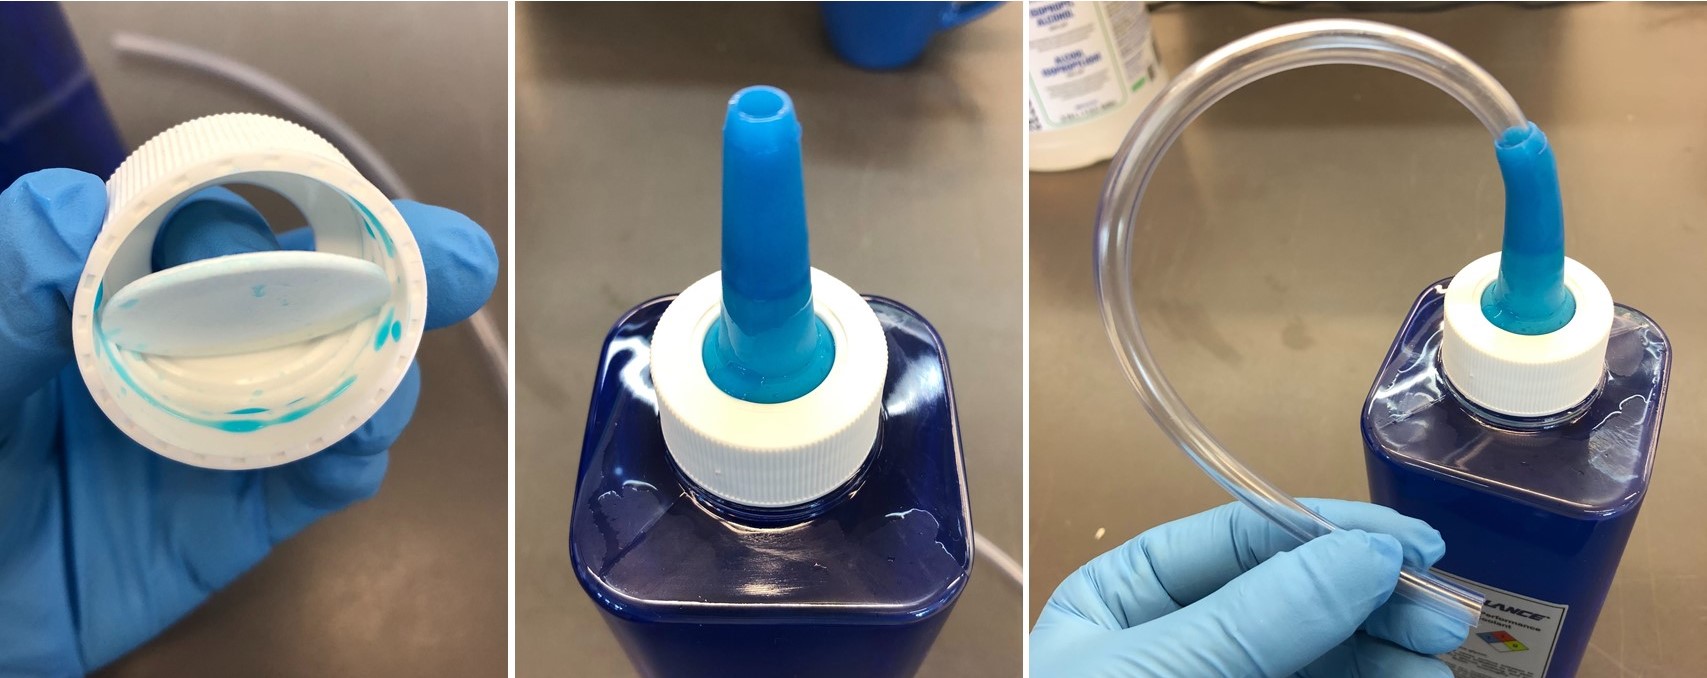
- Remove the bottle cap to install the rubber spout onto the coolant bottle:
- Remove the rubber spout and set aside.
- Remove the plastic center cap. Do not discard the center cap as it can be used to close the coolant bottle.
- Put the rubber spout upright on the coolant bottle opening.
- Install the rubber spout assembly onto the coolant bottle with the cap.

Fill the Cooling Circuit
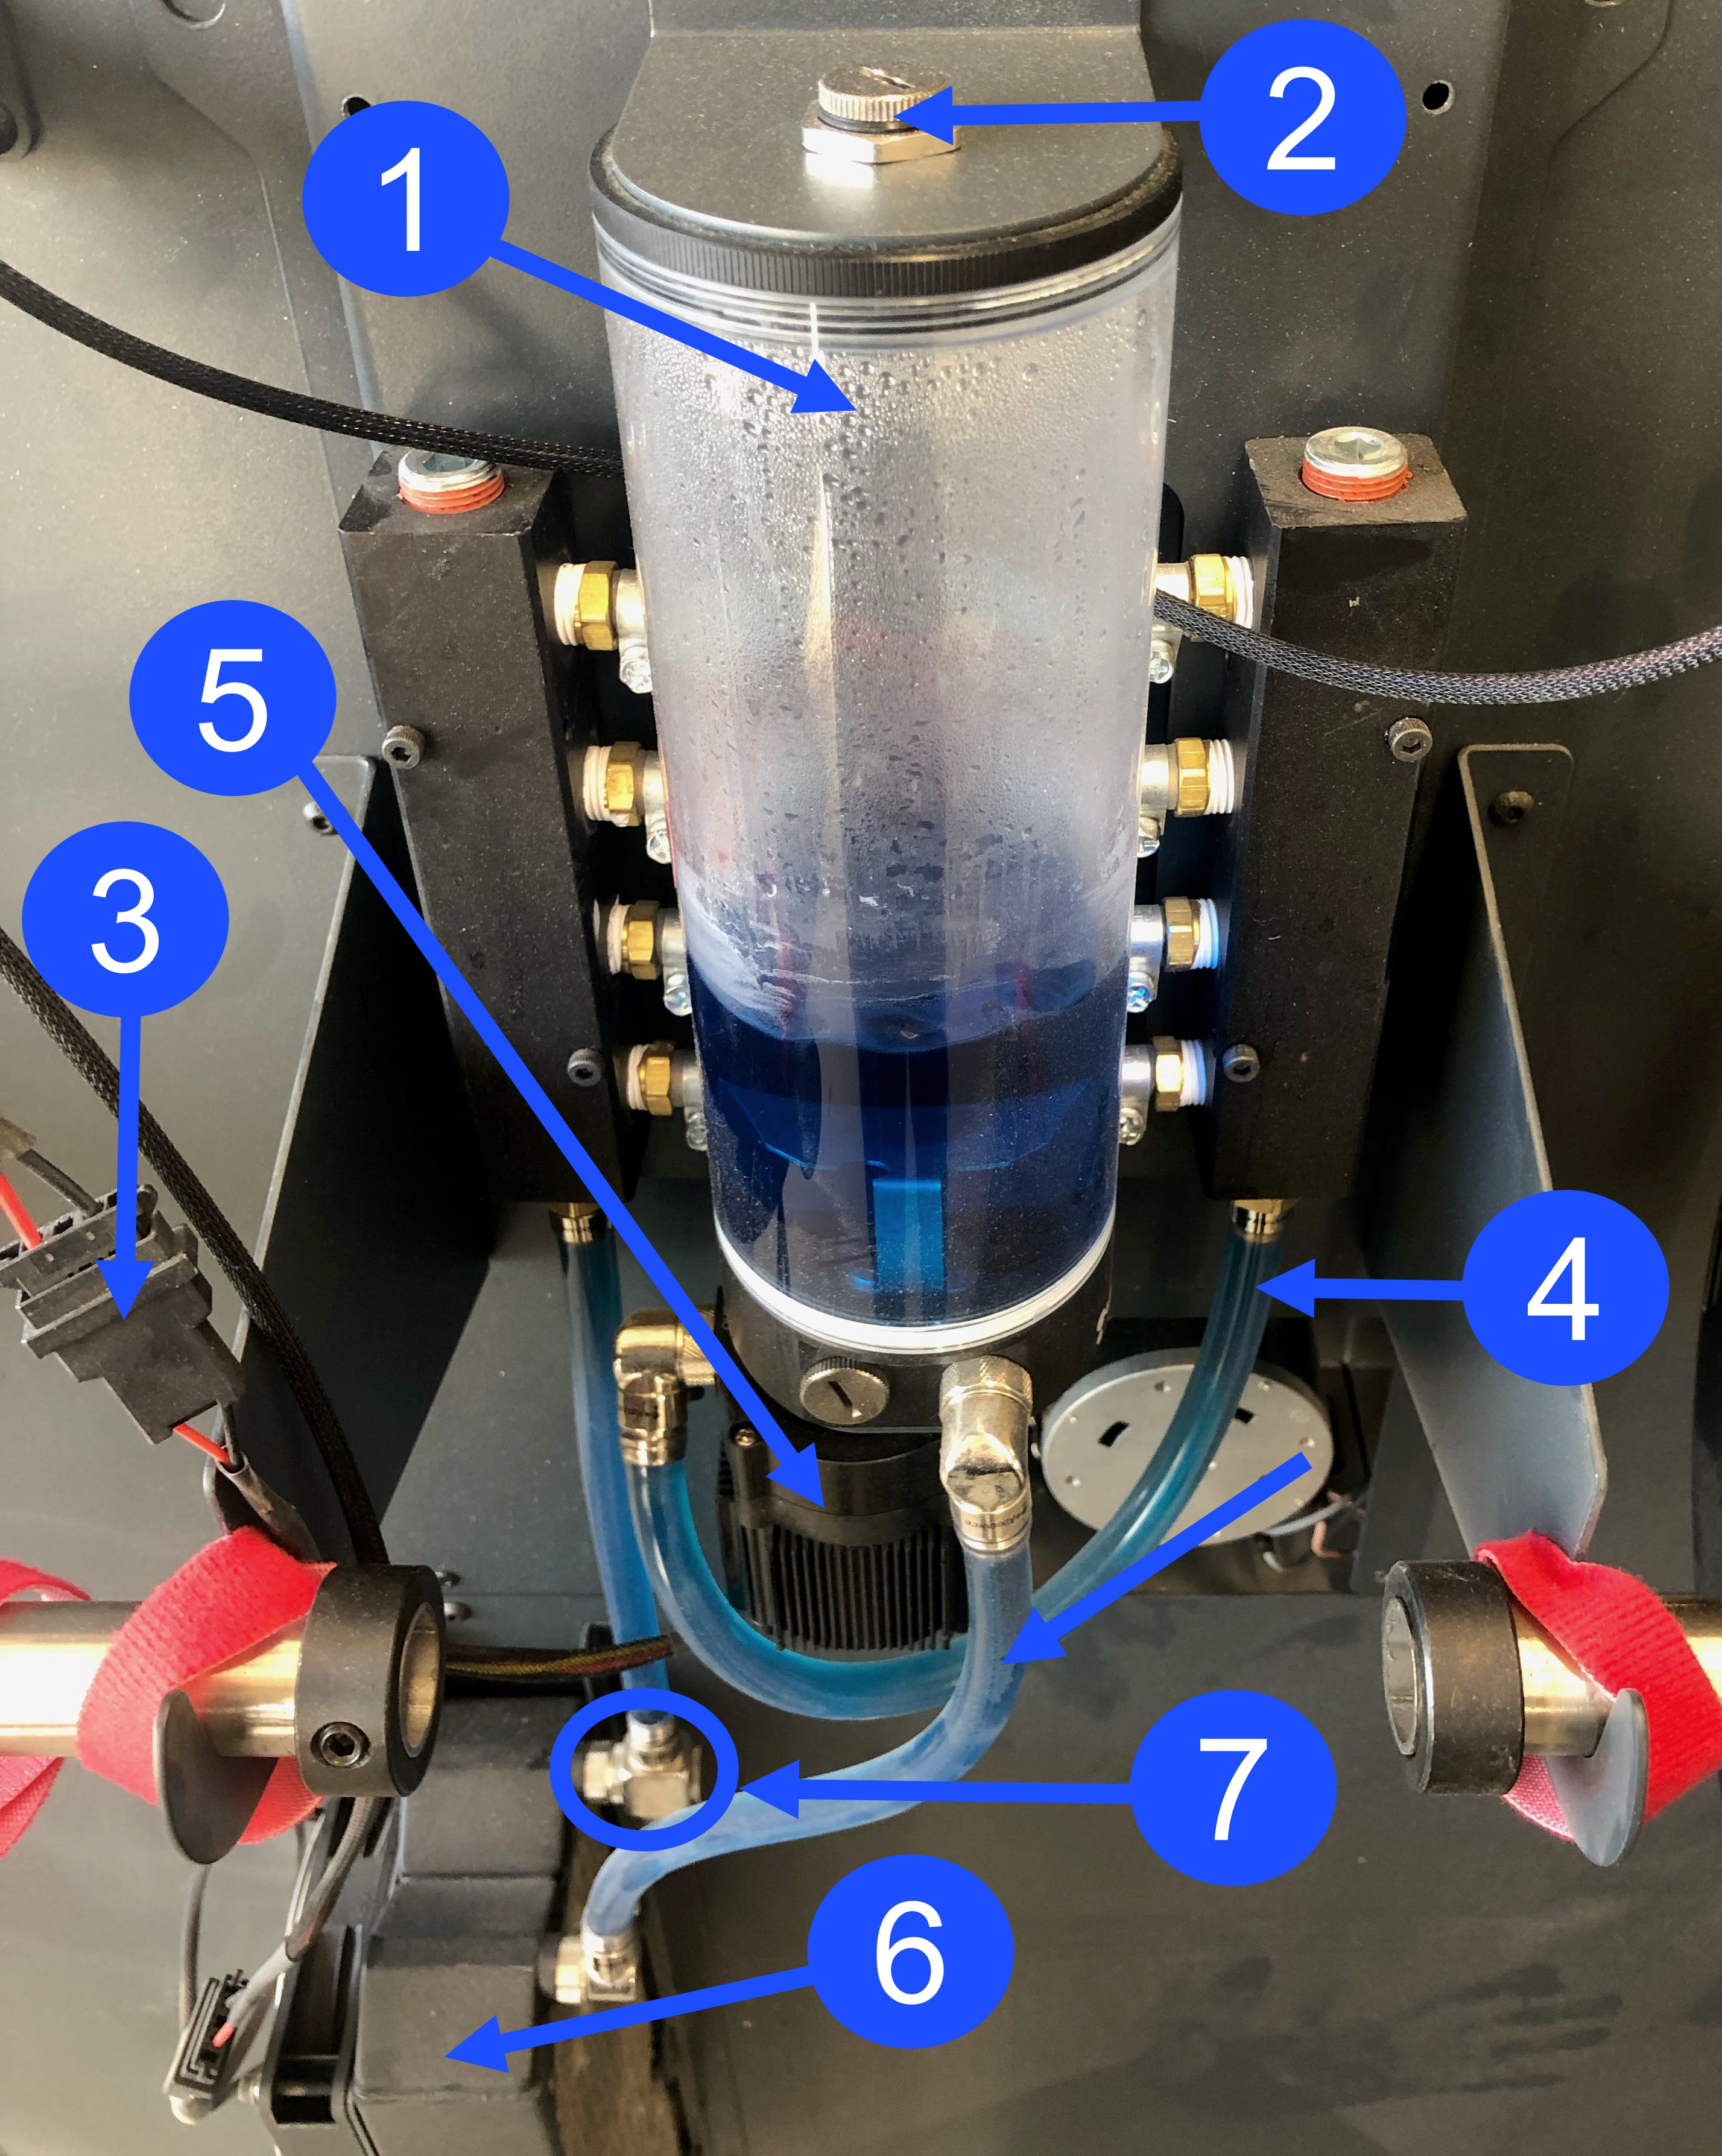
- Disconnect the coolant pump wire harness connector (3) to turn the power the the coolant pump (5) OFF.
- Use the large flathead screwdriver to remove the filler plug (2).
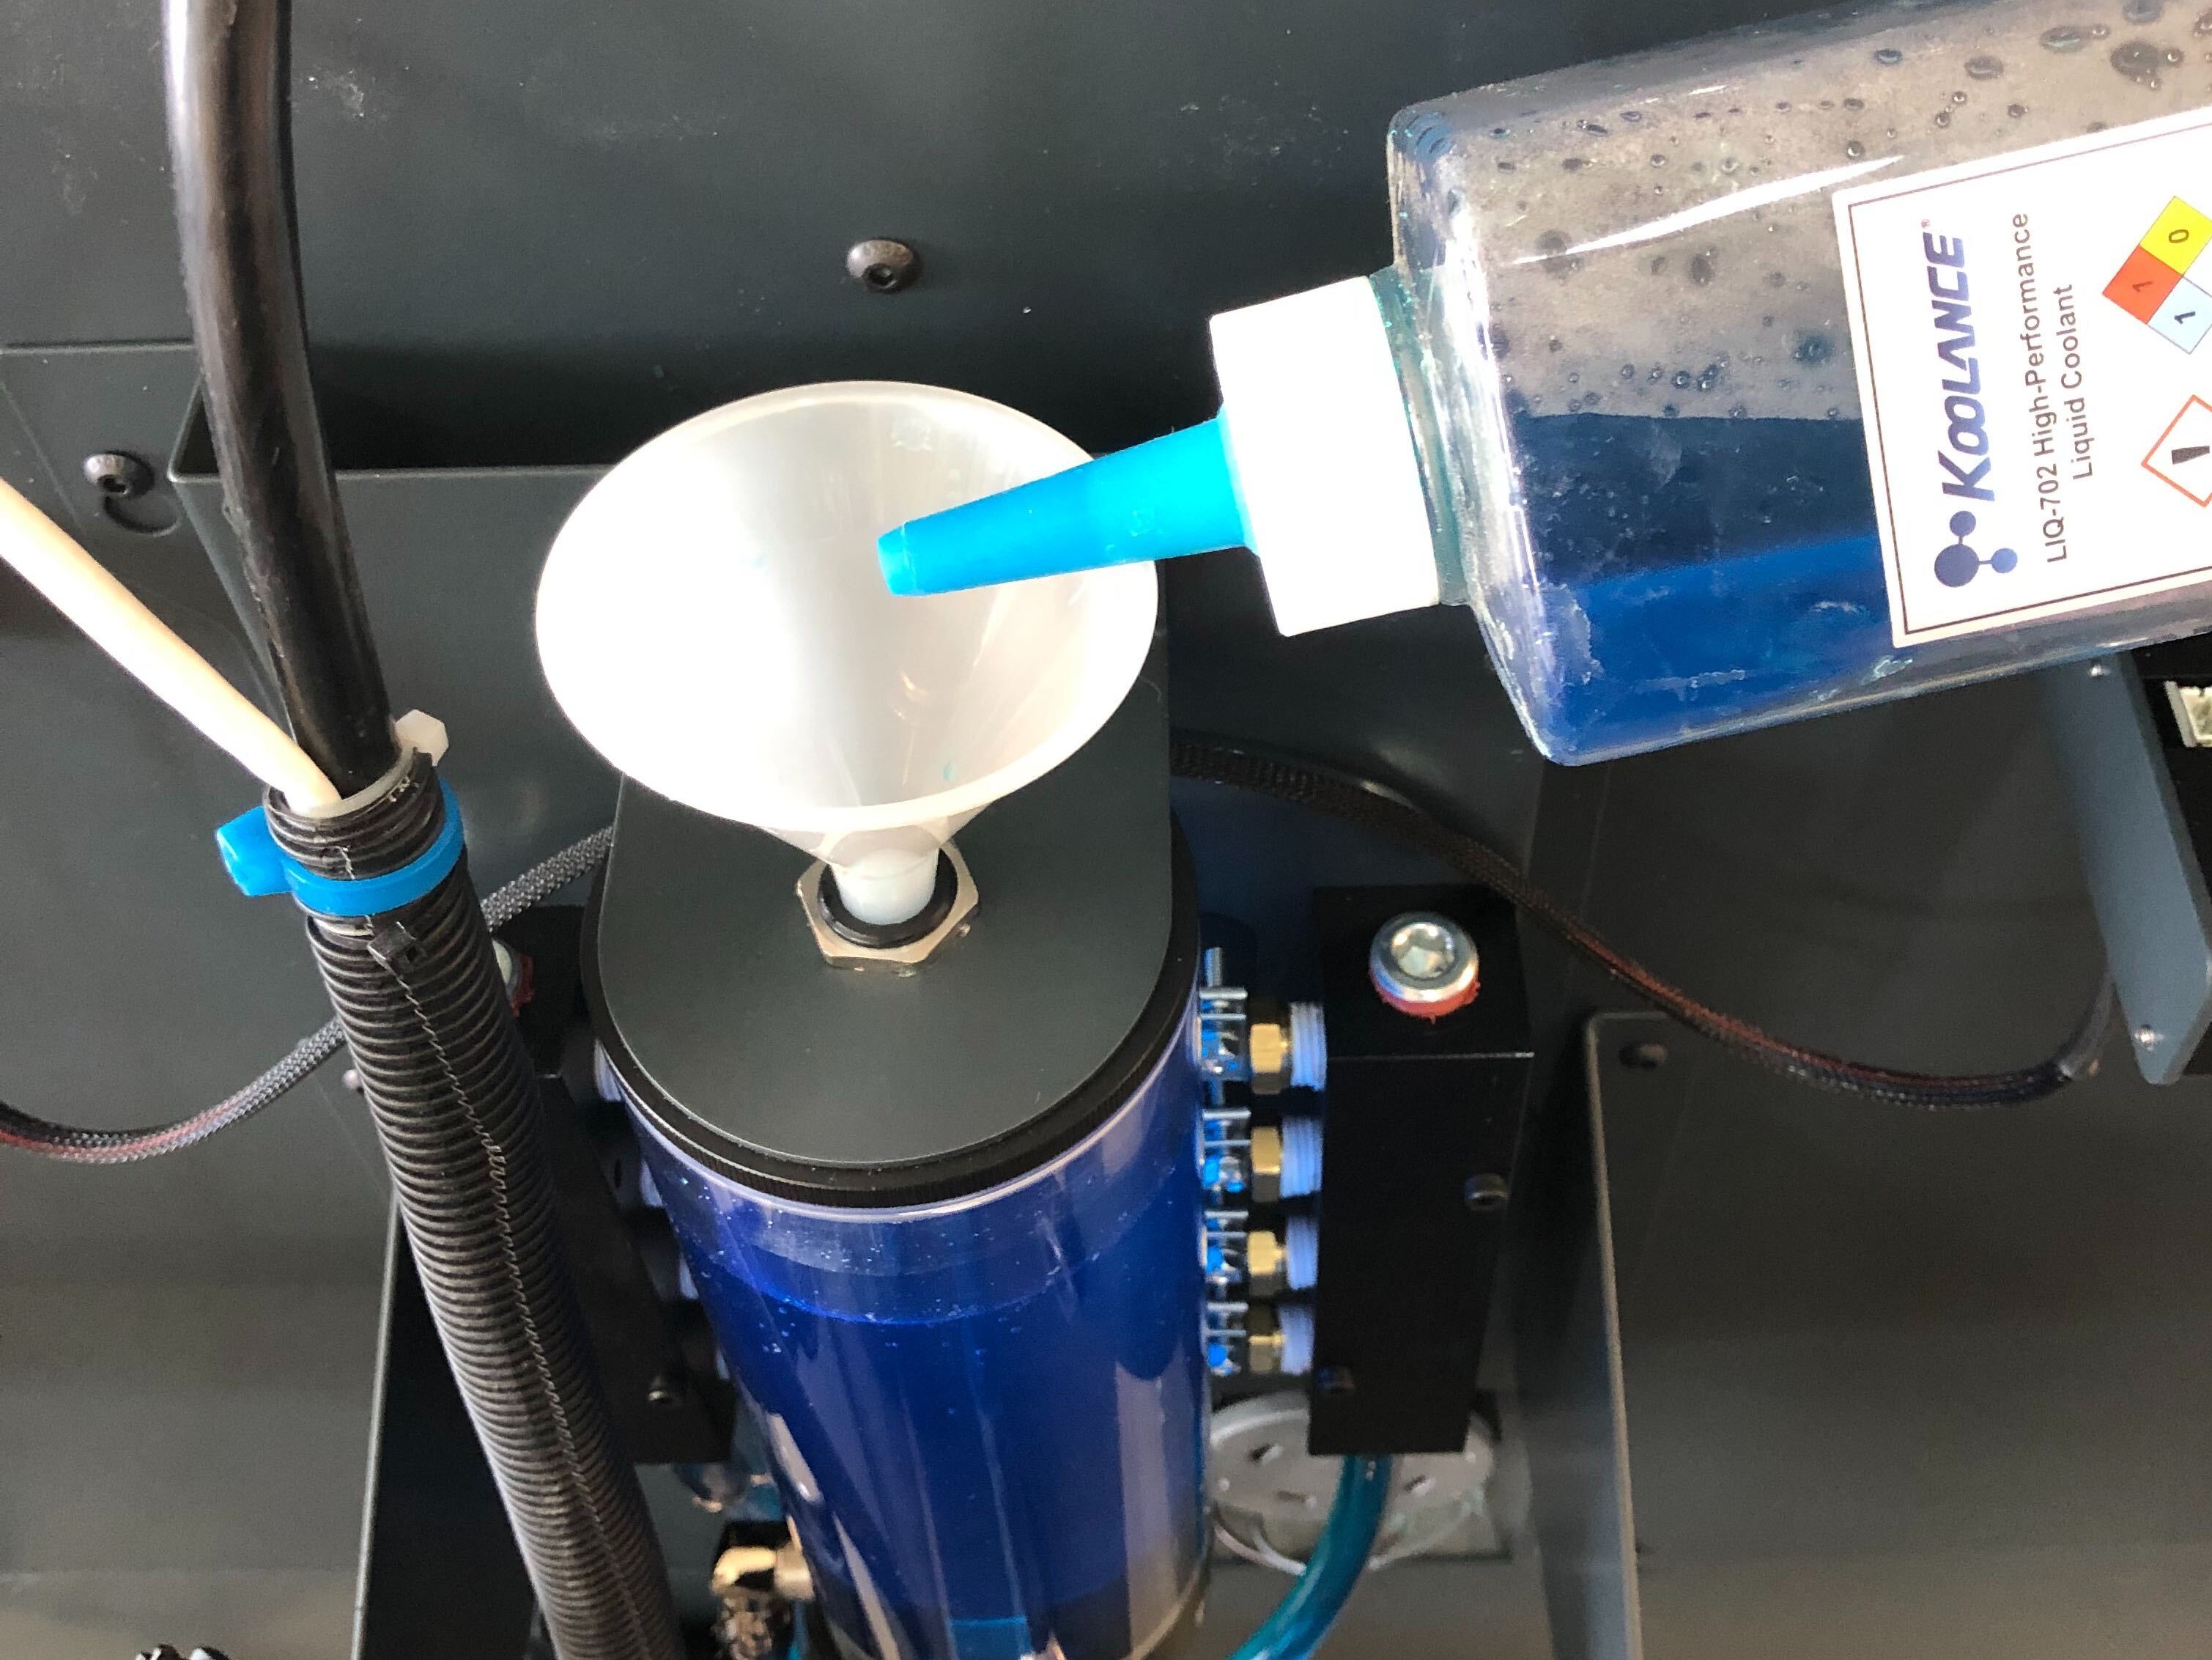
Carefully add coolant into the coolant reservoir (1) in small quantities to not make air bubbles.
- Insert the funnel into the filler hole (2) to add coolant into the coolant reservoir (1).
- Fill the coolant reservoir (1) to one inch from the top.
Bleed Cooling Circuit
- Place the empty 3-liter bucket directly under the radiator bleed valve (7).
- Connect the coolant pump wire harness connector (3) to turn on the coolant pump (5).
- Fill the coolant reservoir (1) to one inch from the top.
- Remove the cap found on the bleed valve (7).
- Install and tighten the cap onto the bleed valve (7) when coolant exits without air.
Make sure bleed valve (7) cap is installed and tightened. A low coolant level will cause machine components to run too hot and void the AON3D warranty.
- Operate the coolant pump (5) for five minutes or until air bubbles are no longer present.
- Fill the coolant reservoir (1) to one inch from the top.
- Install the filler plug (2) onto the coolant reservoir (1) and tighten with the use of the large flathead screwdriver.
AON-M2 Instructions
• AON3D now uses a different coolant solution (now blue in color) from the one originally shipped with the AON-M2.
• AON3D recommends to change coolants when the annual coolant flush is performed.
• Make sure to correctly flush the old coolant when a change in coolant types is performed. Refer to Drain and Replace Coolant.
Do not mix different types of coolant. A mixture of coolant types can cause damages to machine component(s). Only use coolants that are approved by AON3D.
Tools
| Qty | Description | Specification |
|---|---|---|
| 1 | Screwdriver | Flathead, Large |
| 1 | Screwdriver | Flathead, Small |
| 1 | Bucket | 3-liter capacity |
| 1 | Funnel | Small |
| A/R | Rags | Lint-free |
Parts Information
| Qty | Part Number | Description |
|---|---|---|
| A/R | A46067D6 | High-Performance Liquid Coolant, 700ml |
Reach out to our Customer Success team at help@aon3d.com for genuine AON3D replacement part(s).
AON3D uses coolants that can be different in color. All AON3D-approved coolants are interchangeable and are safe to use with AON machine component(s) and cooling circuit(s).
Personal Protective Equipment
| Qty | Description | Minimum Specification |
|---|---|---|
| 1 | Safety Eyewear | ANSI/ISEA Z87.1 |
| A/R | Nitrile Gloves | ISO 2859-1 or ASTM D6319 |
Prepare the Coolant Bottles
The cooling circuit coolant capacity is approximately 1.6 liters (3.38 pints).
- Remove the bottle cap to install the rubber spout onto the coolant bottle:
- Remove the rubber spout and set aside.
- Remove the plastic center cap. Do not discard the center cap as it can be reused to reseal the coolant bottle.
- Put the rubber spout upright on the coolant bottle opening.
- Install the rubber spout assembly onto the coolant bottle with the cap.
- Install the clear filler tube onto the rubber spout.
Fill Cooling Circuit
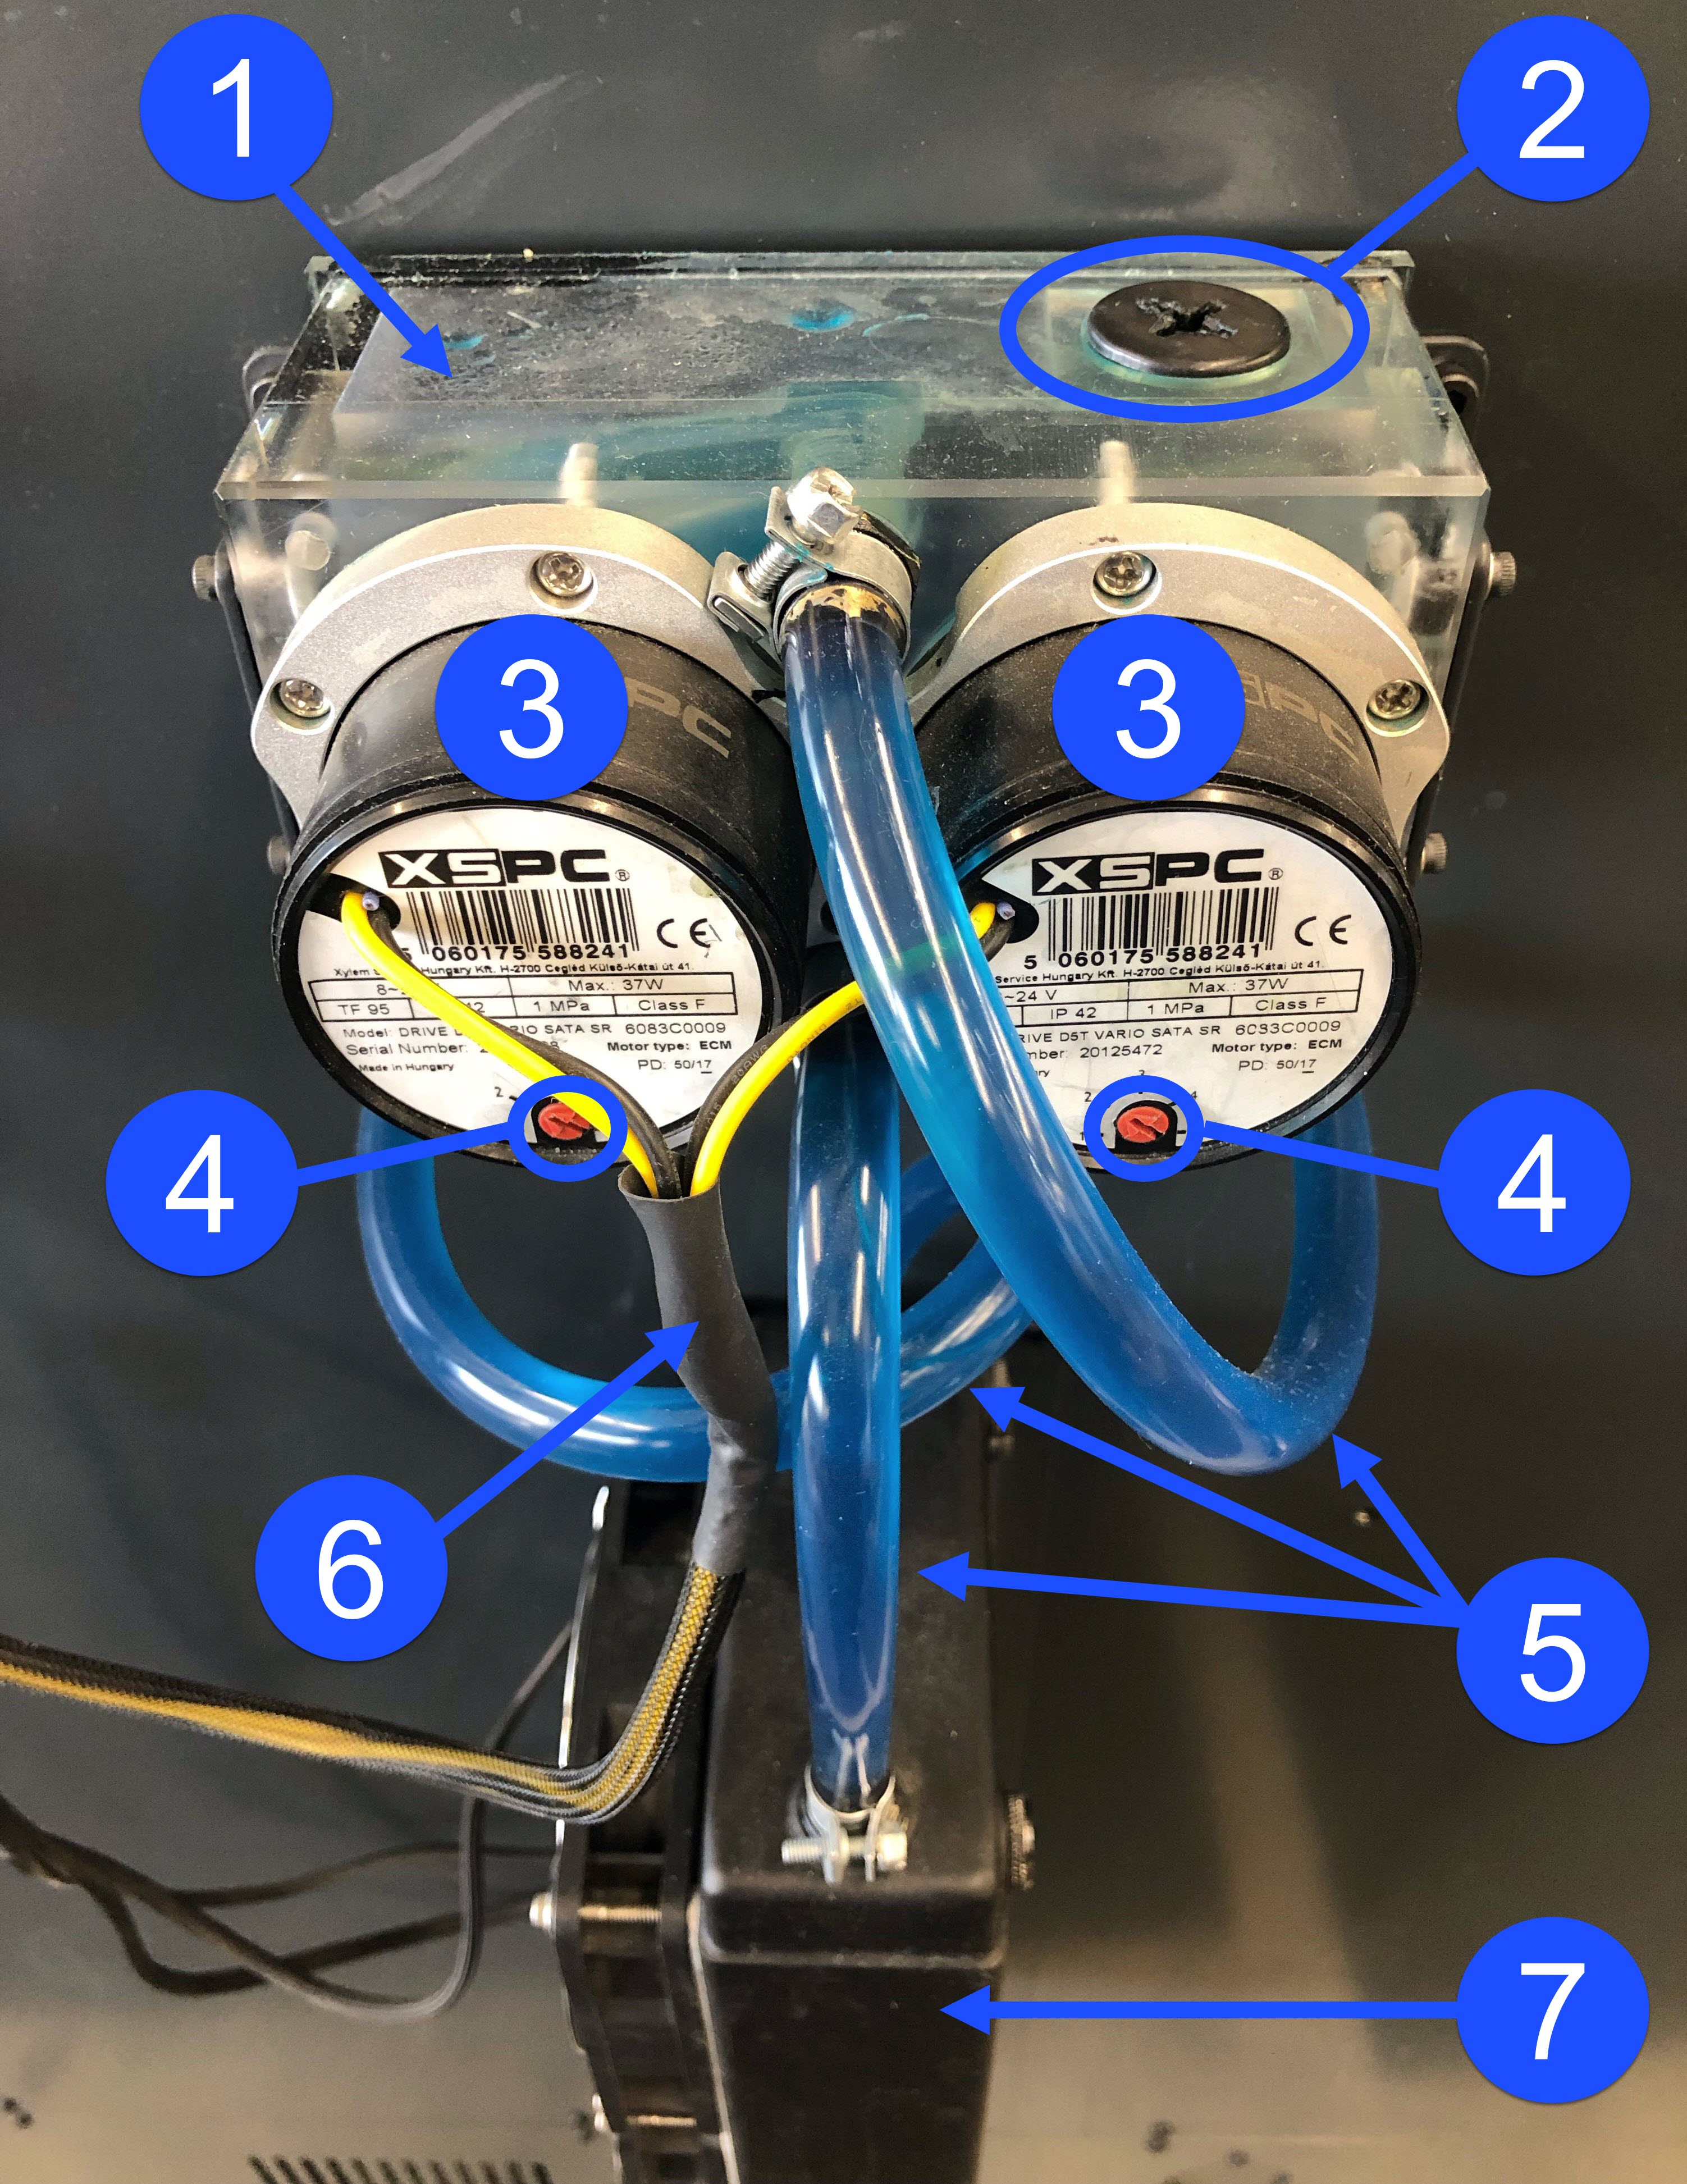
- Separate the coolant pump wire harness connector (6) to turn the two coolant pumps (3) power OFF.
- Use the large flathead screwdriver to remove the filler plug (2).
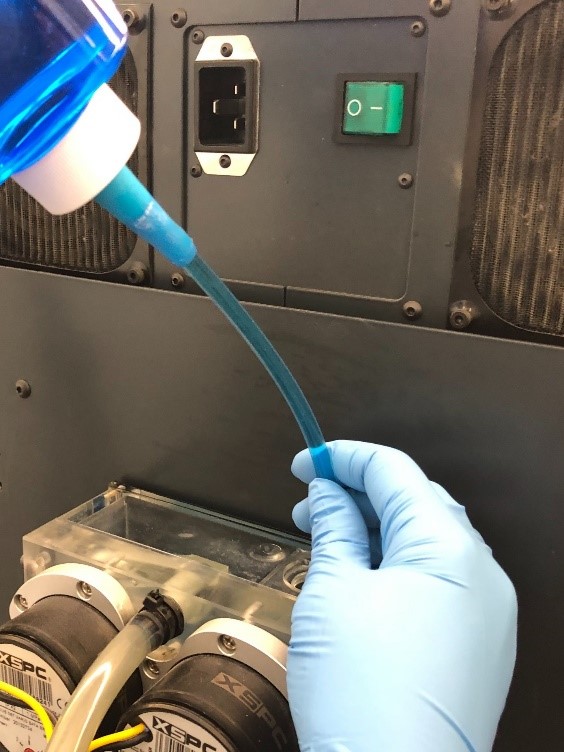
Carefully add coolant into the coolant reservoir (1) in small quantities to not make air bubbles.
- Add coolant into the coolant reservoir (1).
- Use the small flathead screwdriver to set both pump control dials (4) to 5.

- Place a lint-free rag under the left coolant line (5).
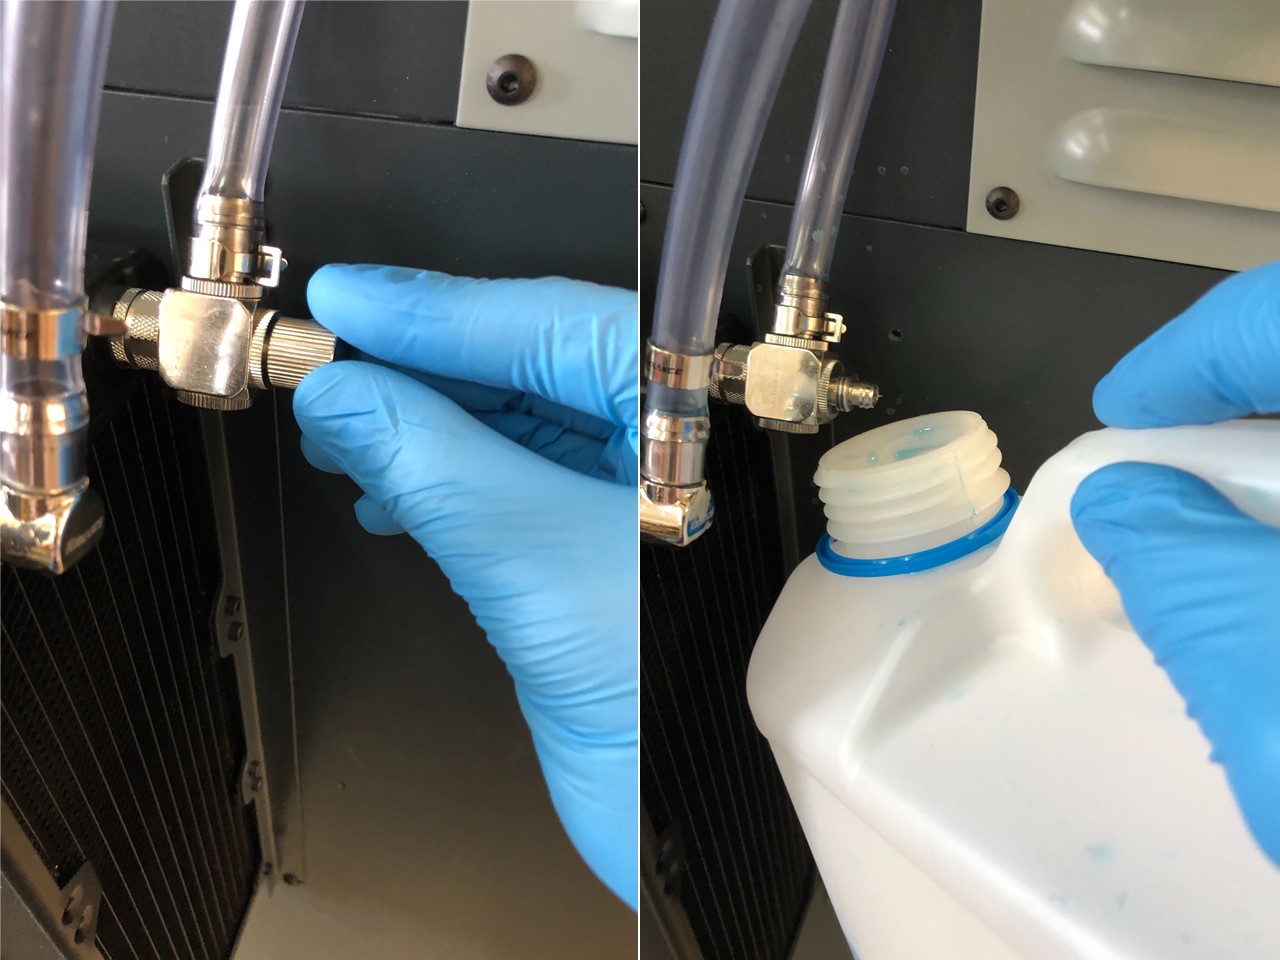
- Remove the left quick-connect fitting located at the end of the coolant line (5) that enters the back of the machine: apply pressure to the green collar and carefully pull the gray connector.
- Connect the coolant pump wire harness connector (6) to turn the power on.
Do not operate coolant pumps when the coolant level is low. This can cause damage to machine component(s).
The two coolant pumps (3) will make emit a strange sound when power is turned on due to air in the cooling circuit. Complete this fill cycle to resolve this.
- Once coolant exits the coolant tube (5), install the coolant tube to the quick-connect circuit fitting. Make sure coolant tube (5) is secure.
- Fill the coolant reservoir (1) to the top, install the filler plug (2) onto the coolant reservoir (1), and tighten with the large flathead screwdriver.
- Set the two coolant pump speed control dials (4) to 1.
Dislodge Trapped Air Bubbles
If difficulties arise to get full coolant circulation with the above-mentioned procedure, one or both of the methods that follow should help. Otherwise, continue to the next section.
Method 1
- With the two speed control dials (4) set to 5, cycle power ON and OFF to the coolant pumps (3) five times. This procedure helps dislodge any air that clogs the cooling circuit.
- Fill the coolant reservoir (1) to the top.
- Install the filler plug (2) onto the coolant reservoir (1) and tighten with large flathead screwdriver. Do not tighten too much.
Method 2
- Separate the coolant pump wire harness connector (6) to turn the power OFF.
- Place a lint-free rag under the right coolant line (5).
- Remove the right quick-connect fitting located at the end of the right coolant line (5) that enters the back of the machine: apply pressure to the green collar and carefully pull the gray connector.
- Connect the coolant pump wire harness connector (6) to turn the power on.
- Once coolant exits the coolant tube (5), install the right coolant tube (5) into the right quick-connect circuit fitting. Make sure coolant tube is secure.
- Fill the coolant reservoir (1) to the top.
- Install the filler plug (2) onto the coolant reservoir (1) and tighten with large flathead screwdriver.
Eliminate Remaining Air Bubbles
- Remove the filler plug (2) from the coolant reservoir (1) with large flathead screwdriver.
- Decrease the two coolant pump speed control dials (4) to 1. The flow should become consistent and free of any air bubbles. Add coolant as necessary to keep the coolant reservoir (1) full.
- Increase the right cooling pump speed control dial (4) to 2. Wait until the air bubbles have finished getting to the coolant reservoir (1). Add coolant as necessary to keep the coolant reservoir (1) full.
- Increase the left cooling pump speed control dial (4) to 2. Wait until the air bubbles have finished getting to the coolant reservoir (1). Add coolant as necessary to keep the coolant reservoir (1) full.
- Do steps 3 and 4, with the coolant pump speed control dials (4) set to 3.
- Do steps 3 and 4, with the coolant pump speed control dials (4) set to 4.
Do not increase pump control dials (4) to 5. This will cause turbulence in coolant flow and will trap air bubbles in the coolant return lines.
- Let the two coolant pumps (3) run for 10 to 15 minutes. The air bubbles will disappear as the coolant circulates throughout the cooling circuit.
- Add coolant as necessary to keep the coolant reservoir (1) full.
- Install the filler plug (2) onto the coolant reservoir (1) and tighten with a large flathead screwdriver.
- Set the two coolant pump speed control dials (4) to 1.
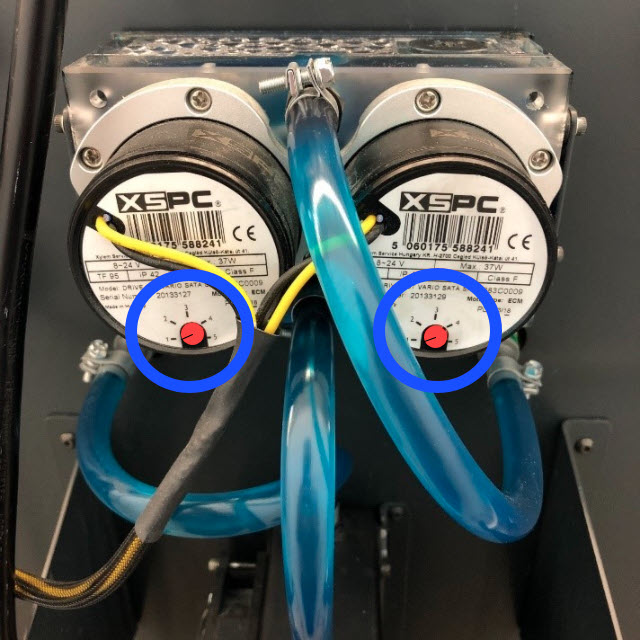
The default AON3D speed control dials (4) must be set to 1 before machine is entered into service. Failure to do can cause the machine component(s) to operate too hot.