SABIC AMS31F
SABIC AMS31F is an amorphous filament used as a breakaway support material, providing excellent adhesion during processing with easy removal after processing. The filament’s white color provides a sharp contrast, allowing the user to quickly identify support structures.
Offering rigidity at high temperatures with ease of support structure removal at room temperature, AMS31F is compatible with TenneT PI as a breakaway support material.
Printing Difficulty: Challenging/Expert
AMS31F can be purchased from AON3D directly by contacting help@aon3d.com.
- Moisture Control
- Build Platform Adhesion
- General Process Settings
- Post-Processing
- Technical Specifications
- Troubleshooting
Moisture Control
AMS31F is extremely susceptible to moisture uptake. Bubbles, popping noises, excessive oozing, and stringing may occur if it has been hydrated.
The filament can be dried in a convection oven at 70ºC for at least 8-10 hours before processing and fed from a low humidity environment. When not in use, store in a sealed package or container with silica desiccant to inhibit moisture absorption. Properly dry the material before adjusting process parameters to obtain reliable and consistent results. Our filament dry storage and feed system setup prevents filament moisture uptake to keep the material printing process free of moisture, contact help@aon3d.com for more information.
For more information, see the Filament Drying and Moisture Control guide.
Build Platform Adhesion
For instructions on how to inspect the AON3D build plates, refer to the Inspect and Clean Build Plates procedure.
PEI Build Sheet With Nano Polymer Adhesive
AMS31F prints best directly on the PEI build sheet with Nano Polymer Adhesive.
High-Temperature Build Plate
AMS31F prints best directly on the AON-M2 High-Temperature Build Plate.
High-Temperature Build Platen
AMS31F prints best directly on the AON-M2 High-Temperature Build Plate.
First Layer Adhesion
Very tall or very thin support structures, and support structures with a small first layer area on the bed, require increased first layer adhesion to remain stable throughout the print. Printing a brim around the support structure out of the model material can act as an anchor and increase stability. Avoid placing less stable support structures over the High-Temperature Build Plate bolt holes. The Nano Polymer Adhesive may become yellow after long exposures to high temperatures but should not affect first layer adhesion strength if it is re-applied.
First layer adhesion can be increased by increasing the Extrusion Temperature or reducing First Layer Speed. First Layer Height and First Layer Width must be balanced with the model material, but a value of 100-120% for both is generally sufficient for AMS31F. Reduce first layer adhesion if you have trouble removing the part and/or you damage the build platform during part removal.
| First Layer Extrusion Temperature | First Layer Speed |
|---|---|
| 385-405ºC | 20-30 mm/s |
For more information, see the Build Platform Adhesion guide.
General Process Settings
For best results, process settings should be adjusted based on model geometry. If you require process development support, our Applications Engineering team can help! Send us a message at help@aon3d.com to consult with one of our Additive Manufacturing Specialists.
Use a nozzle size of at least 0.40 mm with moderate printing speeds between 20-60 mm/s if possible. Slower printing speeds may be printed for small, complex, or delicate structures. Extrusion temperatures and/or printing speeds for AMS31F can be increased/decreased to increase support to model material adhesion. Efficient Ooze Control and Tool Change Script settings will reduce the likelihood of excess AMS31F material getting stuck in the part.
| Setting | AON M2+ | AON-M2 2020 | AON-M2 |
|---|---|---|---|
| Extrusion Temperature | 380-420ºC | 380-420ºC | 380-420ºC |
| Bed Temperature | 155ºC | 170ºC | 170ºC |
| Chamber Temperature | 135ºC | 130ºC | 120ºC |
| Print Speed | 20-50 mm/s | 20-50 mm/s | 20-50 mm/s |
| Nozzle Size | 0.40-0.60 mm | 0.40-0.60 mm | 0.40-0.60 mm |
| Preferred Build Platform | PEI Build Sheet with Nano Polymer Adhesive | High-Temperature Build Plate | High-Temperature Build Plate |
Dual Extrusion and Support
Dual tool printing with AMS31F requires fine-tuning for optimal printing. AMS31F may degrade when exposed to extrusion temperatures while the tool is idle for an extended period. If your model has a large layer size (200x200mm or more), reduce the temperature of the tool to 355ºC while it is idle to avoid clogging the nozzle. Adding a wipe in the Tool Change Script will clean the tool head as it oozes and purges between each layer.
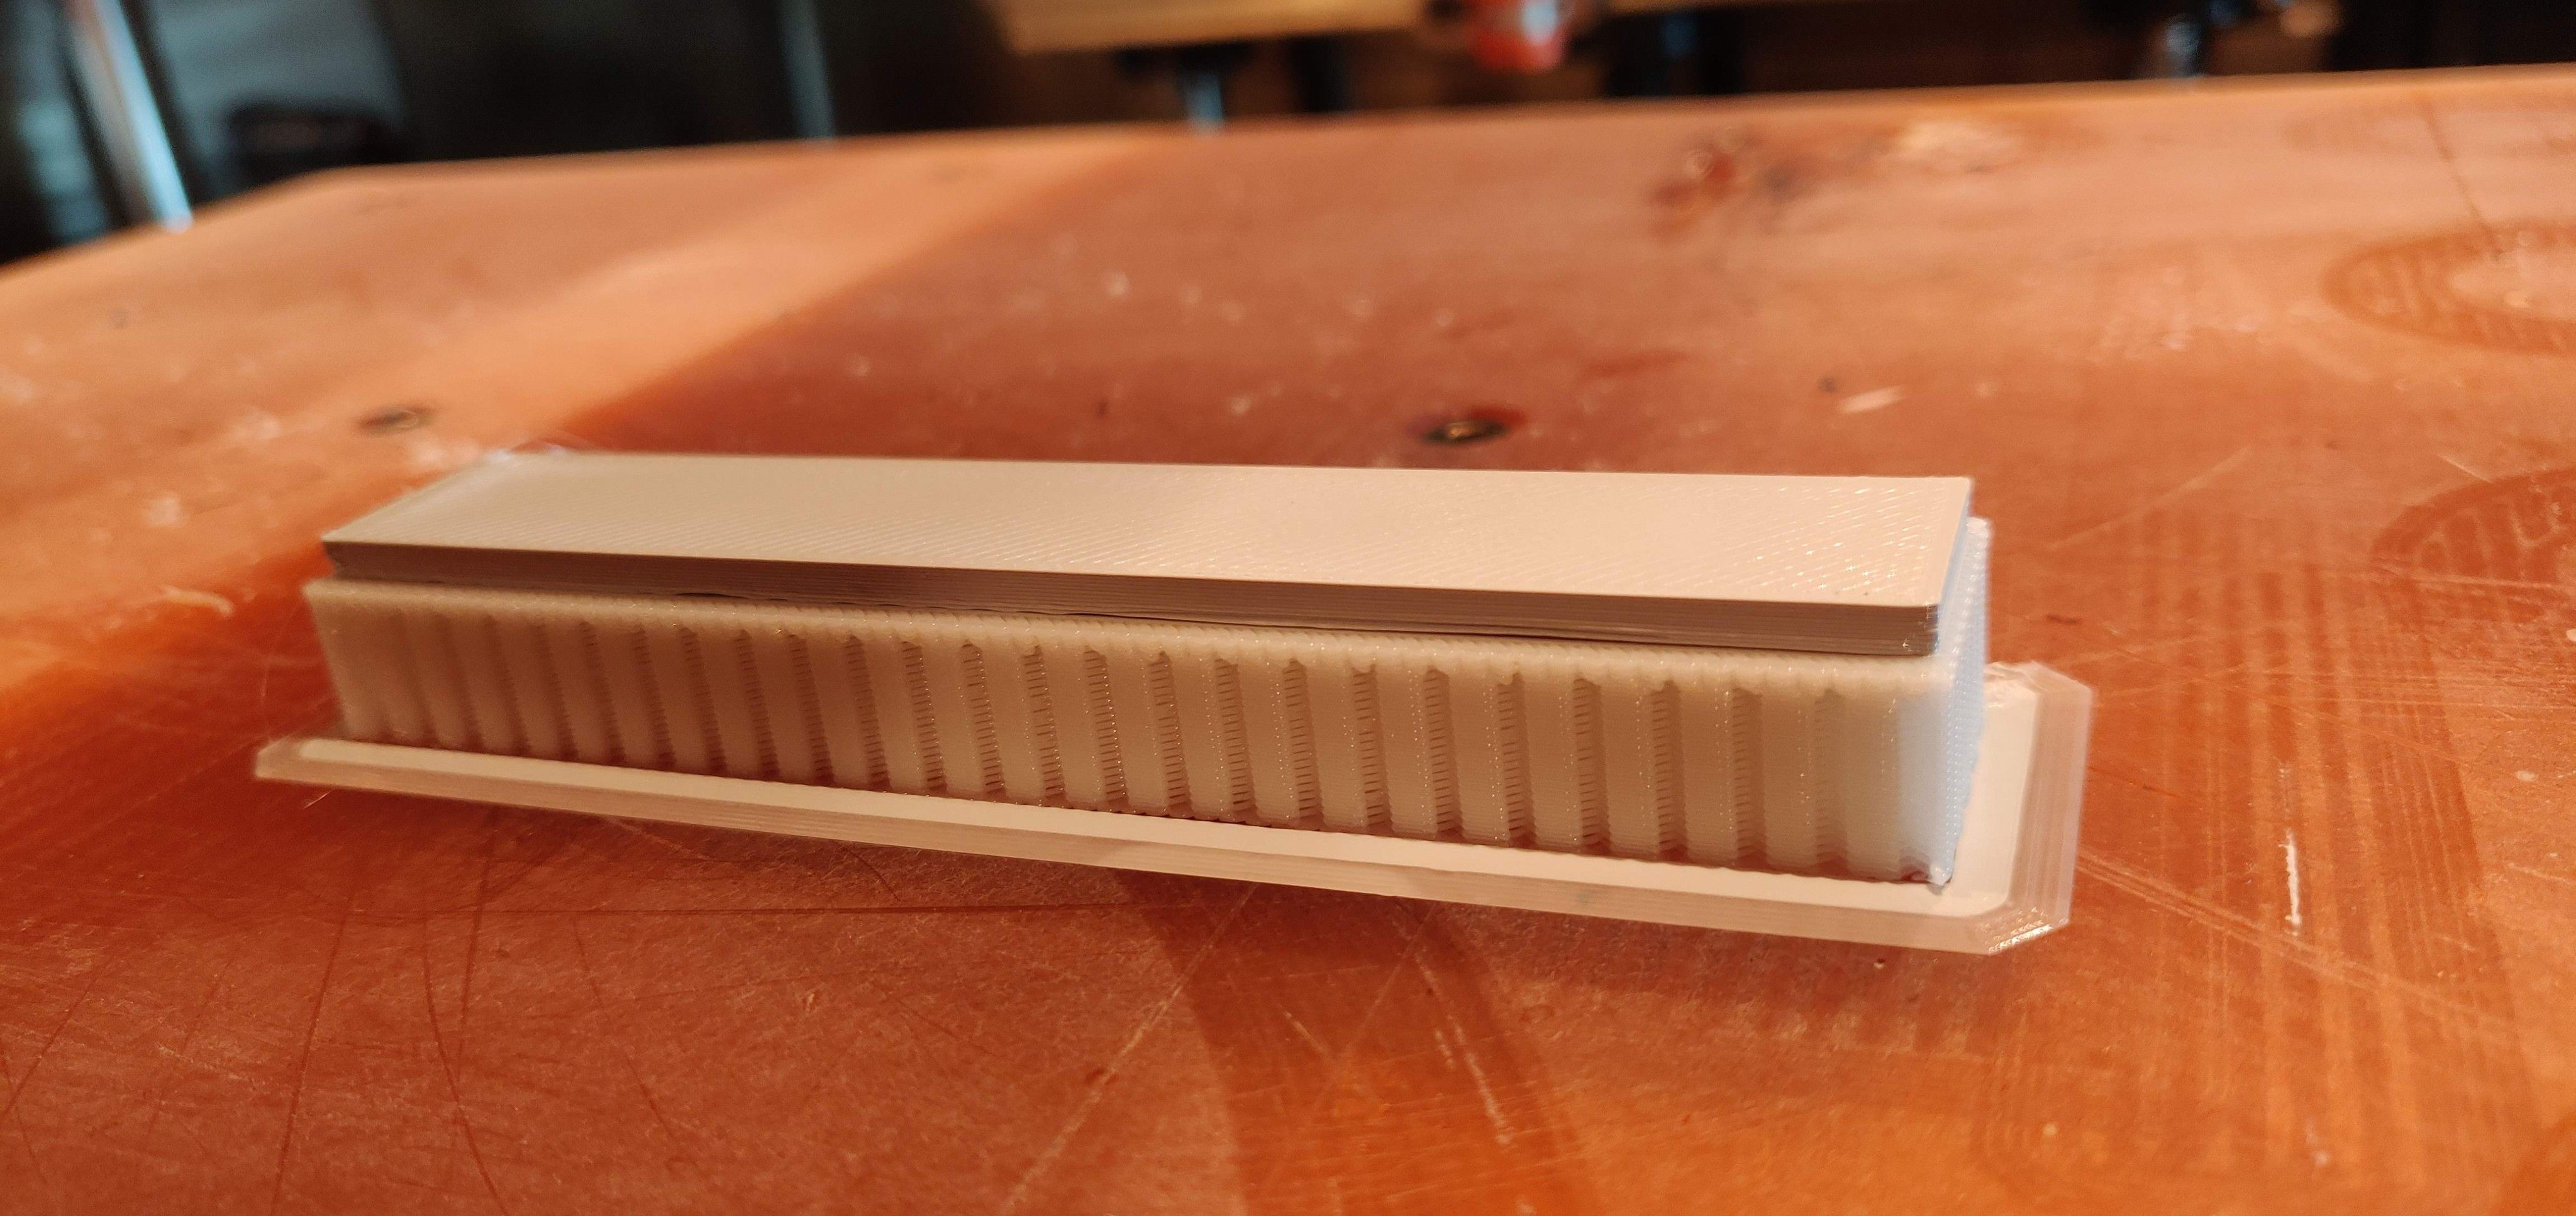
Design your parts to require little or no support material. Generally, it is better to avoid using any support material at all if the geometry permits it. Surfaces supported by AMS31F are visible even with 0 Upper/Lower Layer Separation Layers.
Adding a wipe in the Tool Change Script will clean the tool head as it oozes and purges between each layer. Between each toolhead change, a dwell time of at least 2 seconds may be needed after each purge before wiping in the Tool Change Script. The additional time allows for the purged material to cool down (preventing it from sticking to toolhead and flicking more easily) and fall after being hit by the flat brush and blade wiper assembly. Material accumulation from the purged material curling and sticking to the toolhead is then reduced, as well as with the addition of a wiping sequence.
For example, below is a Tool Change Script example that combines wipe sequences, dwell periods, and M104 & M109 commands to clean the toolheads:
{IF OLDTOOL=0} T1 ; AMS31F, support toolhead
{IF OLDTOOL=0} M104 T0 S370 ;reduce T0 temperature to avoid nozzle clogging
{IF OLDTOOL=0} M109 T1 S385 ;set T1 temperature and wait
{IF OLDTOOL=0} G91 ;relative mode
{IF OLDTOOL=0} G1 E5 F30 ;extrude 5 slow
{IF OLDTOOL=0} G4 S2 ;dwell 2 second
{IF OLDTOOL=0} G1 X60 F10000 ;move T1 tool head to wipe
{IF OLDTOOL=0} G1 X-30 F10000 ;move T1 tool head to wipe
{IF OLDTOOL=0} G1 X30 F10000 ;move T1 tool head to wipe
{IF OLDTOOL=0} G1 X-30 F10000 ;move T1 tool head to wipe
{IF OLDTOOL=0} G1 X30 F10000 ;move T1 tool head to wipe
{IF OLDTOOL=0} G1 X-60 F10000 ;move T1 tool head to wipe
{IF OLDTOOL=0} G1 E5 F30 ;extrude 5 slow
{IF OLDTOOL=0} G4 S2 ;dwell 2 second
{IF OLDTOOL=0} G92 E0 ;reset extruder
{IF OLDTOOL=0} G90 ;absolute mode
Be cautious when using M104 as lowering the AMS31F extrusion temperature while idle is not always a viable option.
Material buildup from printing AMS31F may not soften enough in time, potentially crashing into the part.
By using M109, the toolhead will wait until it reaches the desired extrusion temperature before printing.
As the toolhead heats up, the accumulated material may soften enough for ease of removal with a wiping sequence.
The Tool Change Script must be optimized based on the processing parameters (extrusion and environment temperature) and geometry (timer per toolhead path) to efficiently clean the toolheads.
If some AMS31F support structures are easy to remove but some are permanently bonded to the model material, you may have to recalibrate each axis as shown in the Calibration guide. Poor calibration of each axis may cause uneven support structure placement. Since high temperatures are needed to print AMS31F optimally, ensure that the machine has reached thermal stability as shown in the Standard Printer Pre-Heat Time guide. Once the machine has reached thermal stability, each axis can then be calibrated to ensure sufficient alignment of each axis and toolhead.
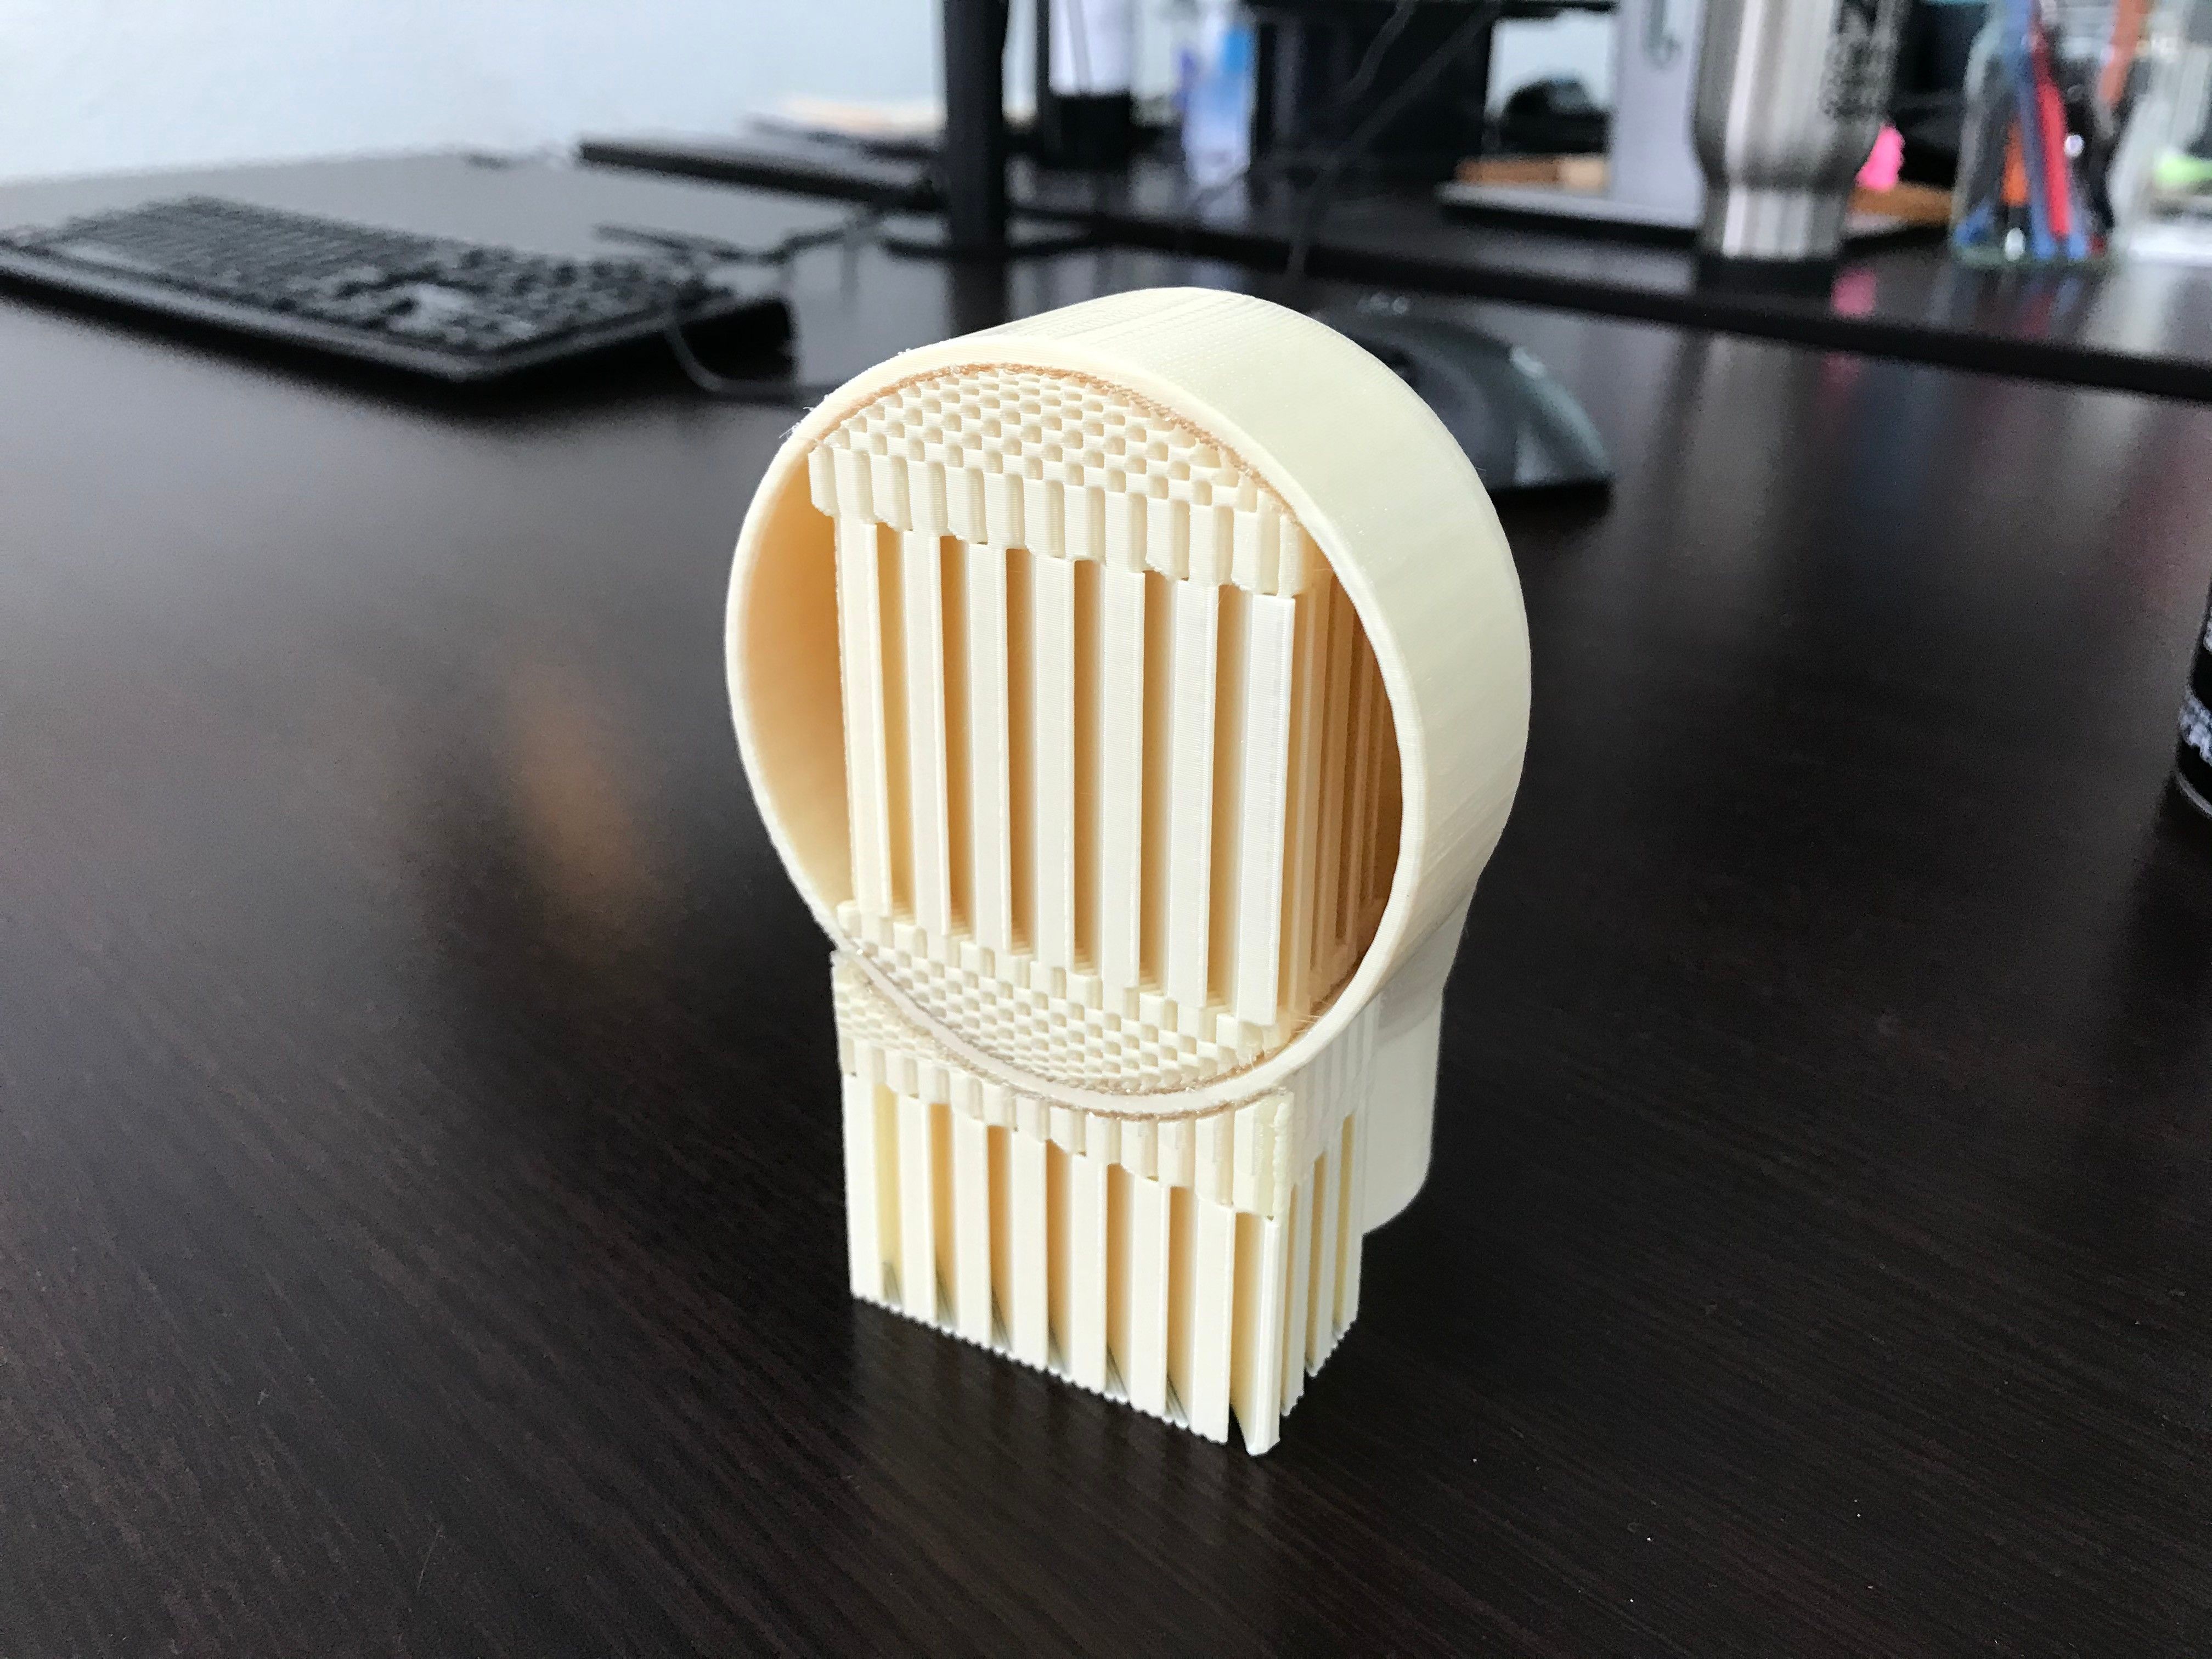
Alternatively, the number of toolhead changes can be reduced by only printing the dense support structures out of AMS31F and coarse support structures out of the model material. As shown above, around 80% of the total toolhead changes were removed. Therefore, the likelihood of material degrading while idle or accumulated material getting stuck decreases.
For more information, see the Using Supports and Support Materials and Dual Extrusion guides.
Sample Slicer Profiles
The FFF material profiles to print AMS31F as a support material can be found in the model material page:
Post-Processing
Allow all machine components to reach room temperature before proceeding further. Failure to allow components to cool down will result in thermal injury (burns) to personnel.
AMS31F parts can be peeled off the PEI build sheet by hand at room temperature. The use of a spatula may be necessary, especially to remove a brim or skirt.
Avoid removing prints while the PEI build sheet is still hot. If not cooled, permanent deformation of the PEI build sheet may occur when removing a large part with a lot of contact area.
AMS31F can be removed from the build platform using a spatula. Instructions for doing this can be found in the Build Platform Adhesion guide.
AMS31F can be removed from the build platform using a spatula. Instructions for doing this can be found in the Build Platform Adhesion guide.
Support Removal
Wear protective eyewear and gloves when mechanically removing AMS31F support structures from prints. AMS31F can suddenly fracture, potentially causing injury from sharp structures.
We recommend mechanically breaking the support structures away from the model once the print has cooled. Support structures can be removed from the part by hand, following the instructions in the Breakaway Support section of the Using Supports and Support Materials guide.
Technical Specifications
For more information on material safety and specific material properties, see the manufacturer’s website.
Physical Properties
| Property | Value | Test Method |
|---|---|---|
| Density | 1.15 g/cm³ | ASTM D792 |
*All data as reported by SABIC Technical Data Sheet dated 7/22/2021. Print conditions listed on the Technical Data Sheet.
Troubleshooting
Nozzle Clogging
AMS31F is susceptible to material degradation if left in the nozzle at extrusion temperatures for too long. Most commonly occurs when the toolhead idles for extended periods during tool changing. Decrease the support material toolhead by around 30ºC from extrusion temperatures for large layer sizes (200x200mm or more) while it is idle to avoid clogging the nozzle.