Inspect and Clean Build Plates
| Model | [ ] AON M2+ (CE) | [ ] AON M2+ (R-NZ) | [ ] AON M2+ | [•] AON-M2 2020 | [•] AON-M2 |
| Category | [•] Preventive | [ ] Corrective | |||
| Frequency | [•] Daily | [ ] Weekly | [ ] Monthly | [ ] Yearly | [ ] As Needed |
Summary
The procedure that follows gives instructions on how to inspect and clean the AON-M2 and AON-M2 2020 build plates.
Estimated time: 30 minutes
A build plate in good condition helps:
- Improve first layer adhesion.
- Print layer reliability and quality.
Tools
| Qty | Description | Specification |
|---|---|---|
| 1 | Mallet | Hard rubber |
| 1 | Scraper, Metal | Sharp edge |
| 1 | Scraper, Plastic | Thin, Flexible |
| A/R | Sandpaper | 220 grit |
| 1 | Hex Key | 2.5 mm |
| 1 | Hex Key | 3 mm |
| 1 | Hex Drive Bit | 2.5 mm |
| 1 | Socket | 2.5 mm, 1/4 inch drive |
| 1 | Torque Wrench | 0-10 Nm range, calibrated |
| A/R | Rags | Lint-free |
| A/R | Isopropyl Alcohol | 99% |
Parts Information
None required.
Personal Protective Equipment
| Qty | Description | Minimum Specification |
|---|---|---|
| 1 | Safety Eyewear | ANSI/ISEA Z87.1 |
| 1 | Safety Footwear | EN ISO 20345 or ASTM F2413 |
| A/R | Nitrile Gloves | ISO 2859-1 or ASTM D6319 |
| A/R | Gloves | Work |
Prepare the Machine
Make sure that there are no prints on the build surface. Remove print(s) before the procedure that follows is started. Failure to do so can cause a collision and cause damage to the machine component(s).
- Home XYZ.
- Lower the Z-axis by 300 mm.
- Push the E-stop button.
- Open the build chamber door.
- Wait until the build chamber, build platform and hot ends are at room temperature.
Remove the Build Plate
Wait until all machine components are at room temperature before you continue. Some machine components can be hot if the machine was recently used. Failure to do so can cause injuries.
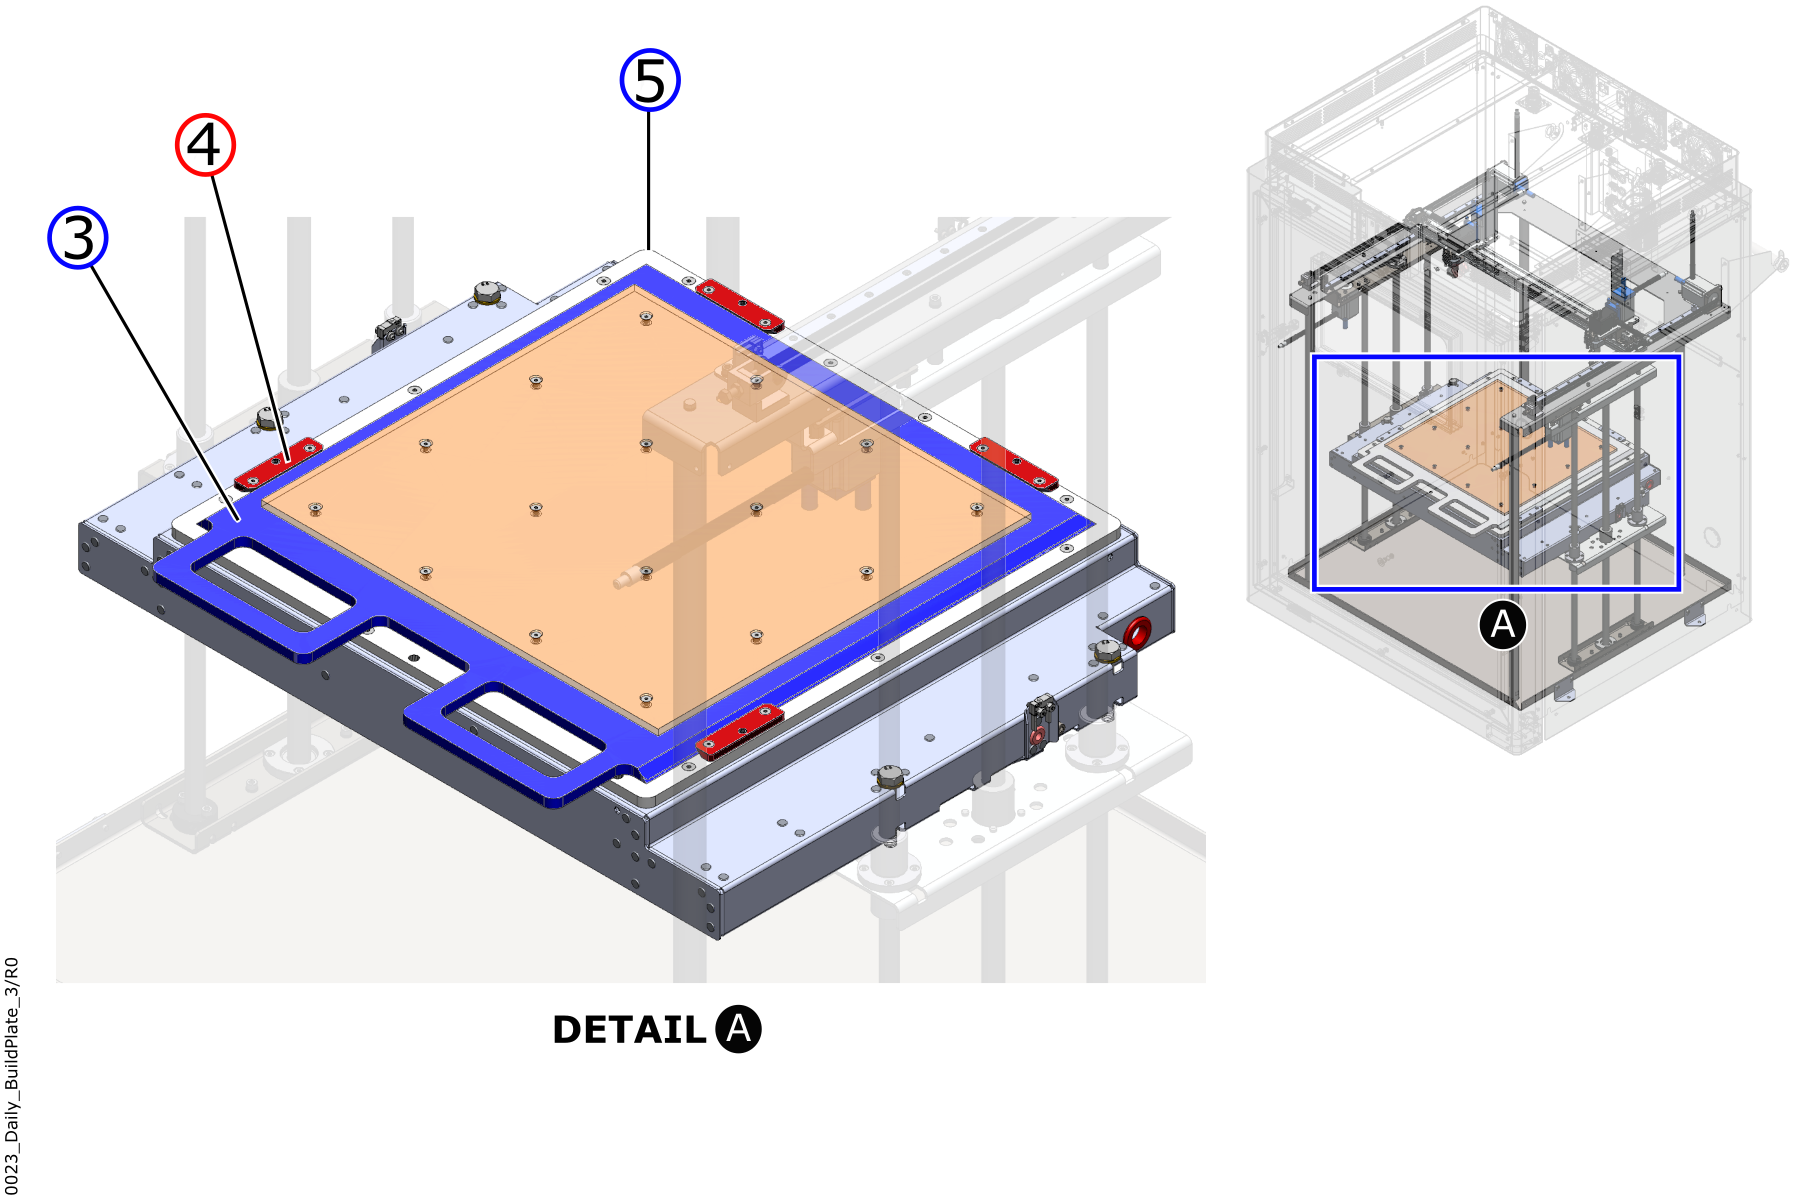

- Use the 3 mm hex key to loosen the two center set screws (6) found on the two dovetail locks (4).
- Carefully pull on the two build plate (3) handles and remove it from the base plate (5).
- Put the build plate (3) on a suitable workbench.
Inspect the Build Plate
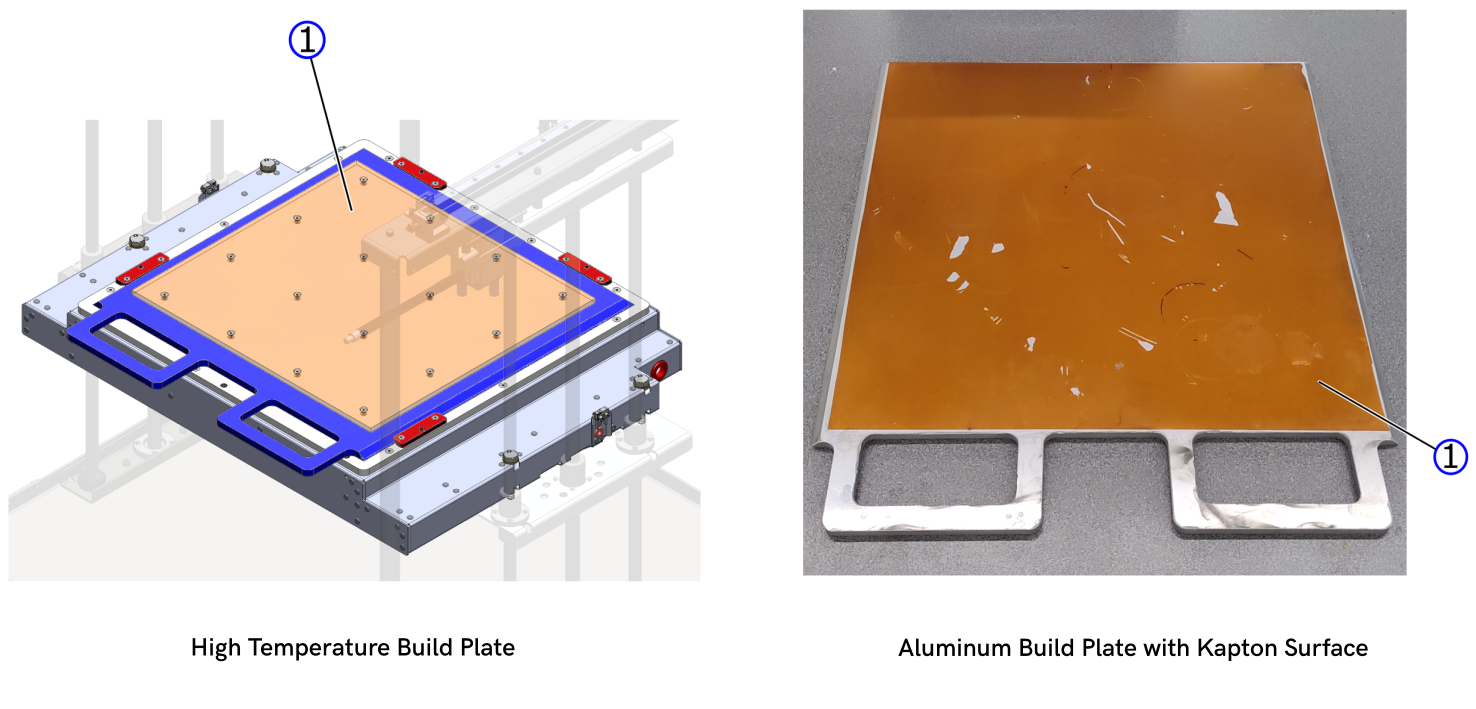
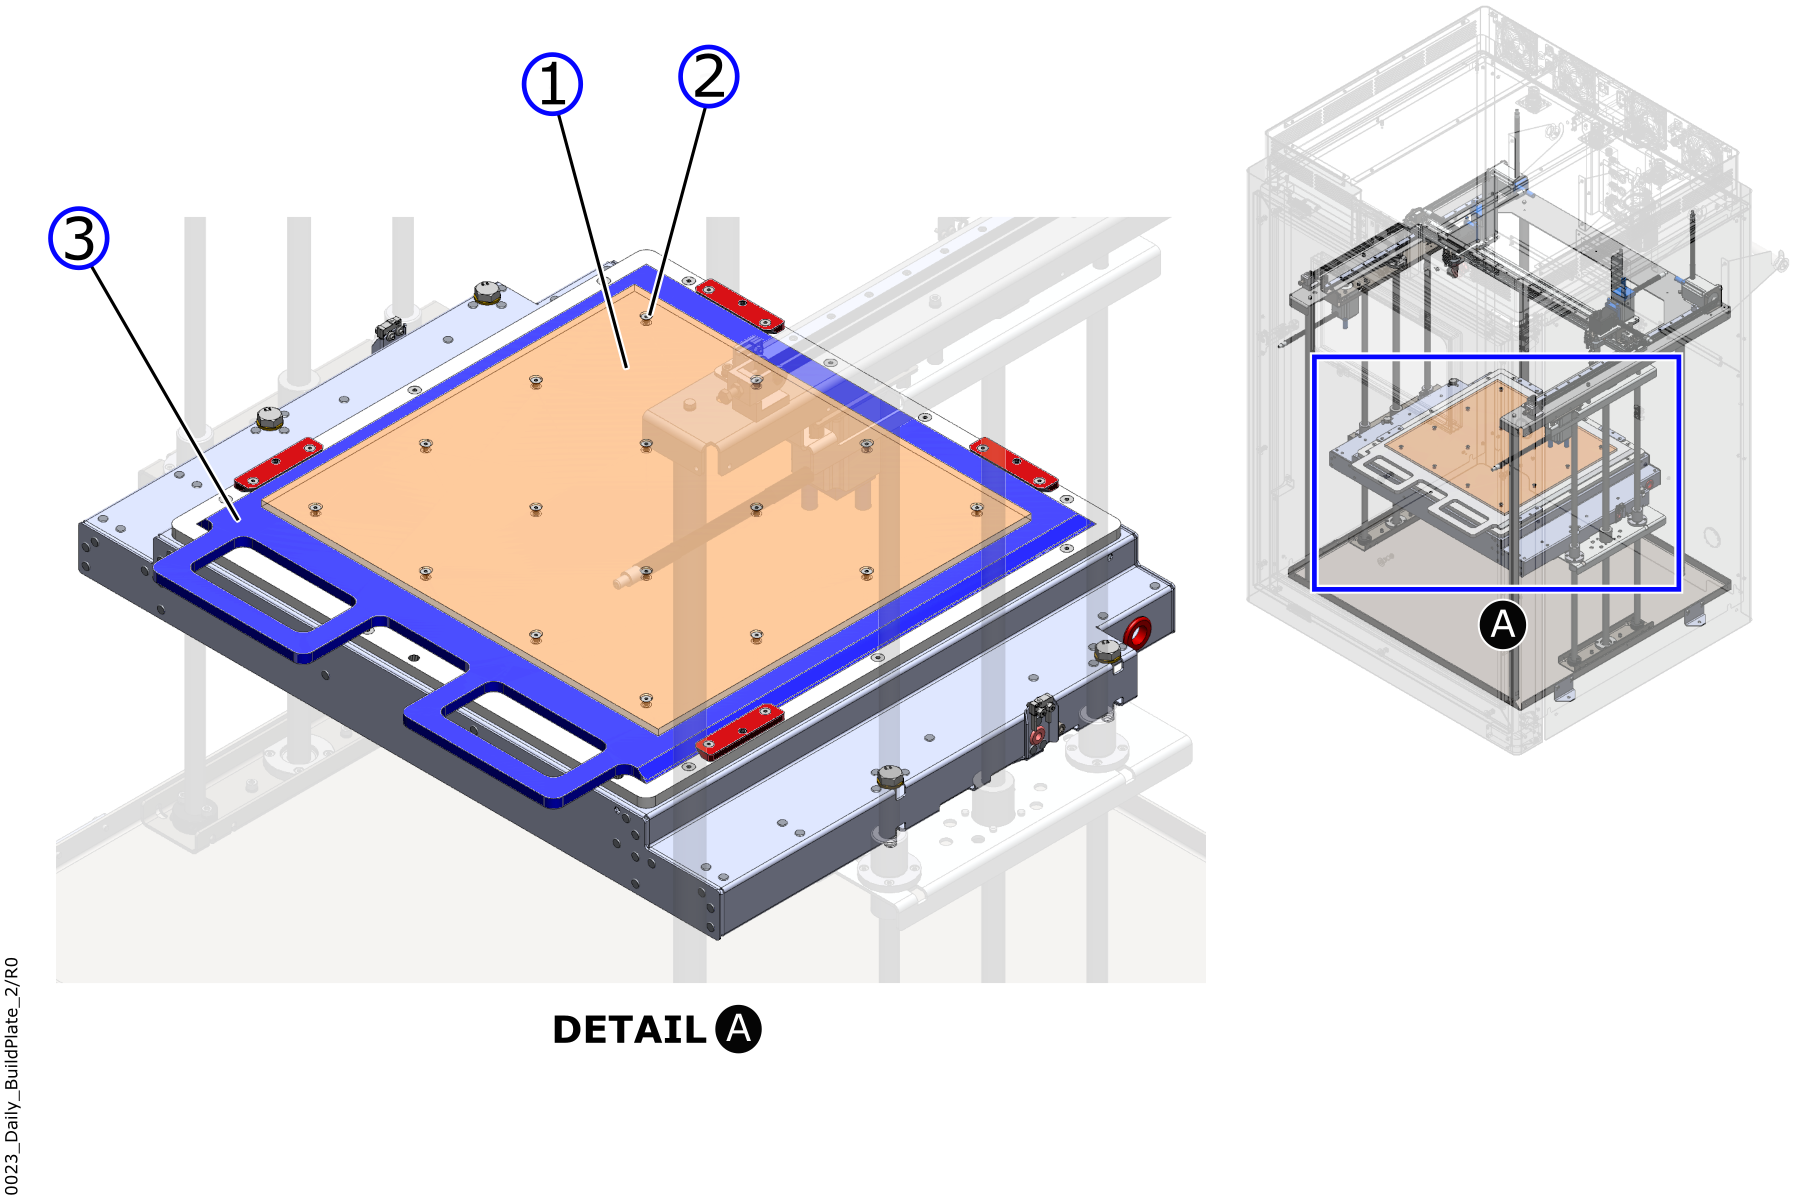
- Remove all unwanted materials from the build plate print surface (1).
- For the High-Temperature Build Plate, if needed use a metal scraper and mallet.
- For the low-temperature build plate, if needed use a plastic scraper and mallet.
• Do not use a wire brush on the Kapton® polyimide tape. The use of a wire brush can cause damages to the Kapton® polyimide tape.
• Do not use a wire brush on the bare aluminum build plate. The use of a wire brush will damage the print surface.If unwanted materials cannot be removed from the High-Temperature Build Plate, the use of 220-grit sandpaper can be used sparingly to avoid creating an uneven surface. Otherwise it is recommended to resurface the High-Temperature Build Plate. Refer to Resurface the High-Temperature Build Plate.
If unwanted materials cannot be removed from the low-temperature build plate, replace the Kapton® polyimide tape. Refer to Replace Kapton® Polyimide Tape.
- Inspect the build surface. Make sure that:
- There are no damage, such as cracks and/or holes.
- The print surface is straight and flat.
- The Kapton® polyimide tape is correctly installed on the full build surface area.
- If the build plate print surface is not satisfactory, refer to the applicable procedure that follow:
- To resurface the High-Temperature Build Plate, refer to Resurface the High-Temperature Build Plate.
- To replace the Kapton® polyimide tape found on the low-temperature build plate, refer to Replace Kapton® Polyimide Tape.
If the damage build plate print surface is small, it is possible to print on a section that is not damaged.
- On the High-Temperature Build Plate, make sure that the 16 screws (2) are tight. Use the tools that follow to tighten the 16 screws (2) to 0.3 Nm, if necessary:
- 2.5 mm hex drive bit.
- 2.5 mm socket.
- Torque wrench.
Install the Build Plate
- Use the isopropyl alcohol and clean lint-free rag(s) to remove all contaminants and unwanted materials from the base plate (5).
If the Nano Polymer Adhesive layer on the build surface is still acceptable and required for the next print, cleaning the build surface with isopropyl alcohol can be skipped.
- Let the base plate (5) dry for two minutes.
- Carefully install the build plate (3) under the two side dovetail locks (4) and onto the base plate (5).
- Carefully push the build plate (3) until it rests against the two stoppers that are found at the rear of the base plate (5).
- Use the 3 mm hex key to tighten the two center set screws (6) found on the two dovetail locks.
- Make sure that the two side dovetail locks (4) hold the build plate (3) correctly onto the base plate (5).
Do not tighten the two flathead screws found on the dovetail locks. Only tighten the set screw that is found at the center of the dovetail lock.
Test and Return to Service
- Make sure all tools are removed from the build chamber.
- Close the build chamber door.
- Release the E-stop button.
- Home XYZ.
- Probe the build surface. Refer to the Auto Bed Leveling procedure.