> AON-M2 Series > Maintenance Guide > Preventive Maintenance > Inspect Linear Components and Lead Screws for Contamination
Inspect Linear Components and Lead Screws for Contamination
| Model | [•] AON M2+ (CE) | [•] AON M2+ (R-NZ) | [•] AON M2+ | [•] AON-M2 2020 | [•] AON-M2 |
| Category | [•] Preventive | [ ] Corrective | |||
| Frequency | [•] Daily | [ ] Weekly | [ ] Monthly | [ ] Yearly | [ ] As Needed |
Summary
The procedure that follows gives instructions on how to look for contamination and unwanted material on the linear rails, linear shafts and lead screws.
Clean components prevent:
- X, Y, and/or Z-axes binding.
- Loud noises when the axes are in motion.
- Unsatisfactory print layers.
Estimated time: 15 minutes
Tools
None required.
Parts Information
None required.
Personal Protective Equipment
| Qty | Description | Minimum Specification |
|---|---|---|
| 1 | Safety Eyewear | ANSI/ISEA Z87.1 |
| A/R | Nitrile Gloves | ISO 2859-1 or ASTM D6319 |
Prepare the Machine
Make sure that there are no prints on the build surface. Remove print(s) before the procedure that follows is started. Failure to do so can cause a collision and cause damage to the machine component(s).
- Home XYZ.
- Lower the Z-axis by 300 mm.
- Push the E-stop button.
- Open the build chamber door.
- Wait until the build chamber, build platform and hot ends are at room temperature.
Inspect the X-Axis Linear Rail
Allow all machine components to reach room temperature prior to proceeding further. Failure to allow components to cool down will result in thermal injury (burns) to personnel.
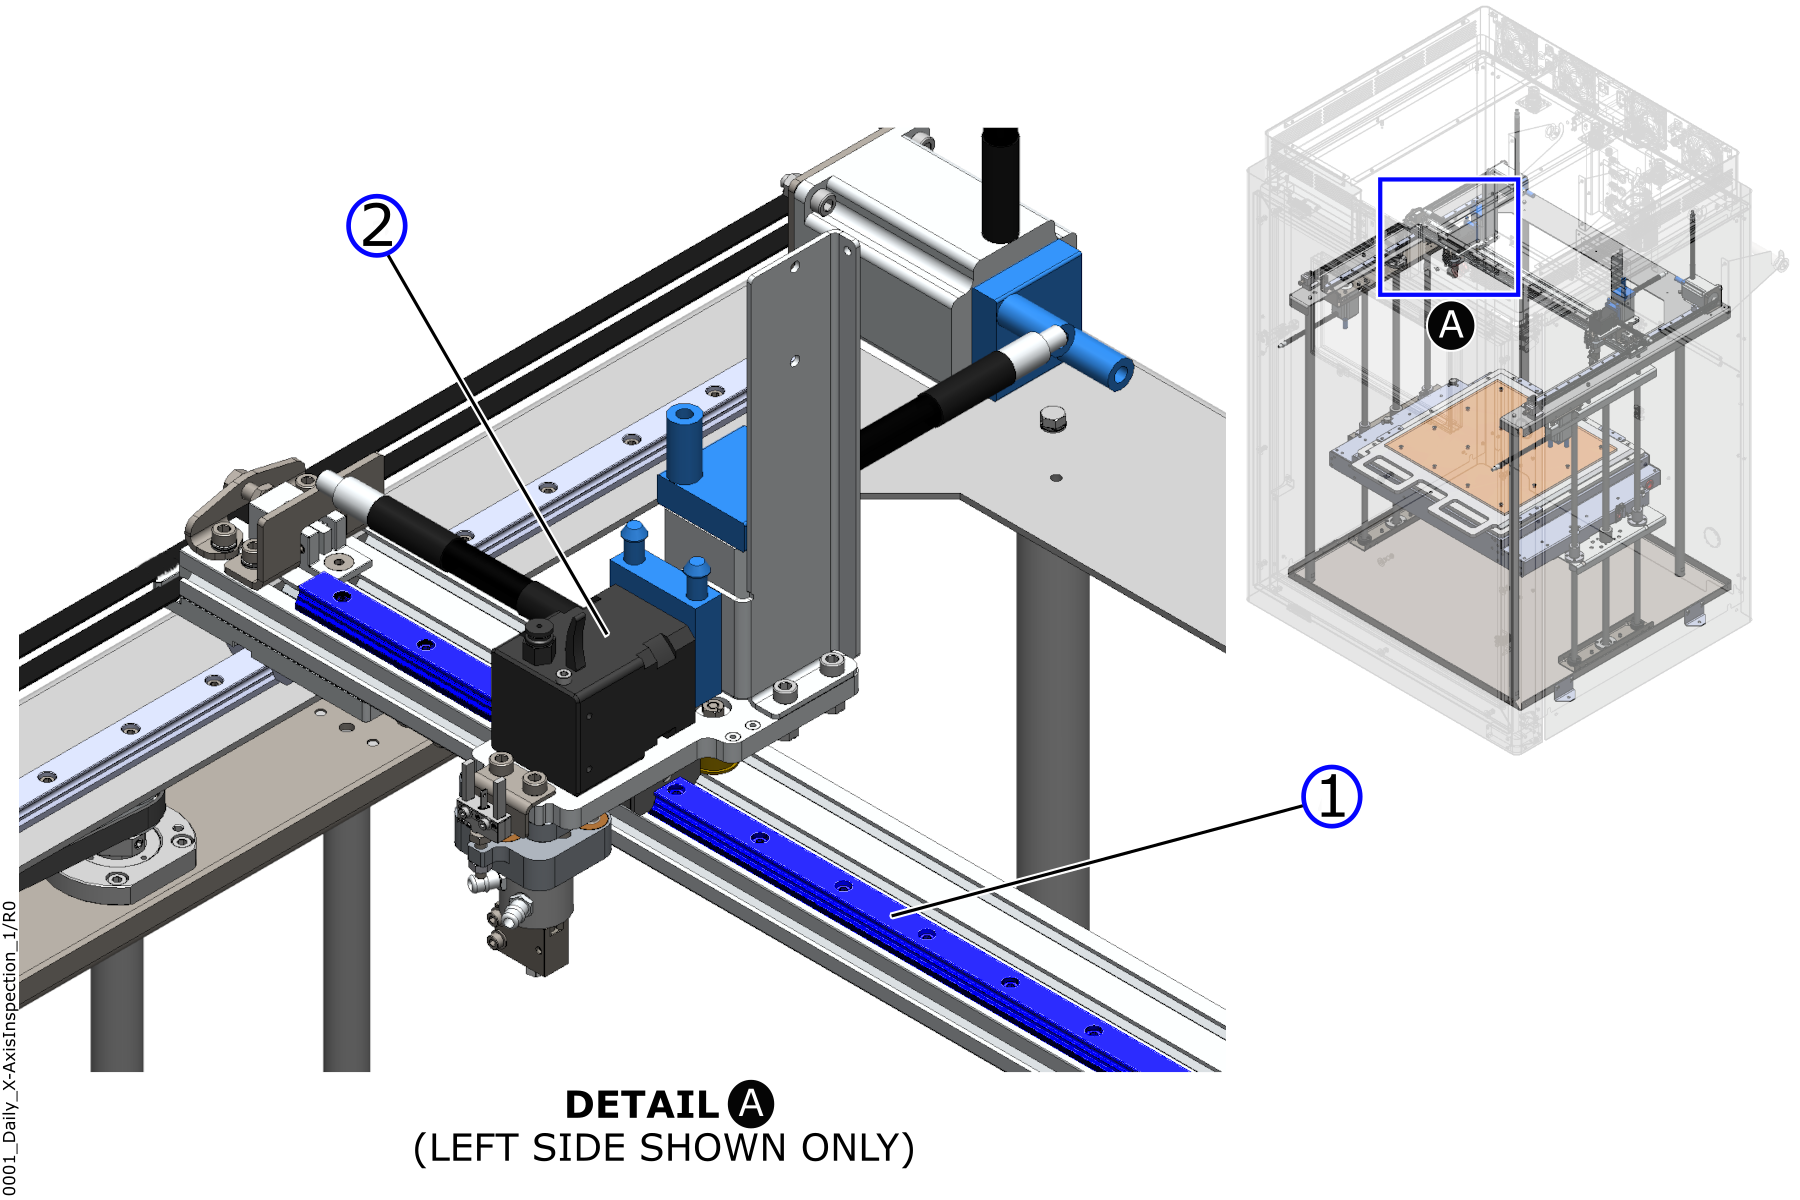
- Manually move T0 (2) to the center of the the X-axis linear rail (1).
- Inspect the X-axis linear rail (1) surfaces for contaminants.
- Manually move T0 (2) to the left-hand side of the X-axis linear rail (1). Inspect X-axis linear rail (1) for contaminants.
- Manually move T1 to the center of the the X-axis linear rail (1).
- Inspect the X-axis linear rail (1) surfaces for contaminants.
- Manually move T1 to the right-hand side of the X-axis linear rail (1). Inspect X-axis linear rail (1) for contaminants.
- Remove all contaminates as necessary. Refer to Clean and Lubricate X/Y-Axes.
Inspect the Y-Axis Linear Rails
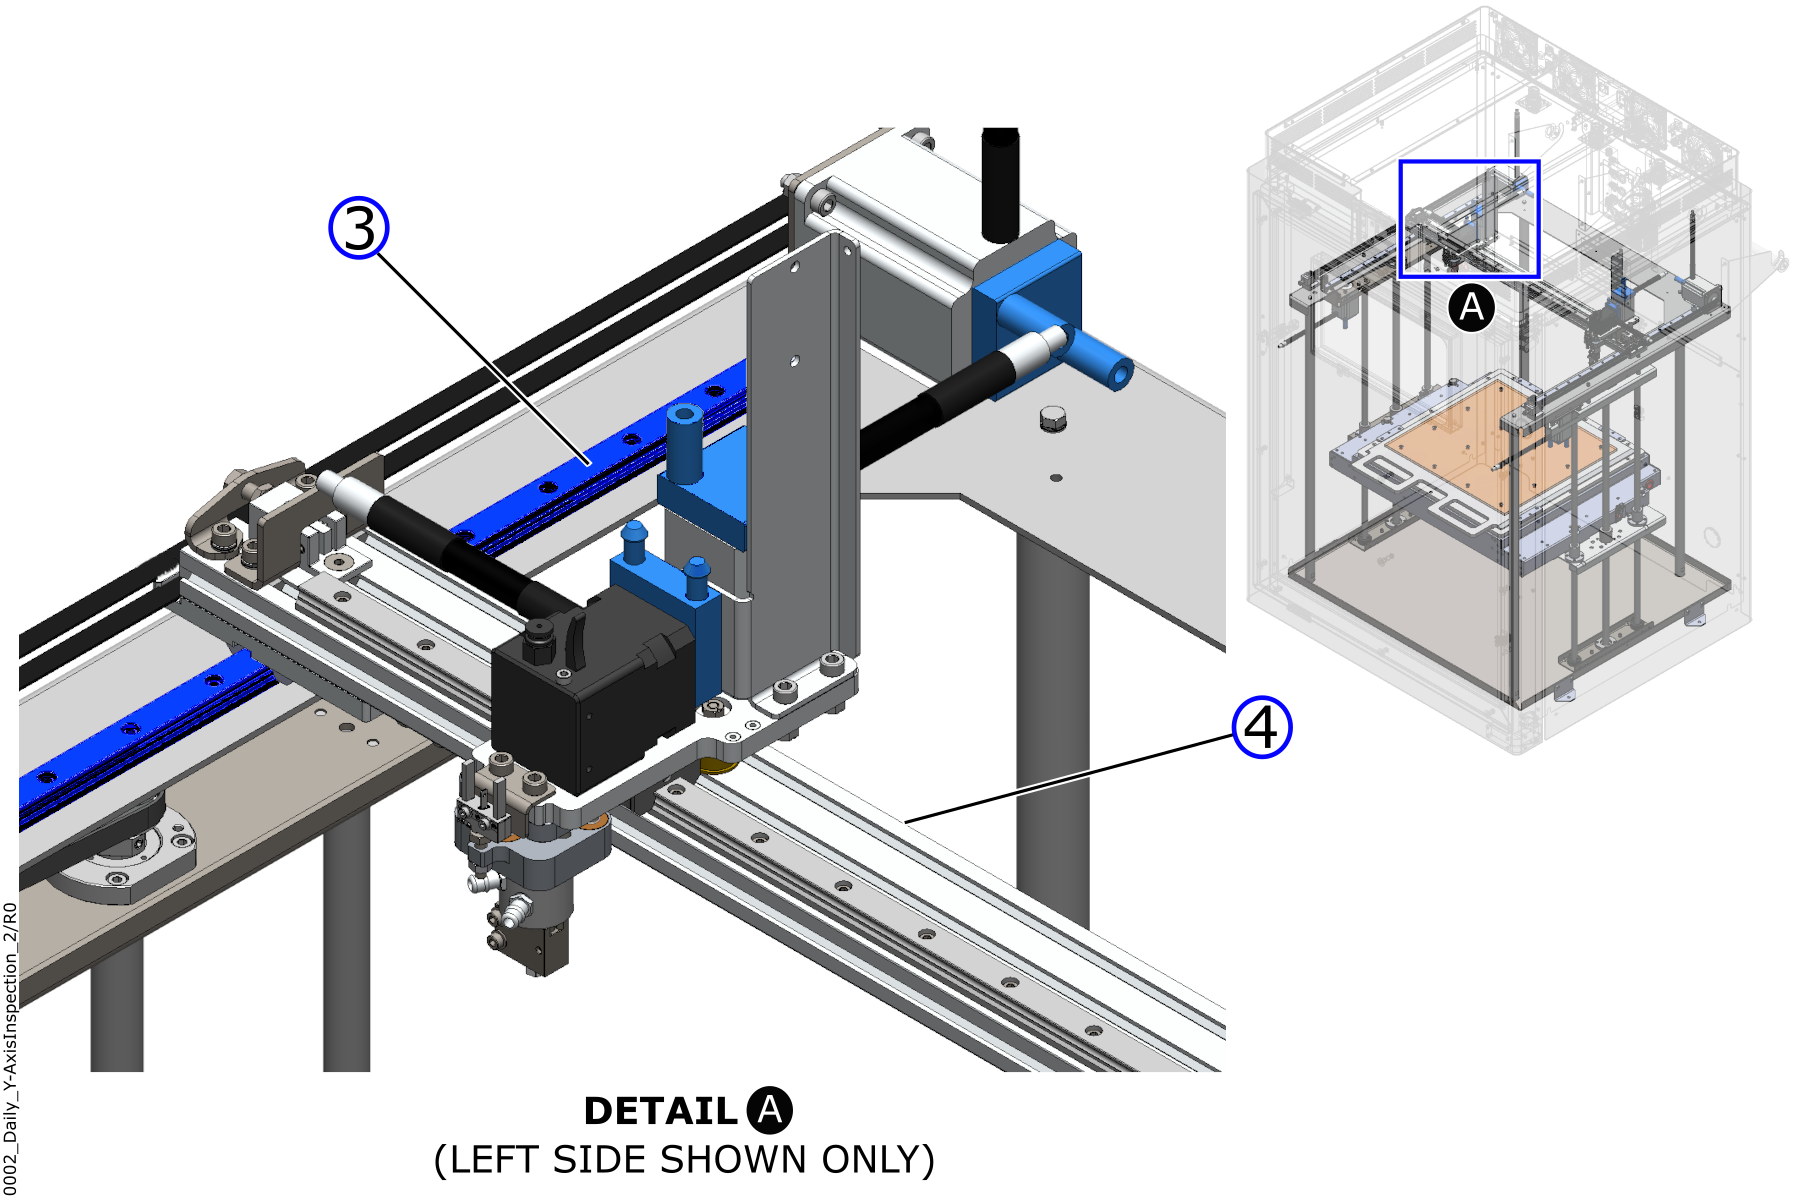
- Manually move the Y-axis gantry (4) to the rear of the build platform.
- Inspect the two Y-axis linear rail (3) surfaces for contaminants. Look for signs of contaminants such as liquids and/or dust.
- Manually pull the center of the X-axis gantry (4) to the center of the Y-axis.
- Remove all contaminates as necessary. Refer to Clean and Lubricate X/Y-Axes.
Inspect the Z-Axis Linear Shafts and Lead Screws

- Inspect the Z-axis linear shafts (5) and both lead screws (6) for contaminants.
- Close the build chamber door.
- Release the E-stop button.
- Home XYZ.
- Lower the Z-axis bed assembly to the bottom of the build chamber.
- Raise the Z-axis by 150 mm.
- Open the build chamber door.
- Push the E-stop button.
- Look for signs of contaminants.
- Remove all contaminants as necessary:
- For AON M2+ machines, refer to Clean and Lubricate Z-Axis (M2+).
- For AON-M2 and AON-M2 2020 machines, refer to Clean and Lubricate Z-Axis.
Test and Return to Service
- Close the build chamber door.
- Release the E-stop button.
- Home XYZ.