> AON-M2 Series > Maintenance Guide > Preventive Maintenance > Inspect and Tighten One-Piece Probe Collar Set Screw
Inspect and Tighten One-Piece Probe Collar Set Screw
| Model | [ ] AON M2+ (CE) | [ ] AON M2+ (R-NZ) | [ ] AON M2+ | [•] AON-M2 2020 | [•] AON-M2 |
| Category | [•] Preventive | [ ] Corrective | |||
| Frequency | [•] Daily | [ ] Weekly | [ ] Monthly | [ ] Yearly | [ ] As Needed |
Summary
The procedure that follows gives instructions on how to inspect and tighten the one-piece probe collar set screws found on the AON-M2 and AON-M2 2020 machines.
Estimated time: 15 minutes
Tools
| Qty | Description | Specification |
|---|---|---|
| 1 | Hex Key | 2 mm |
Parts Information
None required.
Personal Protective Equipment
| Qty | Description | Minimum Specification |
|---|---|---|
| 1 | Safety Eyewear | ANSI/ISEA Z87.1 |
| 1 | Gloves | Nitrile |
| 1 | Gloves | Work |
Prepare the Machine
Make sure that there are no prints on the build surface. Remove print(s) before the procedure that follows is started. Failure to do so can cause a collision and cause damage to the machine component(s).
- Home XYZ.
- Open build chamber door.
- Push the E-stop button.
- Wait until the build chamber, build platform and hot ends are at room temperature.
Inspect the Hot End Assembly in the Probe Collar
Wait until all machine components are at room temperature before you continue. Some machine components can be hot if the machine was recently used. Failure to do so can cause injuries.
- Make sure that the hot end assembly is tight in the one-piece probe collar. Hold the bottom part of the hot end assembly and do the steps that follow:
- Lightly try to move the hot end assembly back and forth.
- Lightly try to move the hot end assembly right to left.
- Lightly try to turn the hot end assembly clockwise and counter-clockwise.
- Make sure that the hot end assembly is tight in the one-piece probe collar.
- Do steps 1 and 2 for the adjacent toolhead, if necessary.
Tighten the Hot End Assembly in the One-Piece Probe Collar
Do not tighten the one-piece probe collar set screw too much. This can damage the machine component(s).
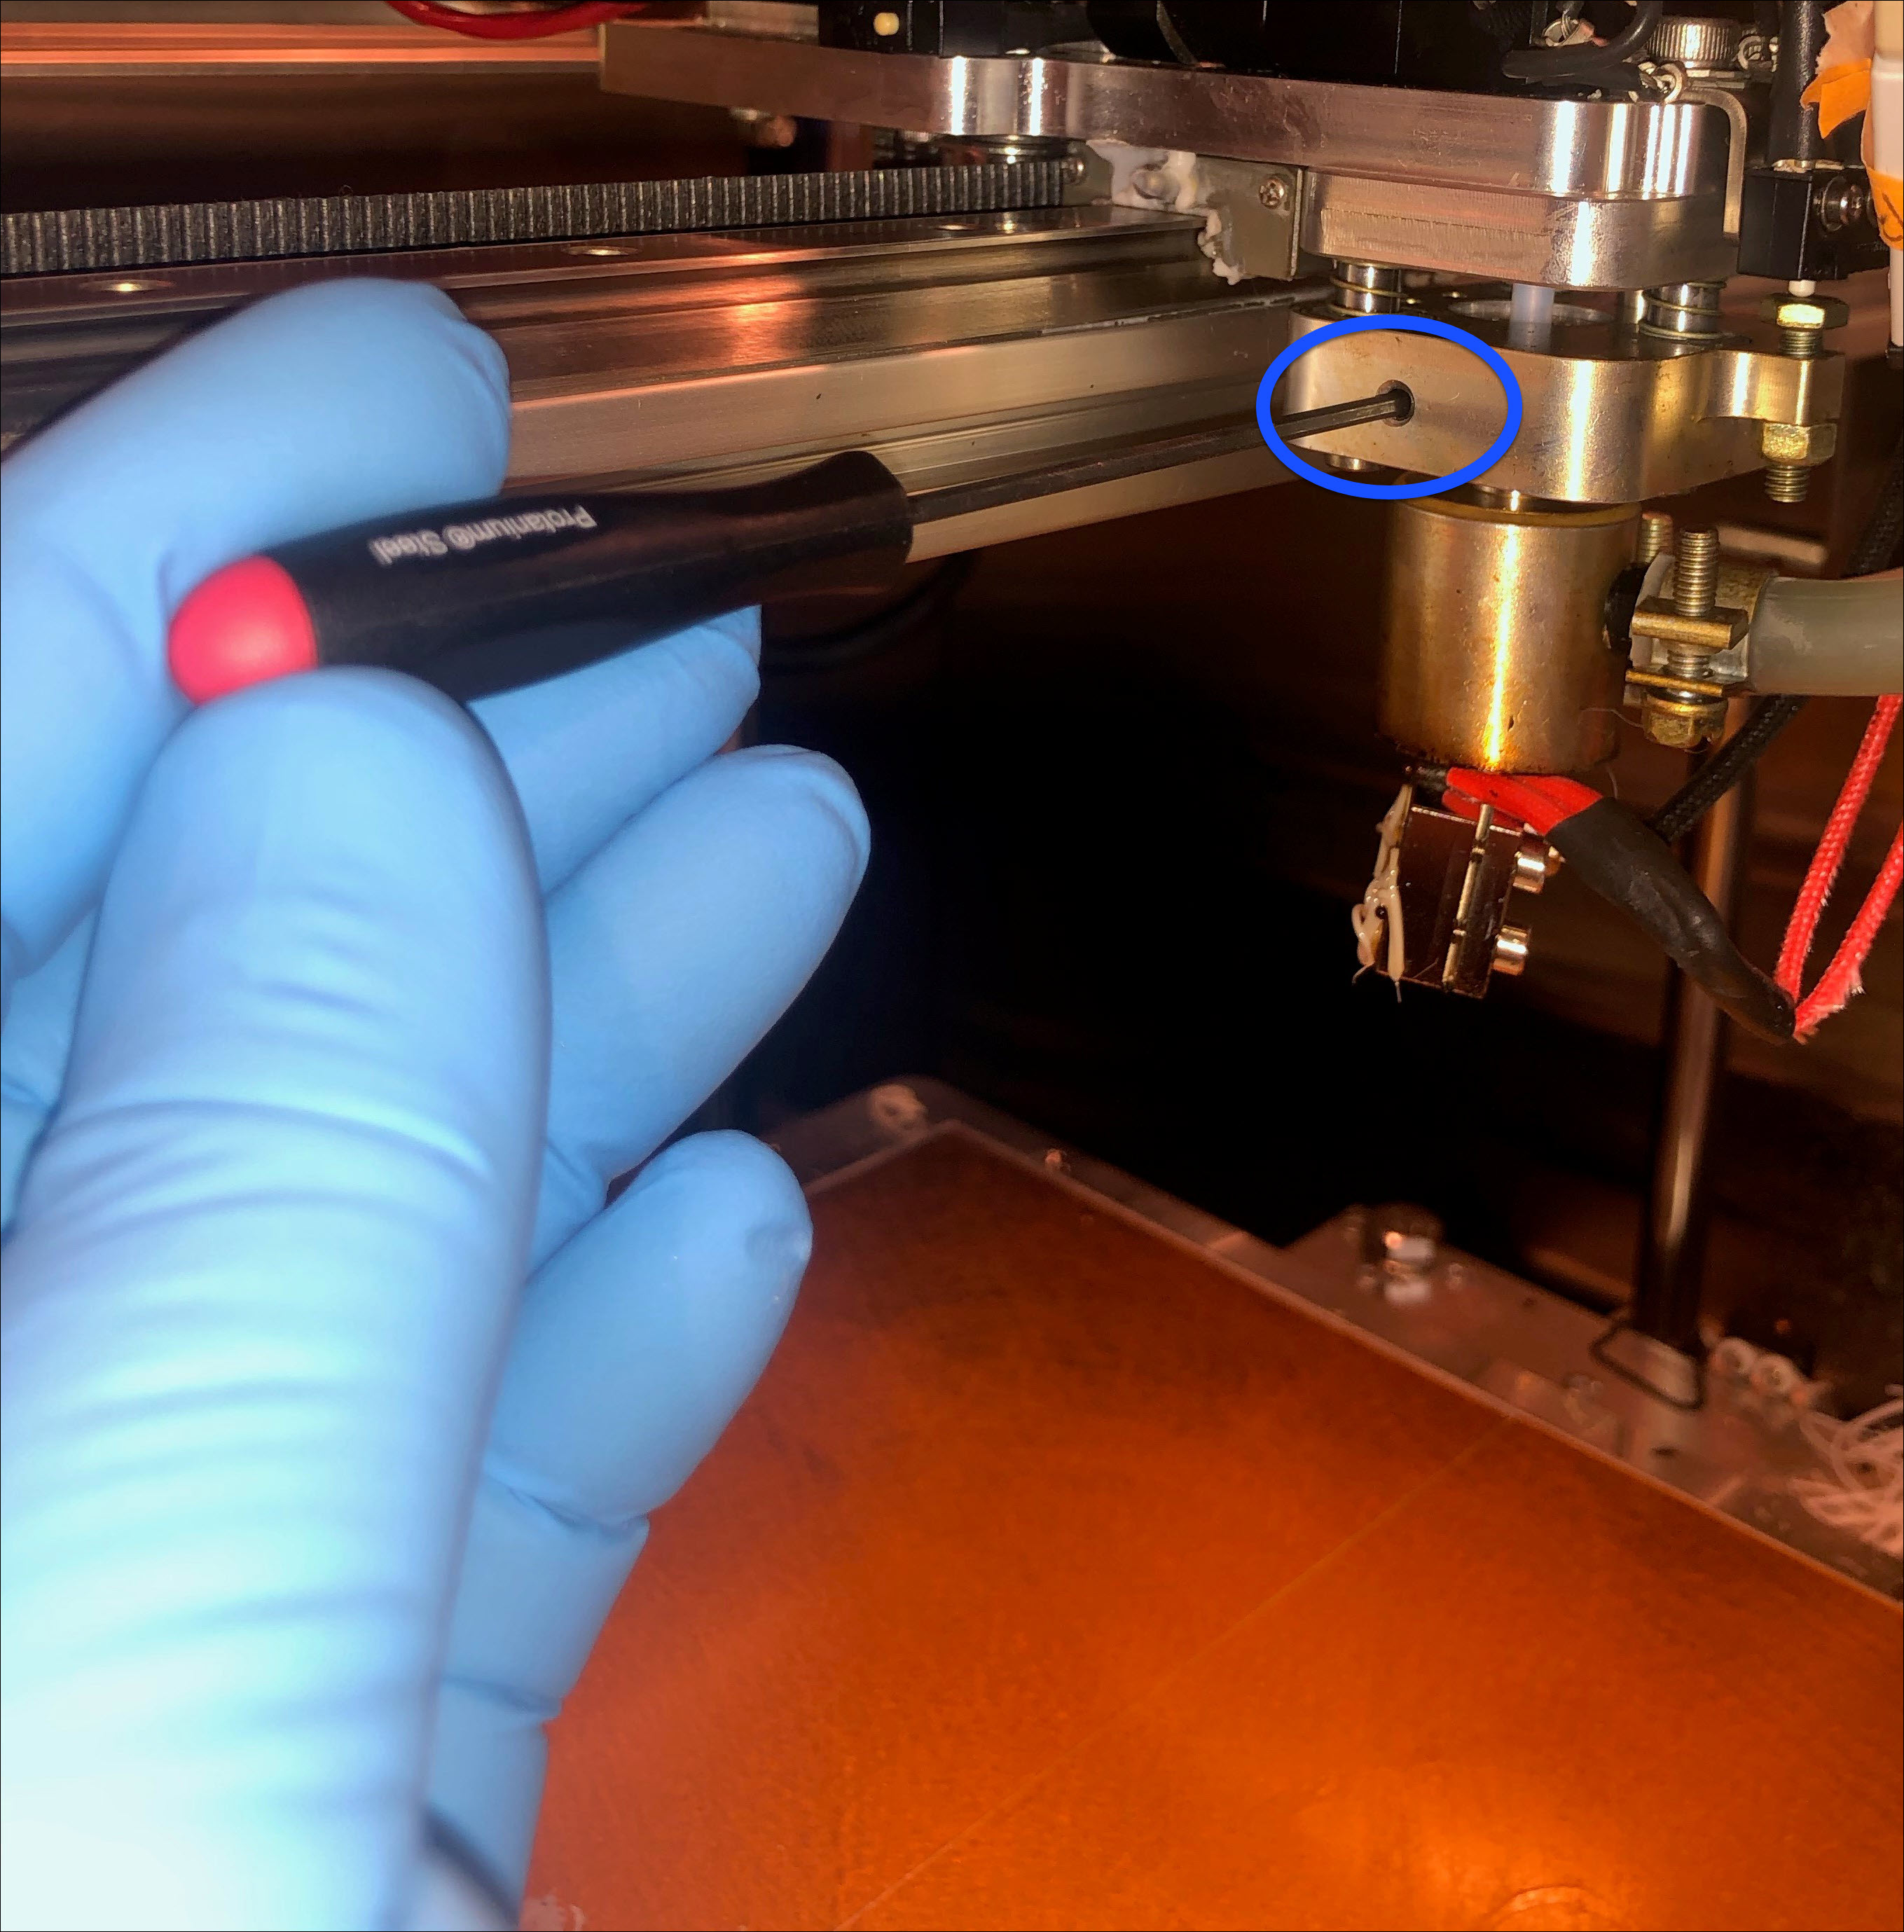
- Use the 2 mm hex key to carefully tighten the T1 one-piece probe collar set screw (1).
- Calibrate the Z-axis. Refer to Z Offset Calibration procedure.
- Do steps 1 and 2 for the adjacent toolhead, if necessary.
Test and Return to Service
- Make sure that you remove all the tools from the build chamber.
- Close build chamber door.
- Release the E-stop button.
- Home XYZ.