Test Microswitches
| Model | [ ] AON M2+ (CE) | [ ] AON M2+ (R-NZ) | [ ] AON M2+ | [•] AON-M2 2020 | [•] AON-M2 |
| Category | [•] Preventive | [ ] Corrective | |||
| Frequency | [ ] Daily | [ ] Weekly | [•] Monthly | [ ] Yearly | [ ] As Needed |
For instructions on how to test XYZ-axes microswitches found on the AON M2+ (CE), AON M2+ (R-NZ) and AON M2+, refer to the Test Microswitches (M2+) procedure.
Summary
This procedure is part of the monthly preventive maintenance routine.
The procedure that follows gives instructions on how to:
- Test the two X-axis microswitches
- Test the two Y-axis microswitches
- Test the two Z-axis microswitches
- Test the two probe microswitches.
Estimated time: 30 minutes
For instructions on how to test the XYZ-axes microswitches found on the AON M2+, refer to the Test Microswitches (M2+) procedure.
Microswitches in good condition prevent:
- Unwanted interference between the XYZ-axes when movements occur.
- Incorrect XYZ-axes reference points.
- Unsatisfactory print layer quality.
Tools
None required.
Parts Information
None required.
Personal Protective Equipment
| Qty | Description | Minimum Specification |
|---|---|---|
| 1 | Safety Glasses | N/A |
| A/R | Nitrile Gloves | ISO 2859-1 or ASTM D6319 |
Prepare the Machine
Make sure that there are no prints on the build surface. Remove print(s) before the procedure that follows is started. Failure to do so can cause a collision and cause damage to the machine component(s).
- Home XYZ.
- Lower the Z-axis by 300 mm.
- Wait until the build chamber, build platform and hot ends are at room temperature.
Test Microswitches
Wait until all machine components are at room temperature before you continue. Some machine components can be hot if the machine was recently used. Failure to do so can cause injuries.
- On the Graphical User Interface (GUI), select Terminal.
- Input the
M18command and select enter. This will disable all the machine steppers motors.
Make sure the M18 command is active. This will disable all the machine stepper motors. Do not home the axes as the motors will re-engage automatically. Failure to do so can cause injuries and/or cause damage to machine components.
- Open the build chamber door.
- Manually move the selected toolhead to the center of the X-axis linear rail.
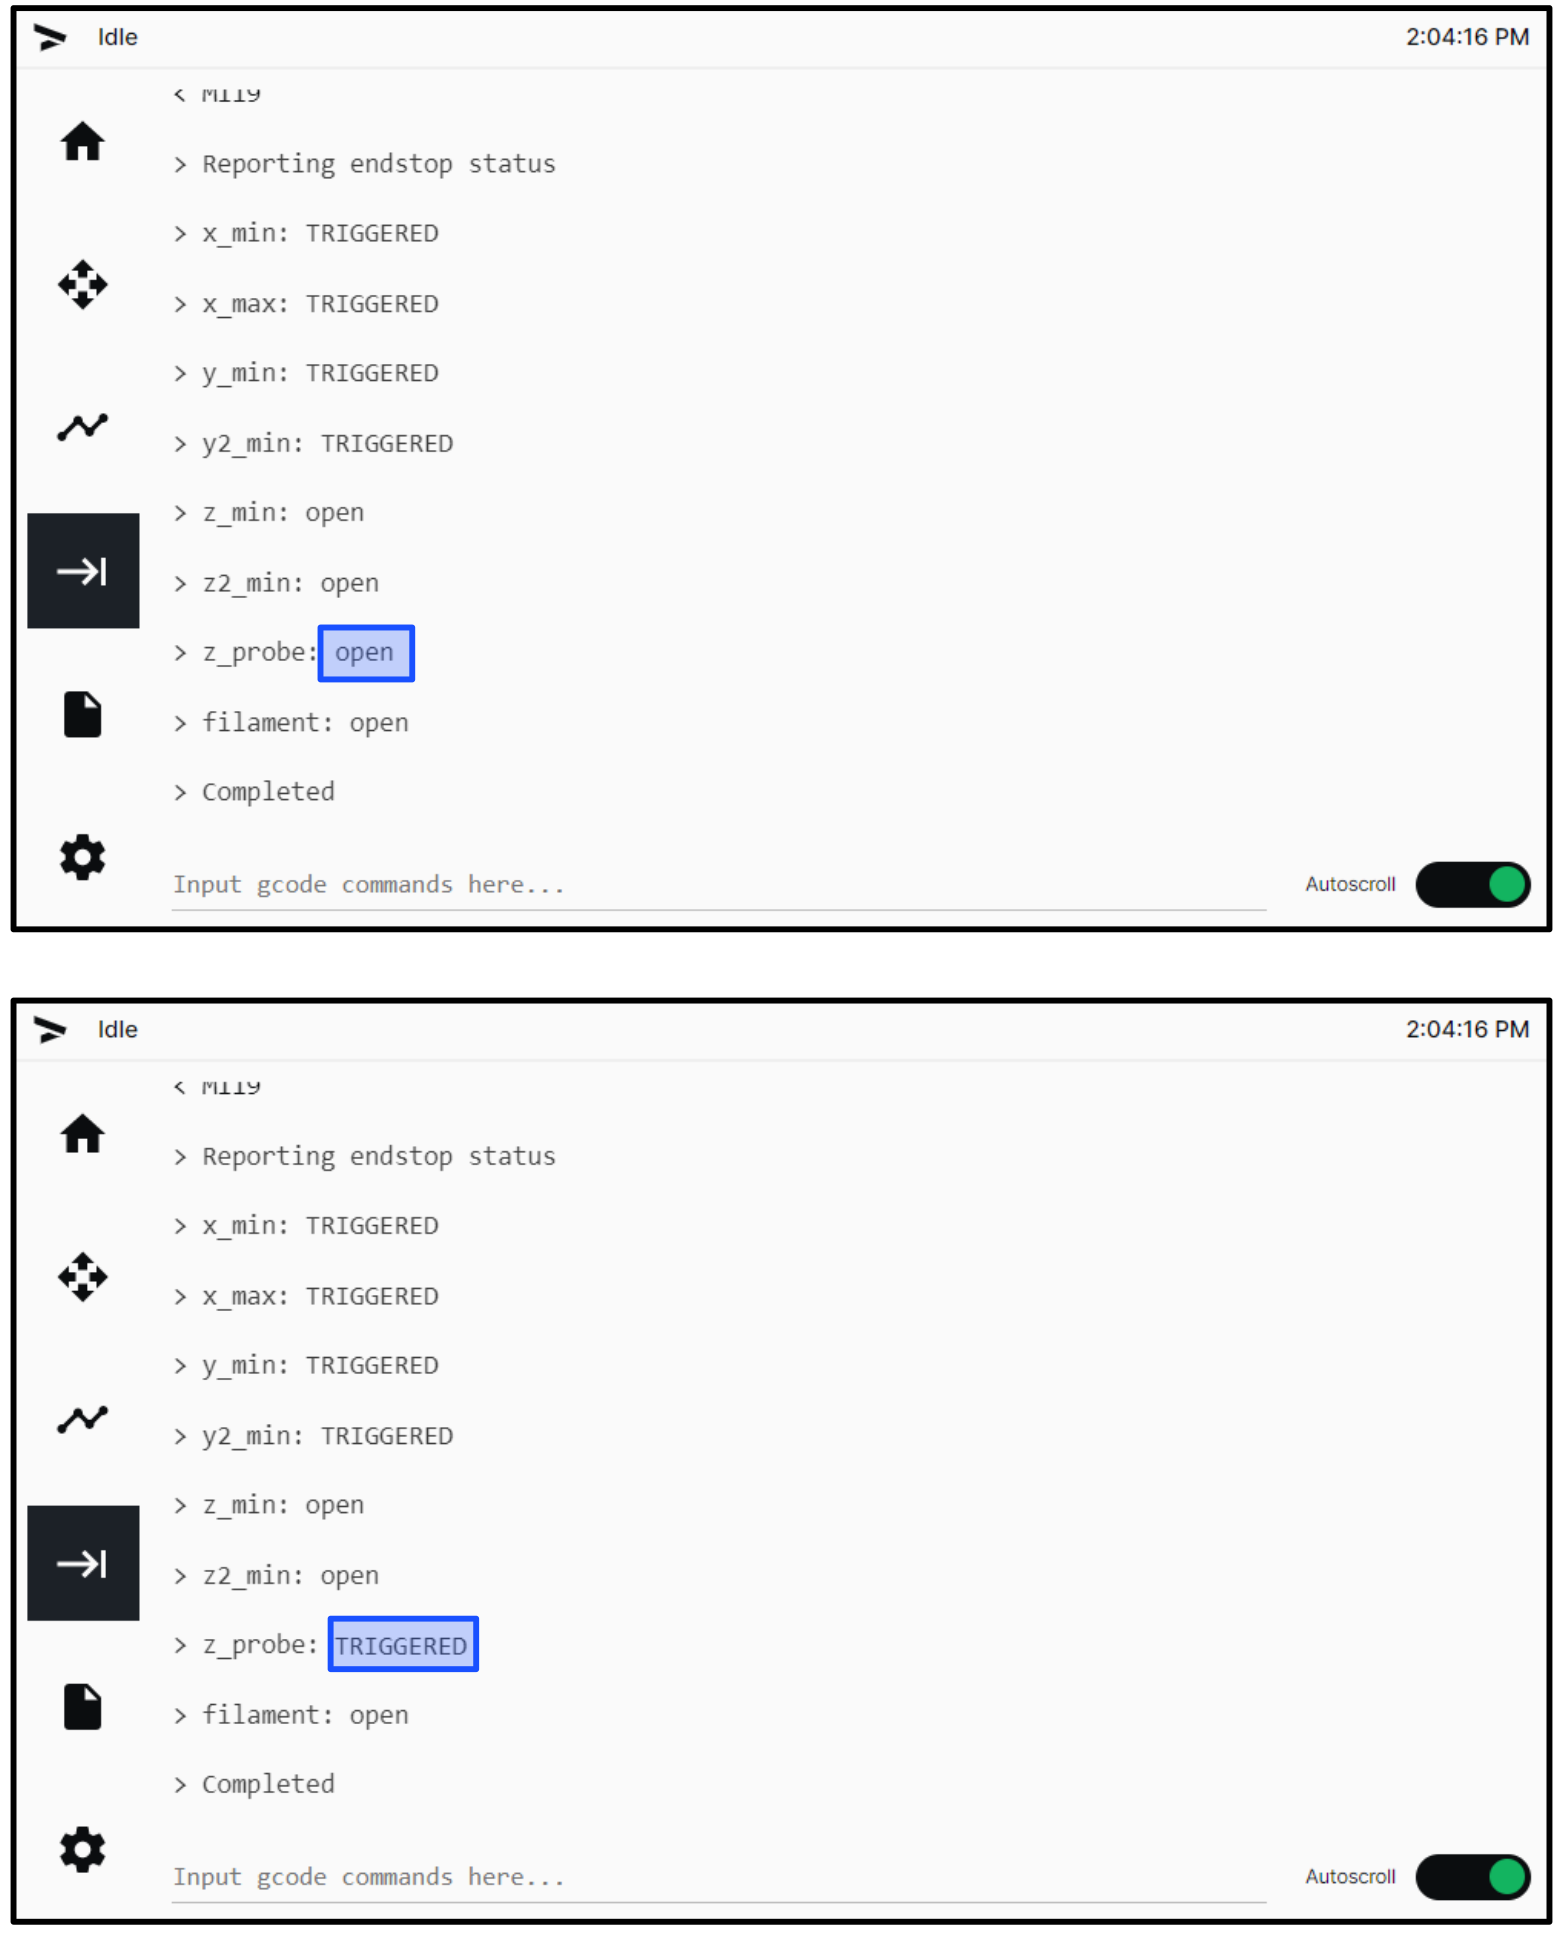
- On the GUI, input
M119, and select enter. TheM119command will show the present condition of all microswitches. - Record the condition of the eight microswitches.
- To test the microswitch found on left Z-axis, do as follows:
- Use your finger to lightly compress the microswitch actuator (5), and the same time, input
M119on the GUI/web browser. - Make sure that the microswitch condition changes to TRIGGERED.
- Release the microswitch actuator (5), and make sure that the microswitch condition changes to open.
- Do steps 5a to 5c three times to make sure that the microswitch operates correctly.
- If the microswitch condition does not change, replace the defective microswitch.
- Use your finger to lightly compress the microswitch actuator (5), and the same time, input
- Do step 5 for the microswitches that follow:
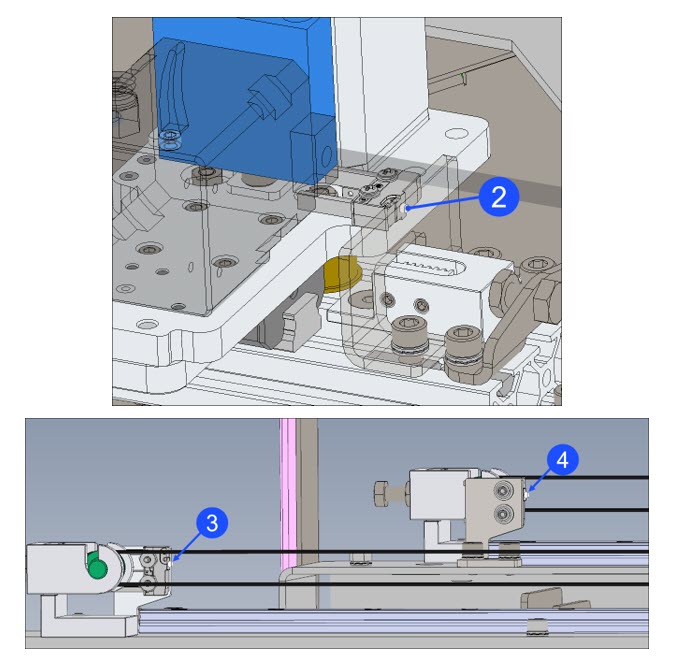
- The two X-axis microswitches found on T0 (1) and T1 (2).
- The two Y-axis microswitches (3)(4).
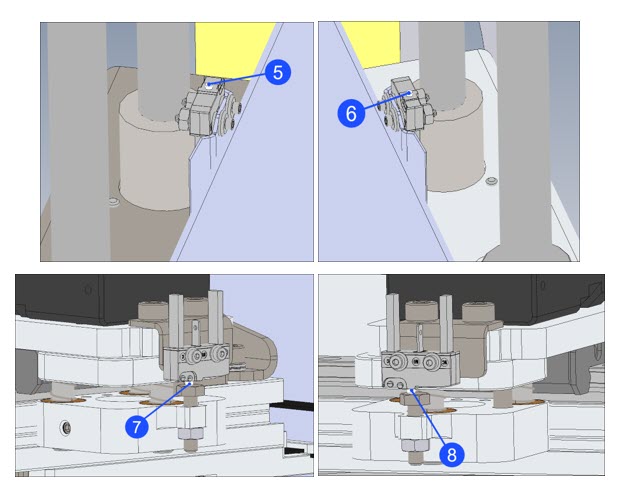
- The right Z-axis microswitch (6).
- The two Z-axis probe microswitches (7)(8).
The two Z-axis probe microswitches (7)(8) are found only on the AON-M2 and AON-M2 2020 models.

Adjust and Replace Defective Microswitches
- To inspect, adjust, and tighten the microswitches, refer to Inspect, Adjust and Tighten Probe Microswitches.
- To replace the probe microswitches, refer to Replace Probe Microswitches.
- To replace the X-axis microswitches, refer to Replace X-Axis Microswitches.
- To replace the Y-axis microswitches, refer to Replace Y-Axis Microswitches.
- To replace the Z-axis microswitches, refer to Replace Z-Axis Microswitches.
Test and Return to Service
- Close the build chamber door.
- Home XYZ.