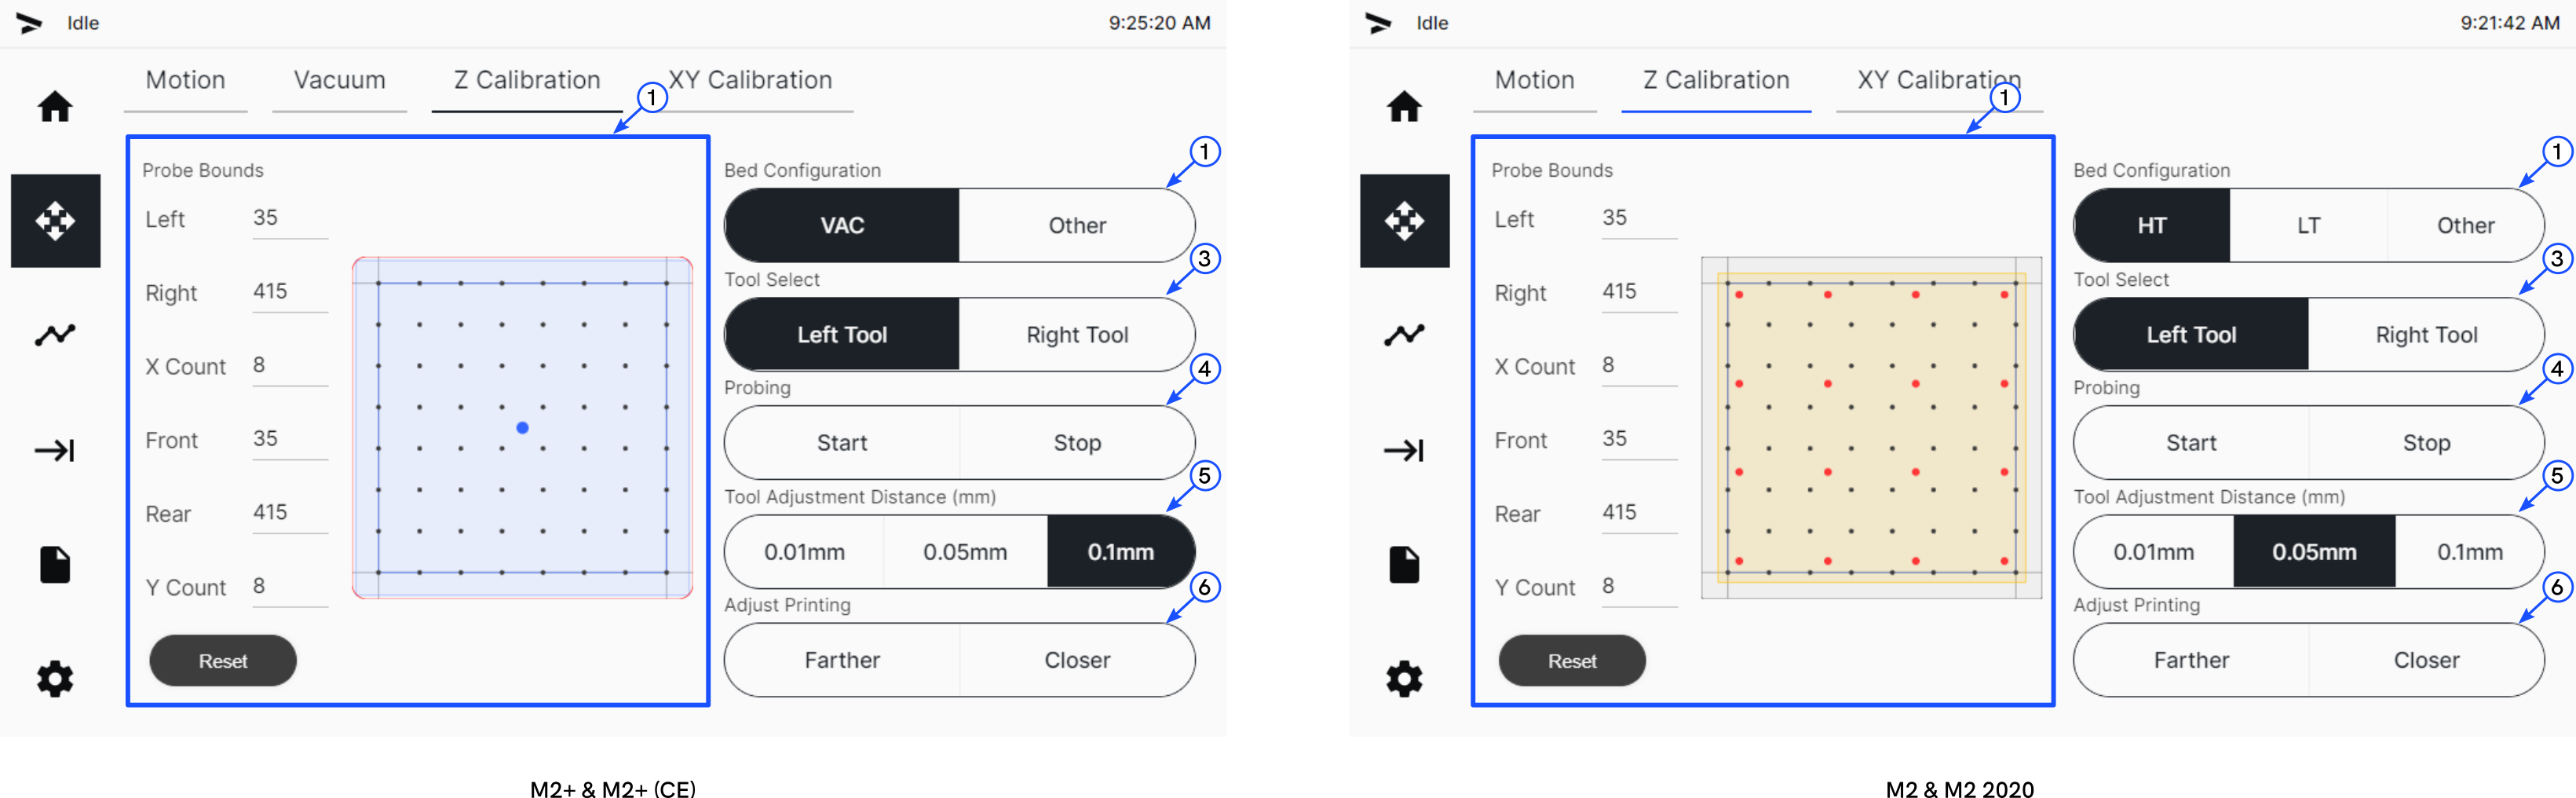
Z Calibration Tab
The Z Calibration tab allows the user to calibrate the Z-axis.
For detailed Z Calibration instructions refer to Z Offset Calibration (AON M2+) or Z Offset Calibration.
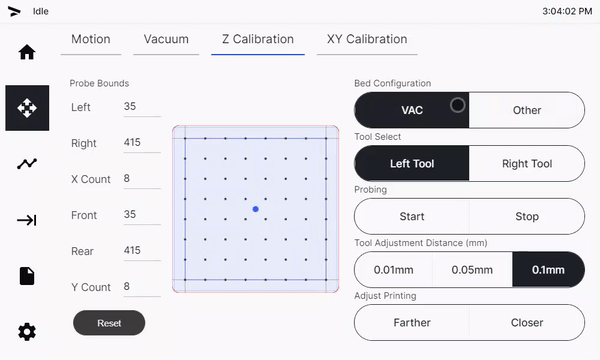
Bed Configuration
Selects the bed type to be probed. The currently selected bed type is highlighted in black. Touch the bed type to select it. The image in the Probe Bounds changes depending on the selected bed.
AON M2+ (CE), AON M2+ (R-NZ) and AON M2+
The bed type that follow can be selected:
- VAC: Selects the vacuum build plate. The blue dot represents the vacuum inlet.
- Other: Selects an other customer supplied build plate.
AON-M2 2020 and AON-M2
The bed type that follow can be selected:
- HT: Selects the High Temperature Build Plate. Screw holes are automatically avoided during the probing process. The red dots represent the position of the screws on the AON3D High Temperature Build Plate.
- LT: Selects the Aluminum Build Plate with Kapton® Surface.
- Other: Selects an other customer supplied build plate.
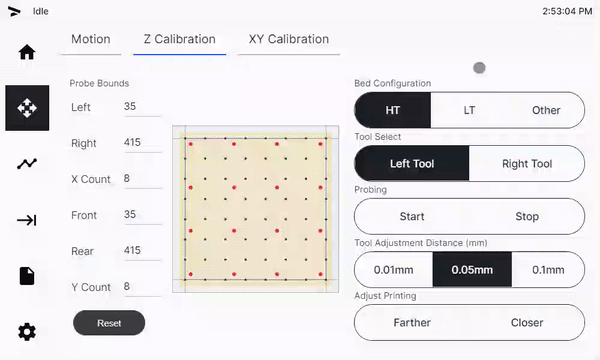
Probe Bounds
Selects the bounds of the probing area. The probing area is defined by
- Left: Defines the left bound of the probing area.
- Right: Defines the right bound of the probing area.
- X Count: Defines the number of probe points in the X-axis.
- Front: Defines the front bound of the probing area.
- Rear: Defines the rear bound of the probing area.
- Y Count: Defines the number of probe points in the Y-axis.
- Reset: Touch the reset button to reset the probing values to default.
- The black points represent the probe points.
- The blue perimeter represents the boundaries of the defined probe area.
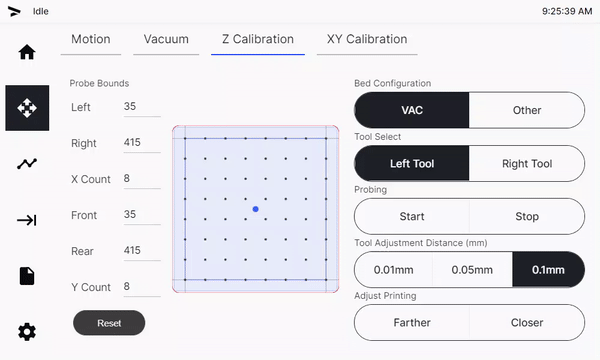
Tool Select
Selects the tool to use for the probing process. The currently selected tool is highlighted in black. Touch the tool to select it.
Probing
Control to start or stop probing.
- Touch Start to start probing the bed.
- Touch Stop to stop probing that is in progress.
Tool Adjustment Distance
Selects the tool adjustment distance. The currently selected adjustment distance is highlighted in black. Touch the adjustment distance to select it. The distances that follow are available:
- 0.01 mm
- 0.05 mm
- 0.1 mm
Adjust Printing
Moves the selected tool the selected distance.
- Touch the Farther button to move the bed farther from the tool by the selected distance.
- Touch the Closer button to move the bed closer to the tool by the selected distance.