Inspect Coolant Level
| Model | [•] AON M2+ (CE) | [•] AON M2+ (R-NZ) | [•] AON M2+ | [•] AON-M2 2020 | [•] AON-M2 |
| Category | [•] Preventive | [ ] Corrective | |||
| Frequency | [ ] Daily | [•] Weekly | [ ] Monthly | [ ] Yearly | [ ] As Needed |
Summary
The procedures that follows gives instructions on how to inspect the coolant level in the coolant reservoir.
The correct coolant levels prevents:
- Machine components that operate too hot.
- Machine component failures.
- Unsatisfactory print quality.
Estimated time: 15 minutes
The coolant pump configurations are different between the AON M2+ (CE)/AON M2+ (R-NZ)/AON-M2 2020 and the original AON-M2 model. Instructions for both configurations are found on this page:
Tools
| Qty | Description | Specification |
|---|---|---|
| 1 | Screwdriver | Flathead, Large |
| 1 | Funnel | Small |
| A/R | Rags | Lint-free |
Parts Information
| Qty | Part Number | Description |
|---|---|---|
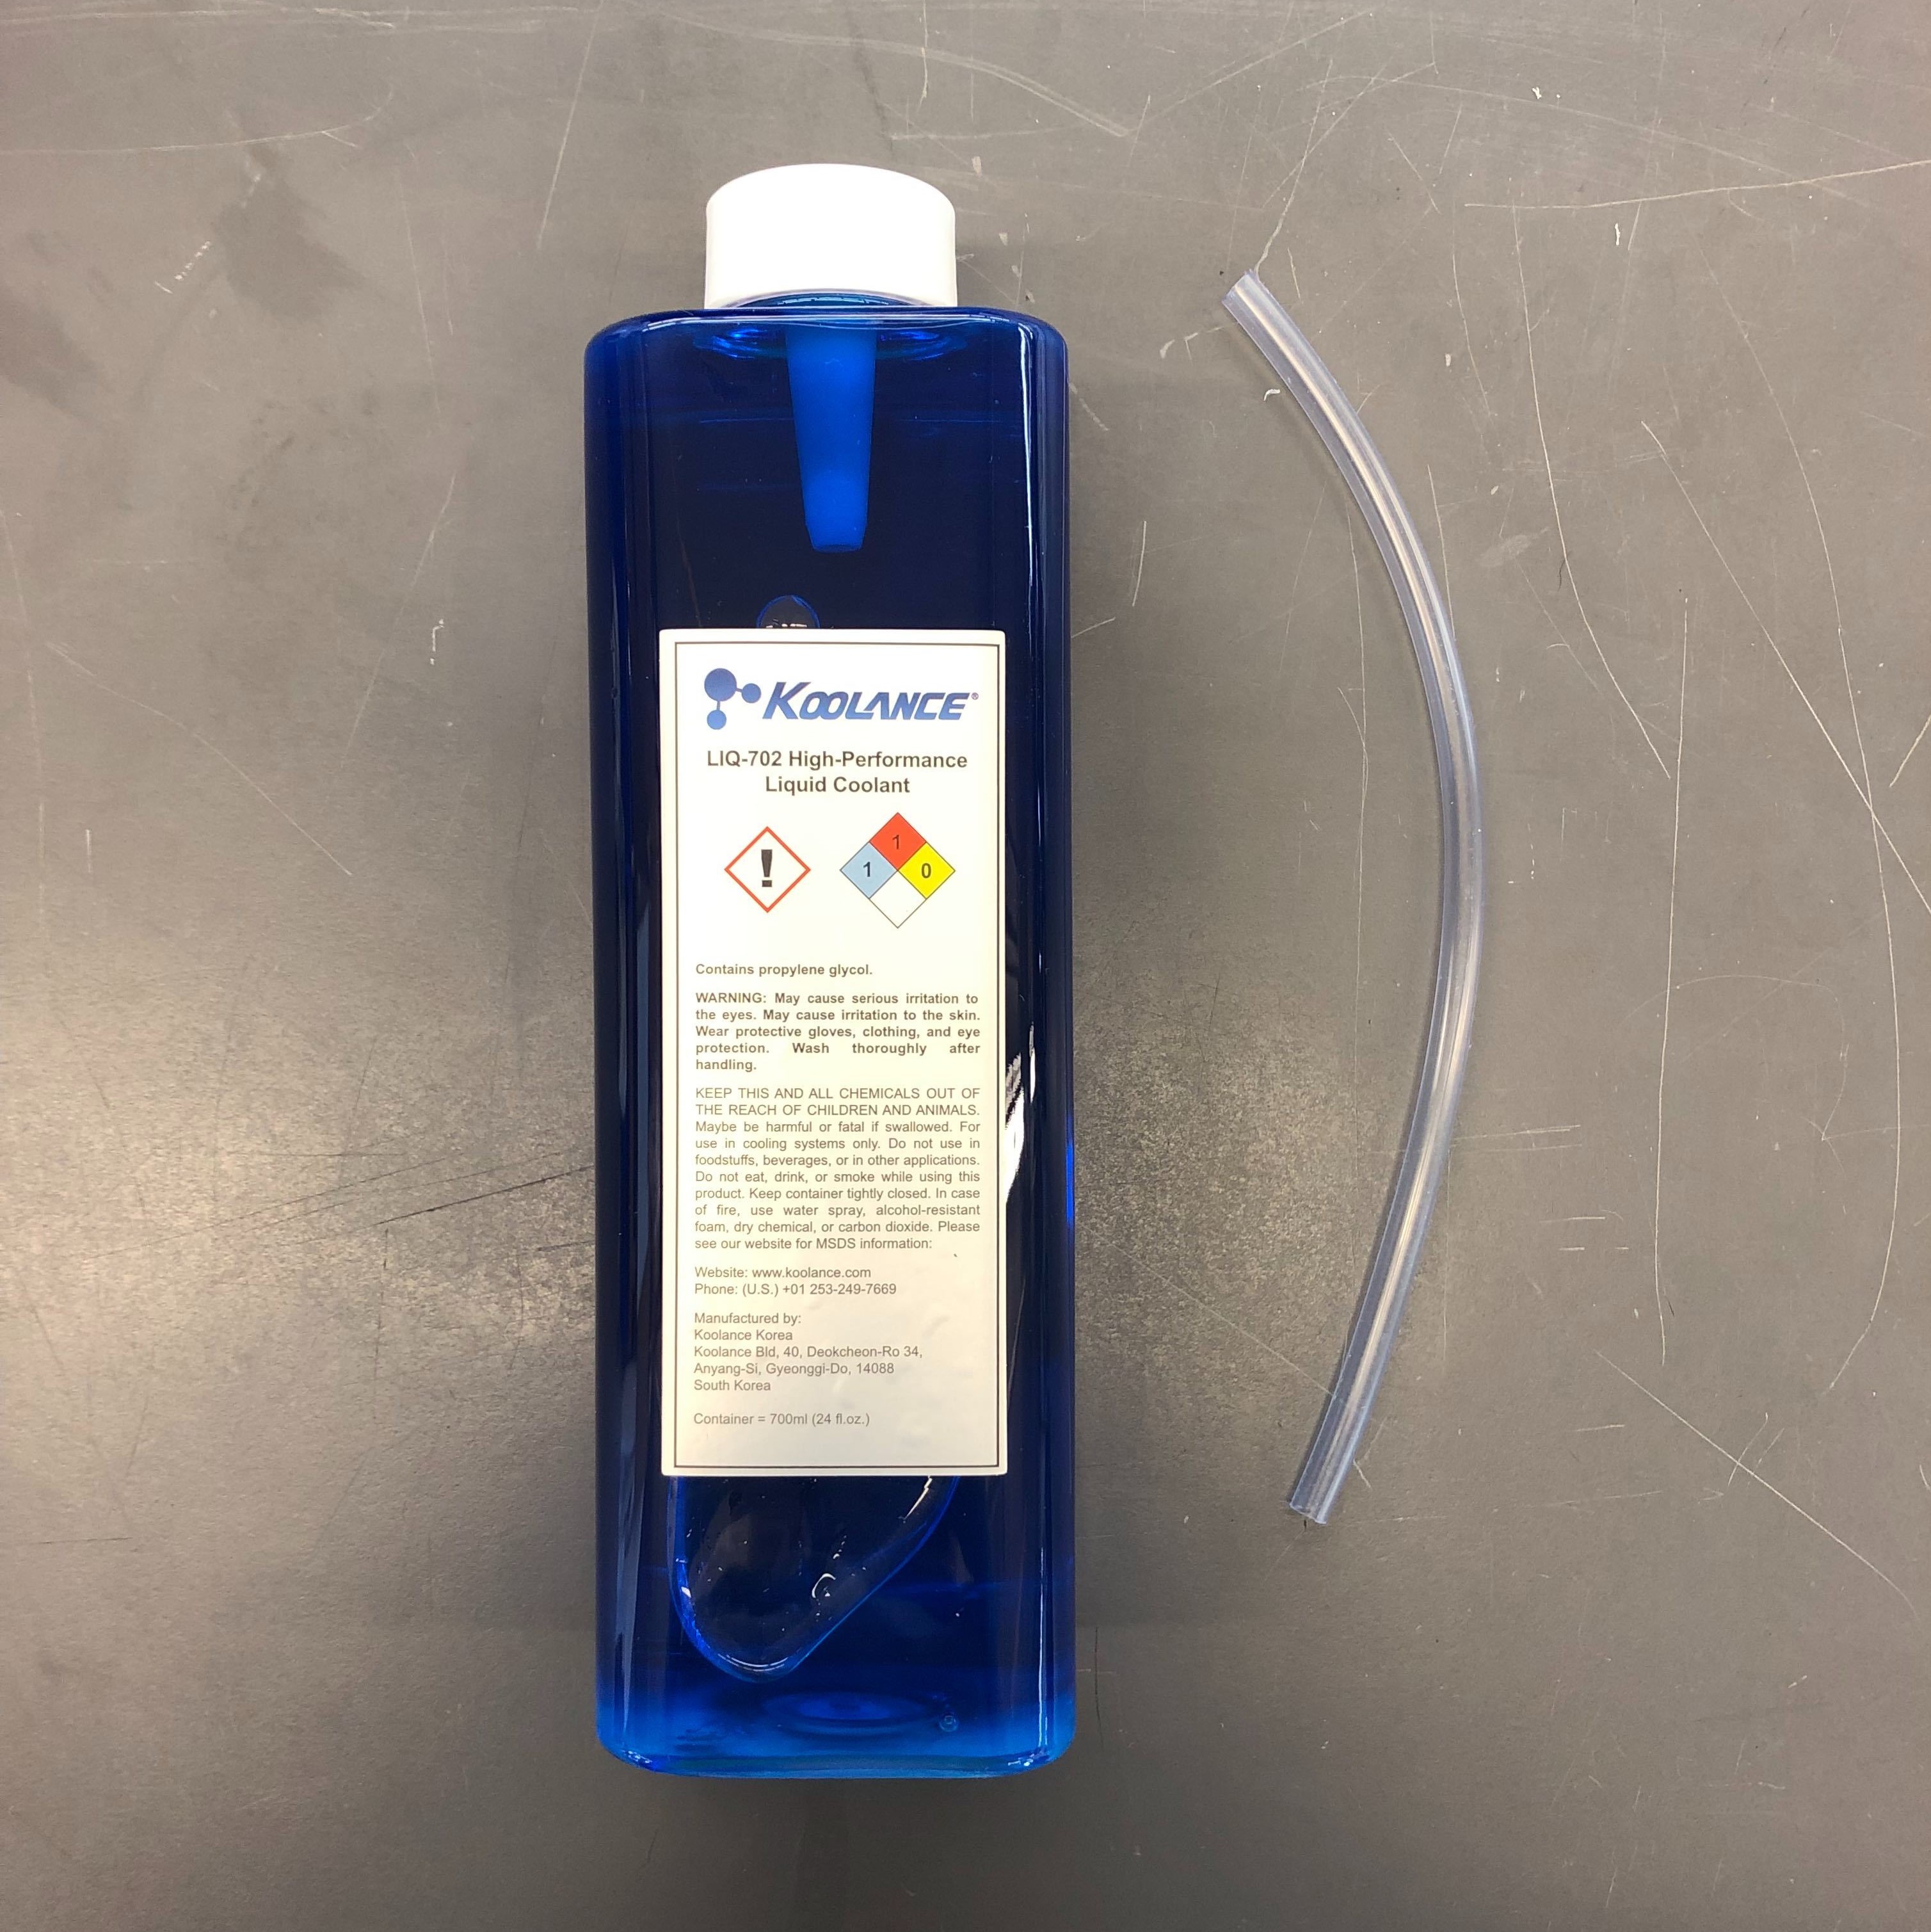
| A/R | A46067D6 | High-Performance Liquid Coolant, 700ml |
Reach out to our Customer Success team at help@aon3d.com for to purchase AON3D coolant.
AON3D uses coolants that can be different in color. All AON3D-approved coolants are interchangeable and are safe to use with AON machine component(s) and cooling circuit(s).
Personal Protective Equipment
| Qty | Description | Minimum Specification |
|---|---|---|
| 1 | Safety Eyewear | ANSI/ISEA Z87.1 |
| A/R | Nitrile Gloves | ISO 2859-1 or ASTM D6319 |
Prepare the Coolant Bottle
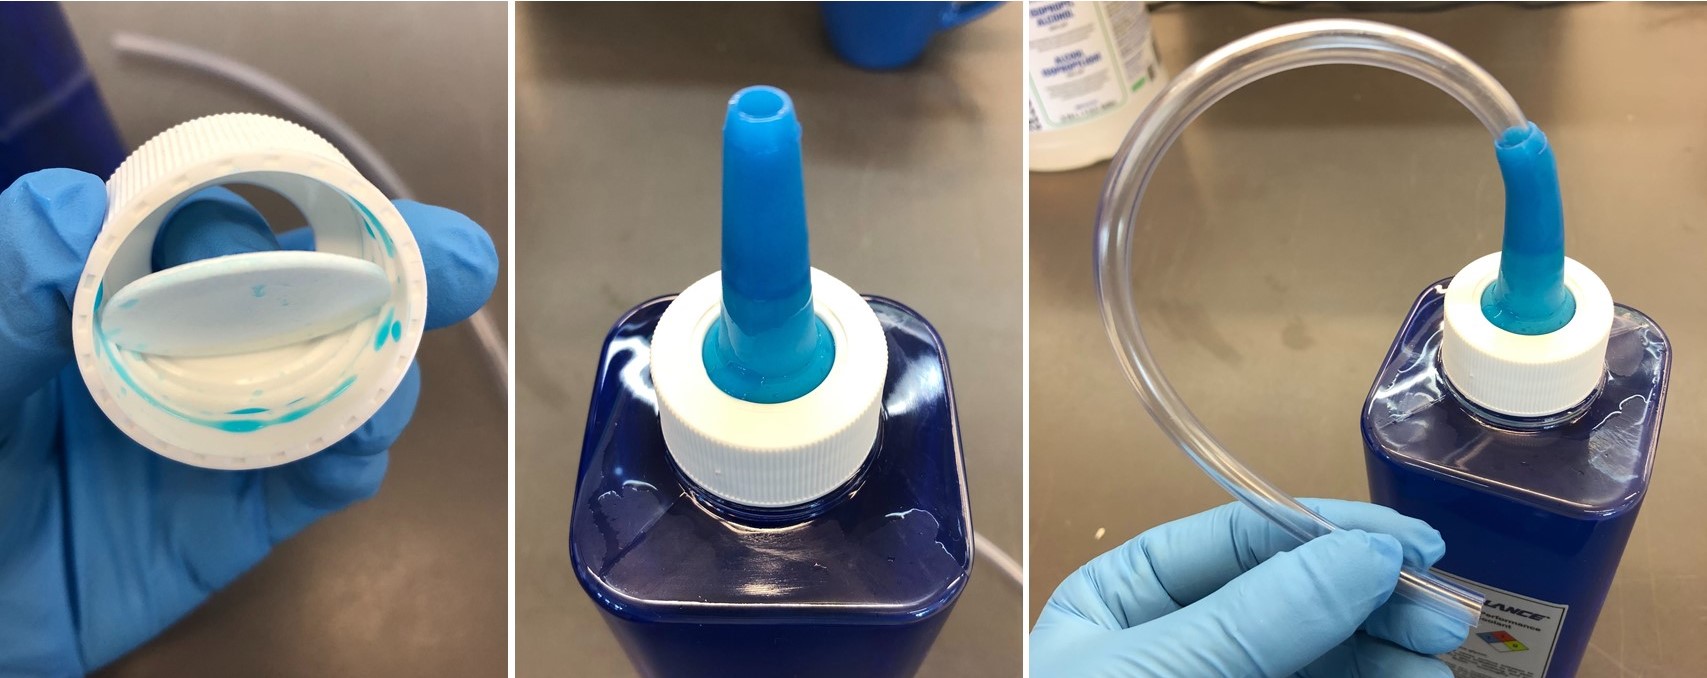
- Remove the coolant bottle cap to assemble the rubber spout onto the coolant bottle.
- Remove the rubber spout and set aside.
- Remove the plastic center cap. Do not discard the center cap as it can be reused to reseal the coolant bottle.
- Put the rubber spout upright on the coolant bottle opening.
- Secure the rubber spout assembly onto the coolant bottle with the cap.
- Install the clear filler tube onto the rubber spout (AON-M2 application only).
The installation of the clear filler tube is for the AON-M2 application only.
Prepare the Machine
- Push the E-stop button.
AON M2+ (CE), AON M2+ (R-NZ) and AON-M2 2020 Coolant Level Fill
Only use the AON3D recommended coolant. Failure to use the recommended coolant can cause damage to the machine component(s) and cooling circuit.
- Make sure that the coolant level in the coolant reservoir (1) is approximately 2.5 cm (one inch) from the top.
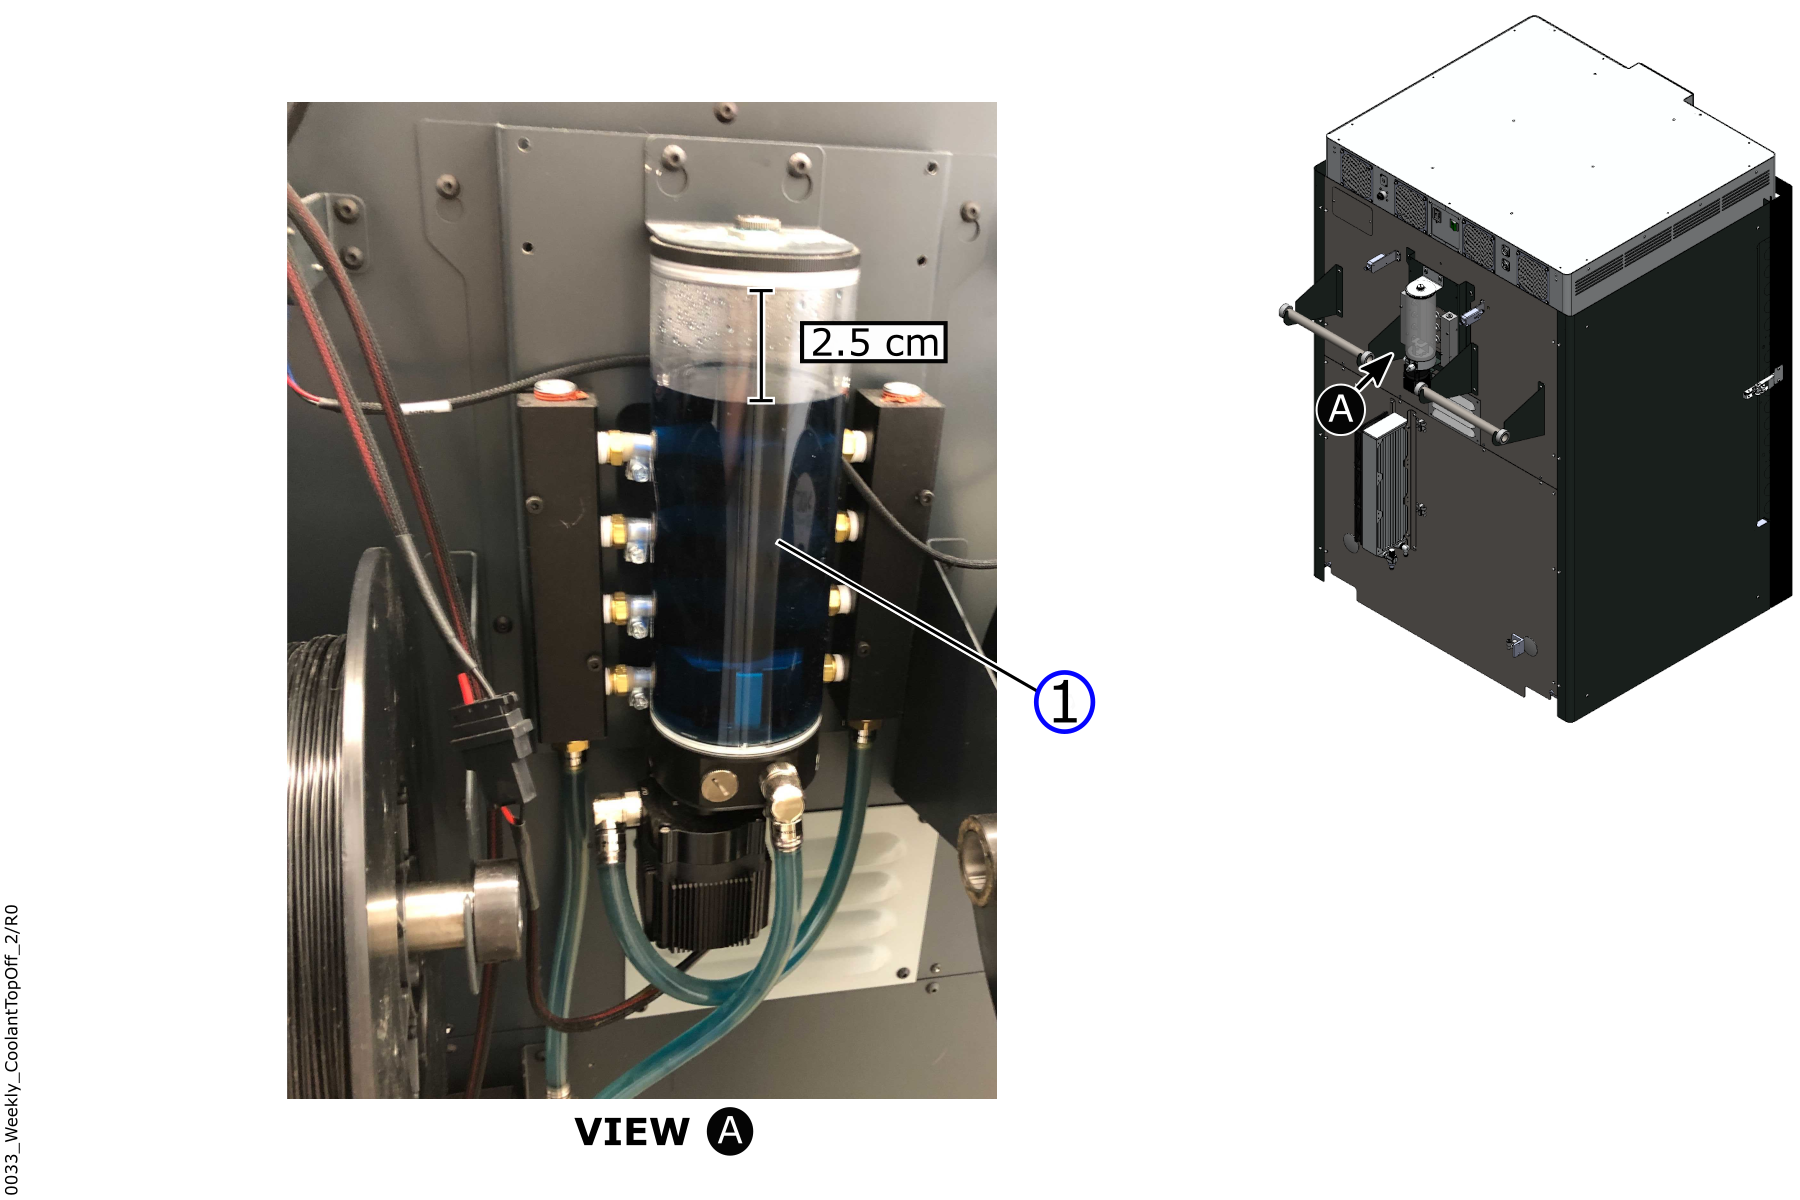
- If there is not sufficient coolant in the coolant reservoir (1), do steps 3 to 7.
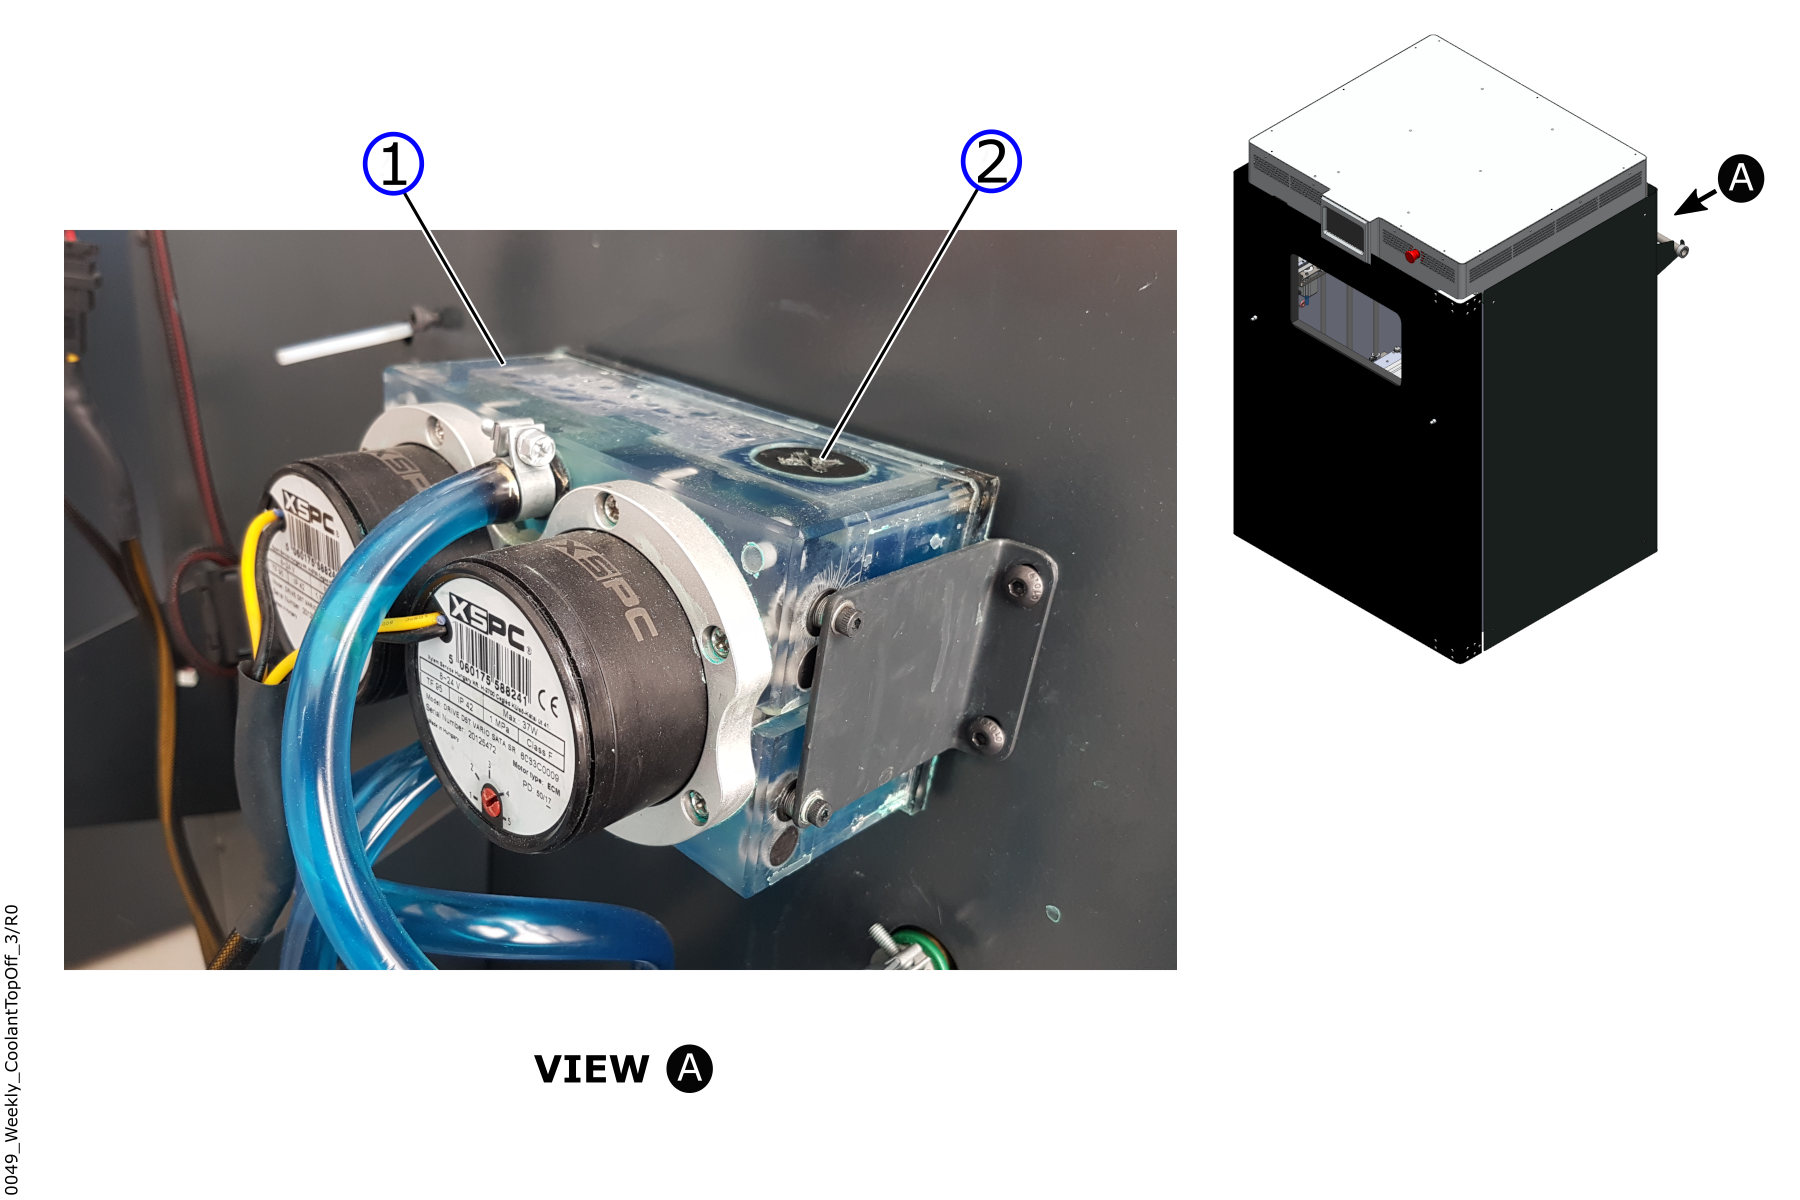
- Use the large flathead screwdriver to remove the coolant reservoir cap (2).

- Put the tip of the small funnel into the coolant reservoir (1).
- Carefully add coolant in the coolant reservoir (1) until the coolant level is approximately 2.5 cm (one inch) from the top.
- If coolant overflows, clean with lint-free rag(s).
- Install coolant reservoir cap (2) onto the coolant reservoir (1).
- Use the large flathead screwdriver to tighten the coolant reservoir cap (2). Do not tighten too much.
AON-M2 Coolant Level Fill
Only use the AON3D recommended coolant. Failure to use the recommended coolant can cause damage to the machine component(s) and cooling circuit.
AON3D now uses a different coolant solution from the one originally shipped with the AON-M2 machine. AON3D recommends to change the coolants when the recommended annual coolant flush is performed. A thorough coolant flush is necessary when a change in coolant types is done. Refer to Drain and Fill Coolant.
- Make sure that the coolant level in the coolant reservoir (1) is approximately 2.5 cm (one inch) from the top.
- If there is not sufficient coolant in the coolant reservoir (1), do steps 3 to 6.
- Use the large flathead screwdriver to remove coolant reservoir plug (2).
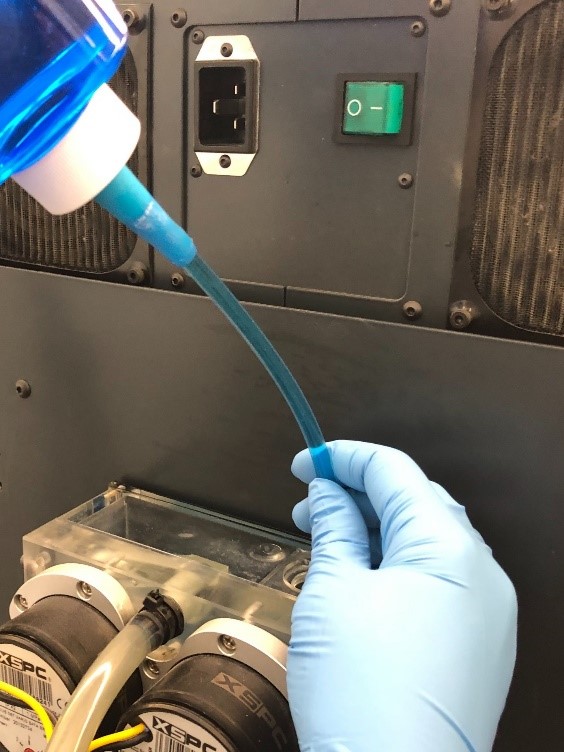
- Carefully add coolant in the coolant reservoir (1) until approximately 2.5 cm (one inch) from the top.
- If coolant overflows, clean with lint-free rag(s).
- Install the coolant reservoir plug (2) into the coolant reservoir (1).
- Use the large flathead screwdriver to tighten the coolant reservoir plug (2). Do not tighten too much.
Test and Return to Service
- Release the E-stop button.
- Home XYZ.
- Make sure that coolant does not leak on the outside of the machine while the cooling system is in operation.