Clean Filament Sensors
| Model | [•] AON M2+ (CE) | [•] AON M2+ (R-NZ) | [•] AON M2+ | [•] AON-M2 2020 | [•] AON-M2 |
| Category | [•] Preventive | [ ] Corrective | [ ] Troubleshooting | ||
| Frequency | [ ] Daily | [ ] Weekly | [ ] Monthly | [•] Yearly | [ ] As Needed |
Summary
The procedure that follows gives instructions on how to clean the two filament sensor foam filters.
If this procedure is done as a part of the preventive maintenance plan, the two filament sensor foam filters must be cleaned.
Estimated time: 30 minutes
Tools
| Qty | Description | Specification |
|---|---|---|
| 1 | Air Compressor | 15 psi (maximum) |
| 1 | Wrench | 10 mm |
| 1 | Hex Key | 4 mm |
| 1 | Tweezers | Non-Conductive, small |
| 1 | Ruler or Tape Measure | N/A |
| 1 | Marker | Fine Tip (recommended) |
Parts Information
None required.
Personal Protective Equipment
| Qty | Description | Minimum Specification |
|---|---|---|
| 1 | Safety Eyewear | ANSI/ISEA Z87.1 |
| A/R | Nitrile Gloves | ISO 2859-1 or ASTM D6319 |
Prepare the Machine
Make sure that there are no prints on the build surface. Remove print(s) before the procedure that follows is started. Failure to do so can cause a collision and cause damage to the machine component(s).
- Unload the filament from the feed path. Refer to Load Filament.
- Home XYZ.
- Push the E-stop button.
- Wait until the build chamber, build platform and hot ends are at room temperature.
Remove and Clean Filament Sensor Foam Filter
Wait until all the machine components are at room temperature before you continue. Some machine components can be hot if the machine was recently used. Failure to do so can cause injuries.
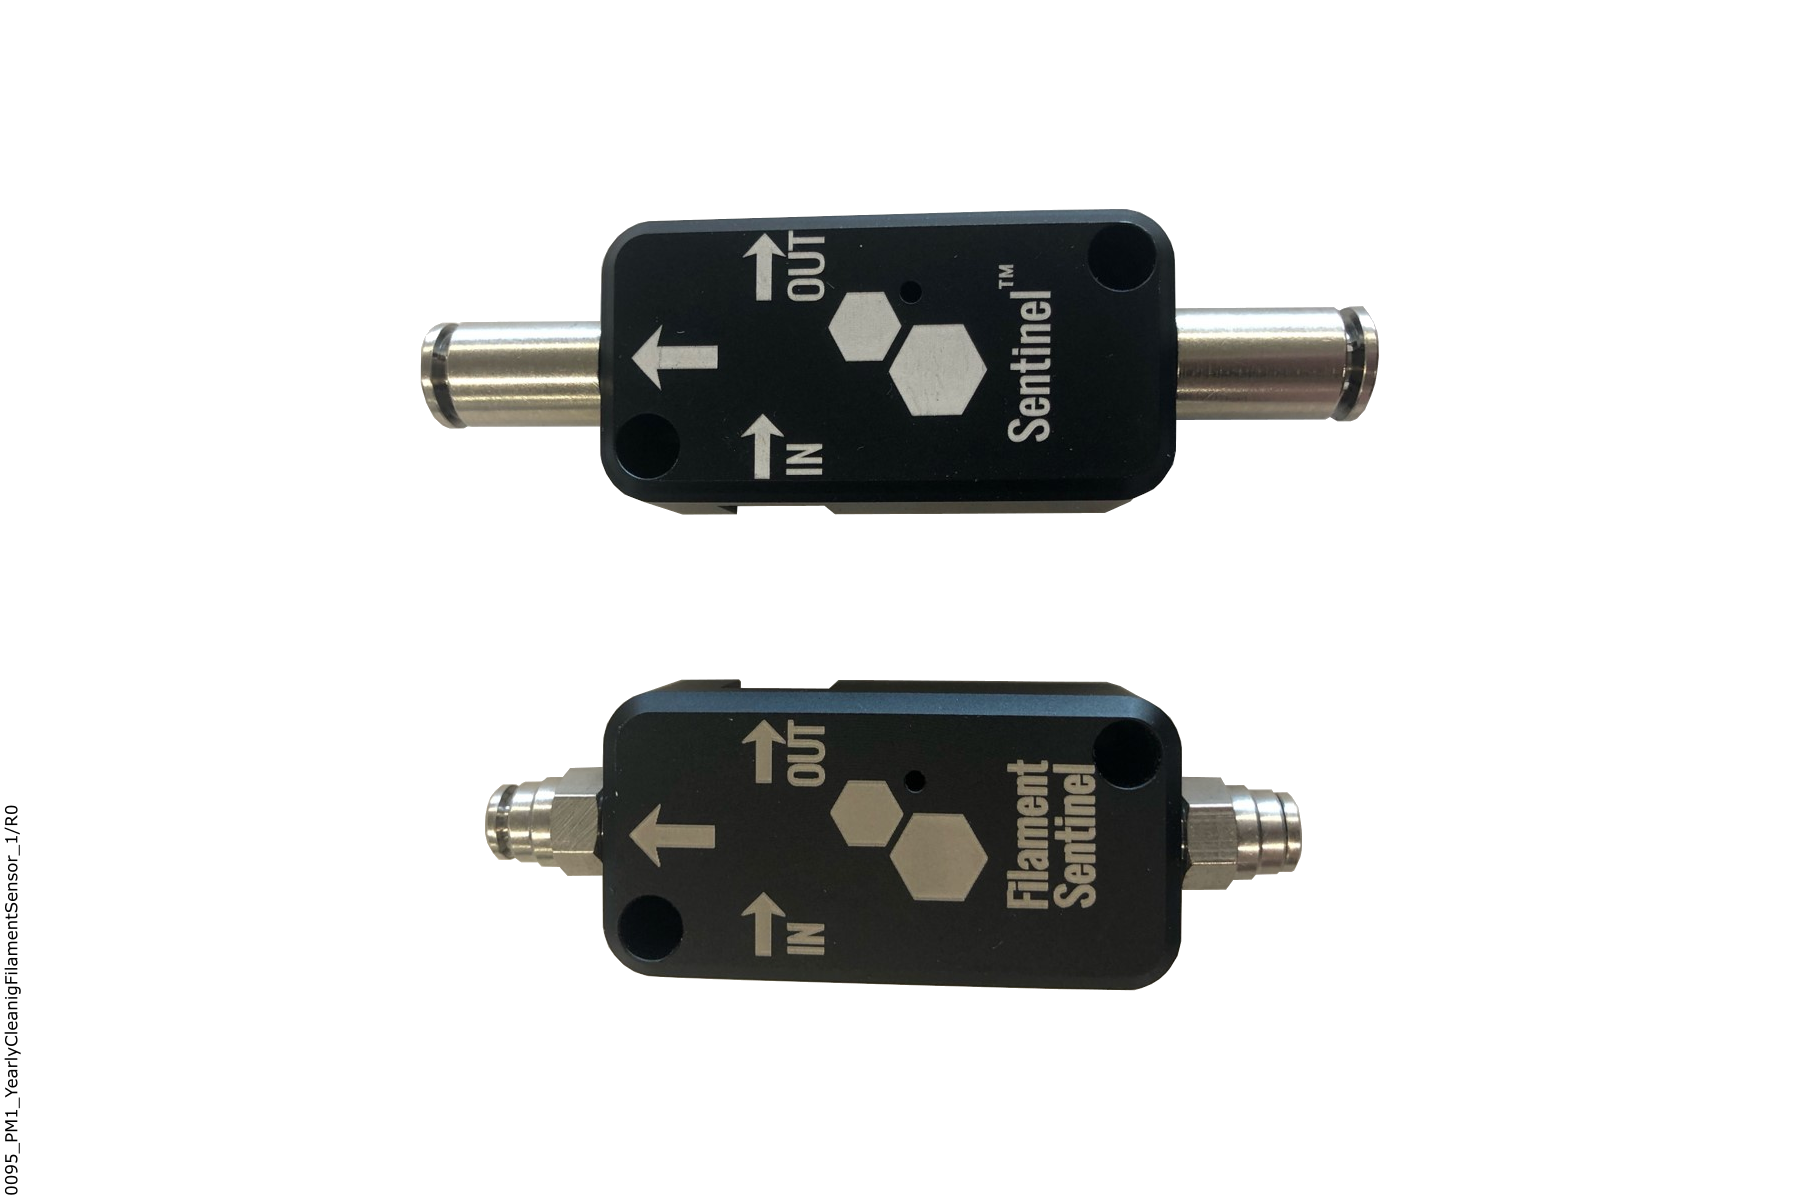
The first generation of the filament sensor has two hex fittings.
The second generation of the filament sensor has two rounded fittings.
Wait until all the machine components are at room temperature before you continue. Some machine components can be hot if the machine was recently used. Failure to do so can cause injuries.
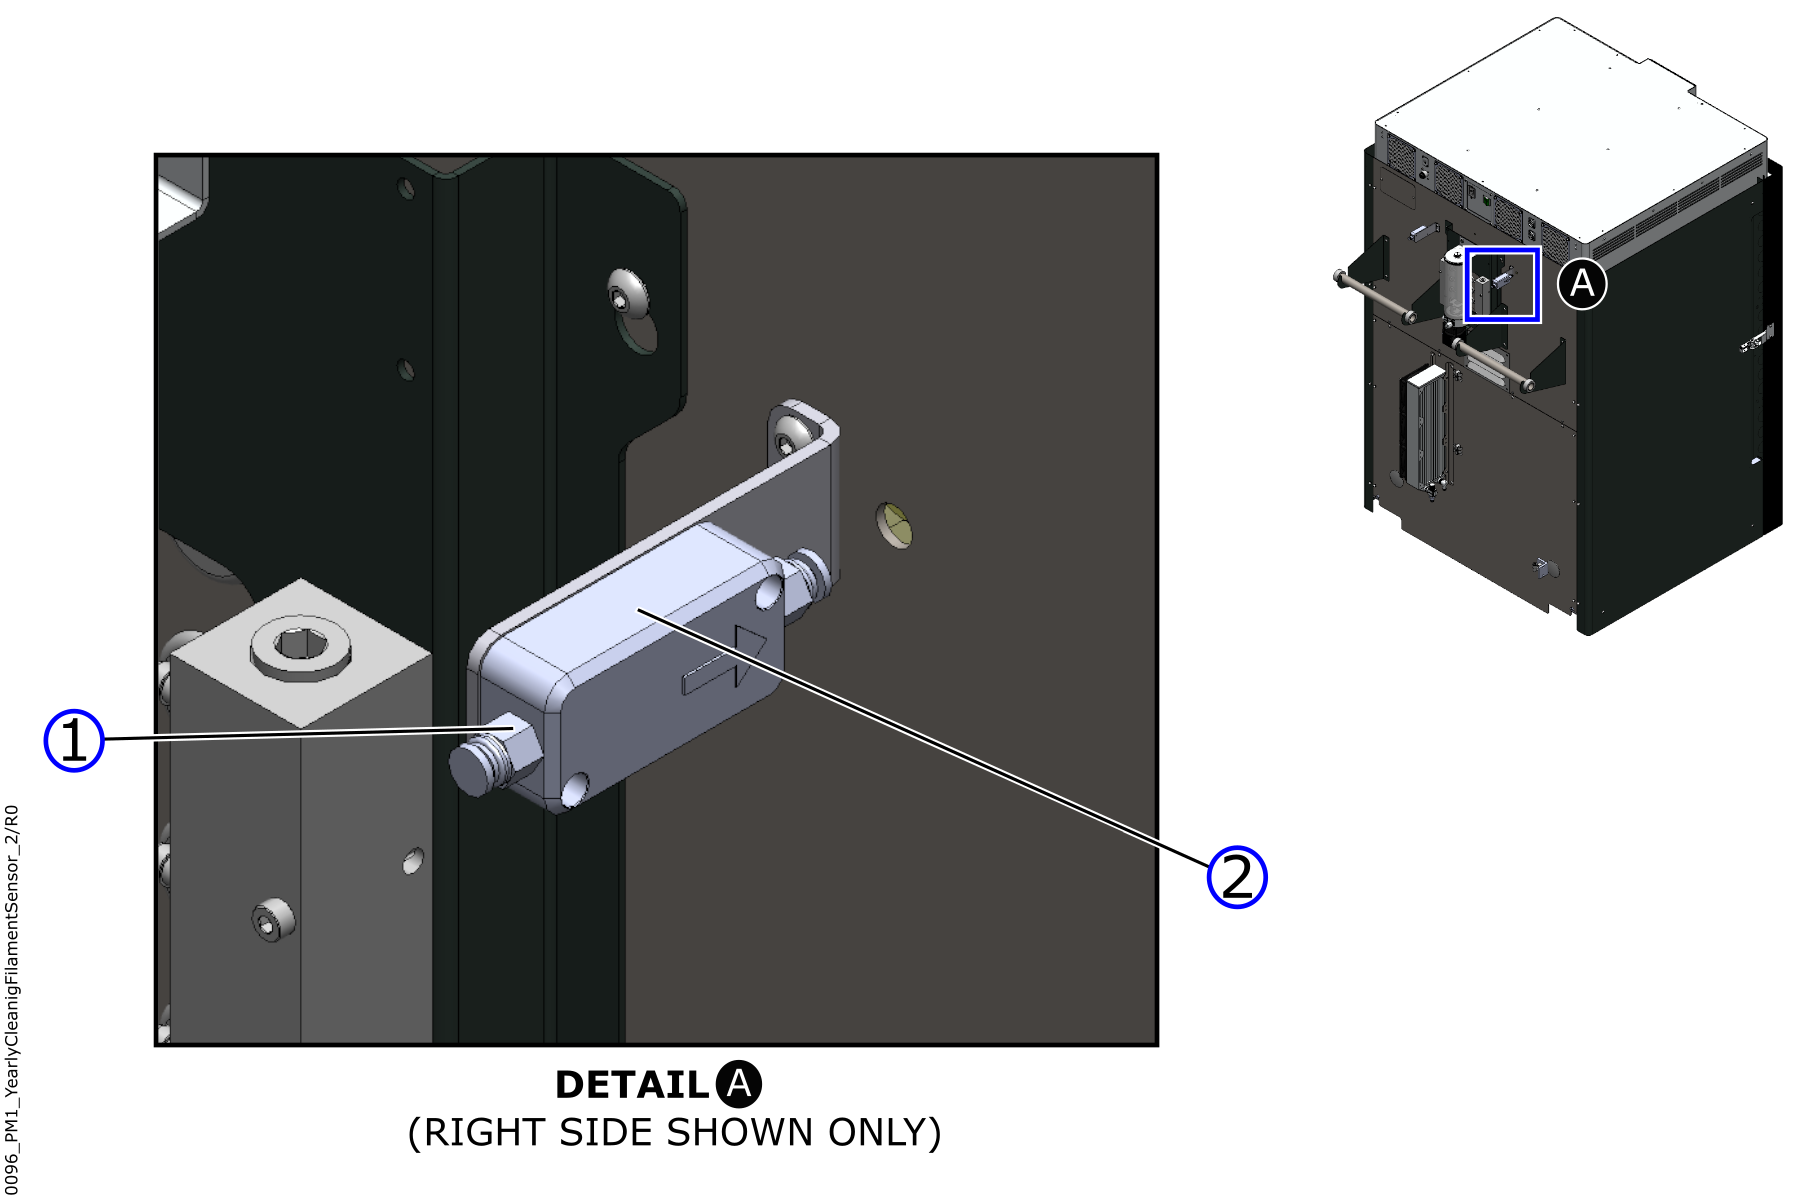
- Manually remove the fitting (1) found at the entrance of the filament sensor housing (2).
- Use the 10 mm wrench to remove the first generation fittings.
- Use the 4 mm hex key to remove the second generation fittings.
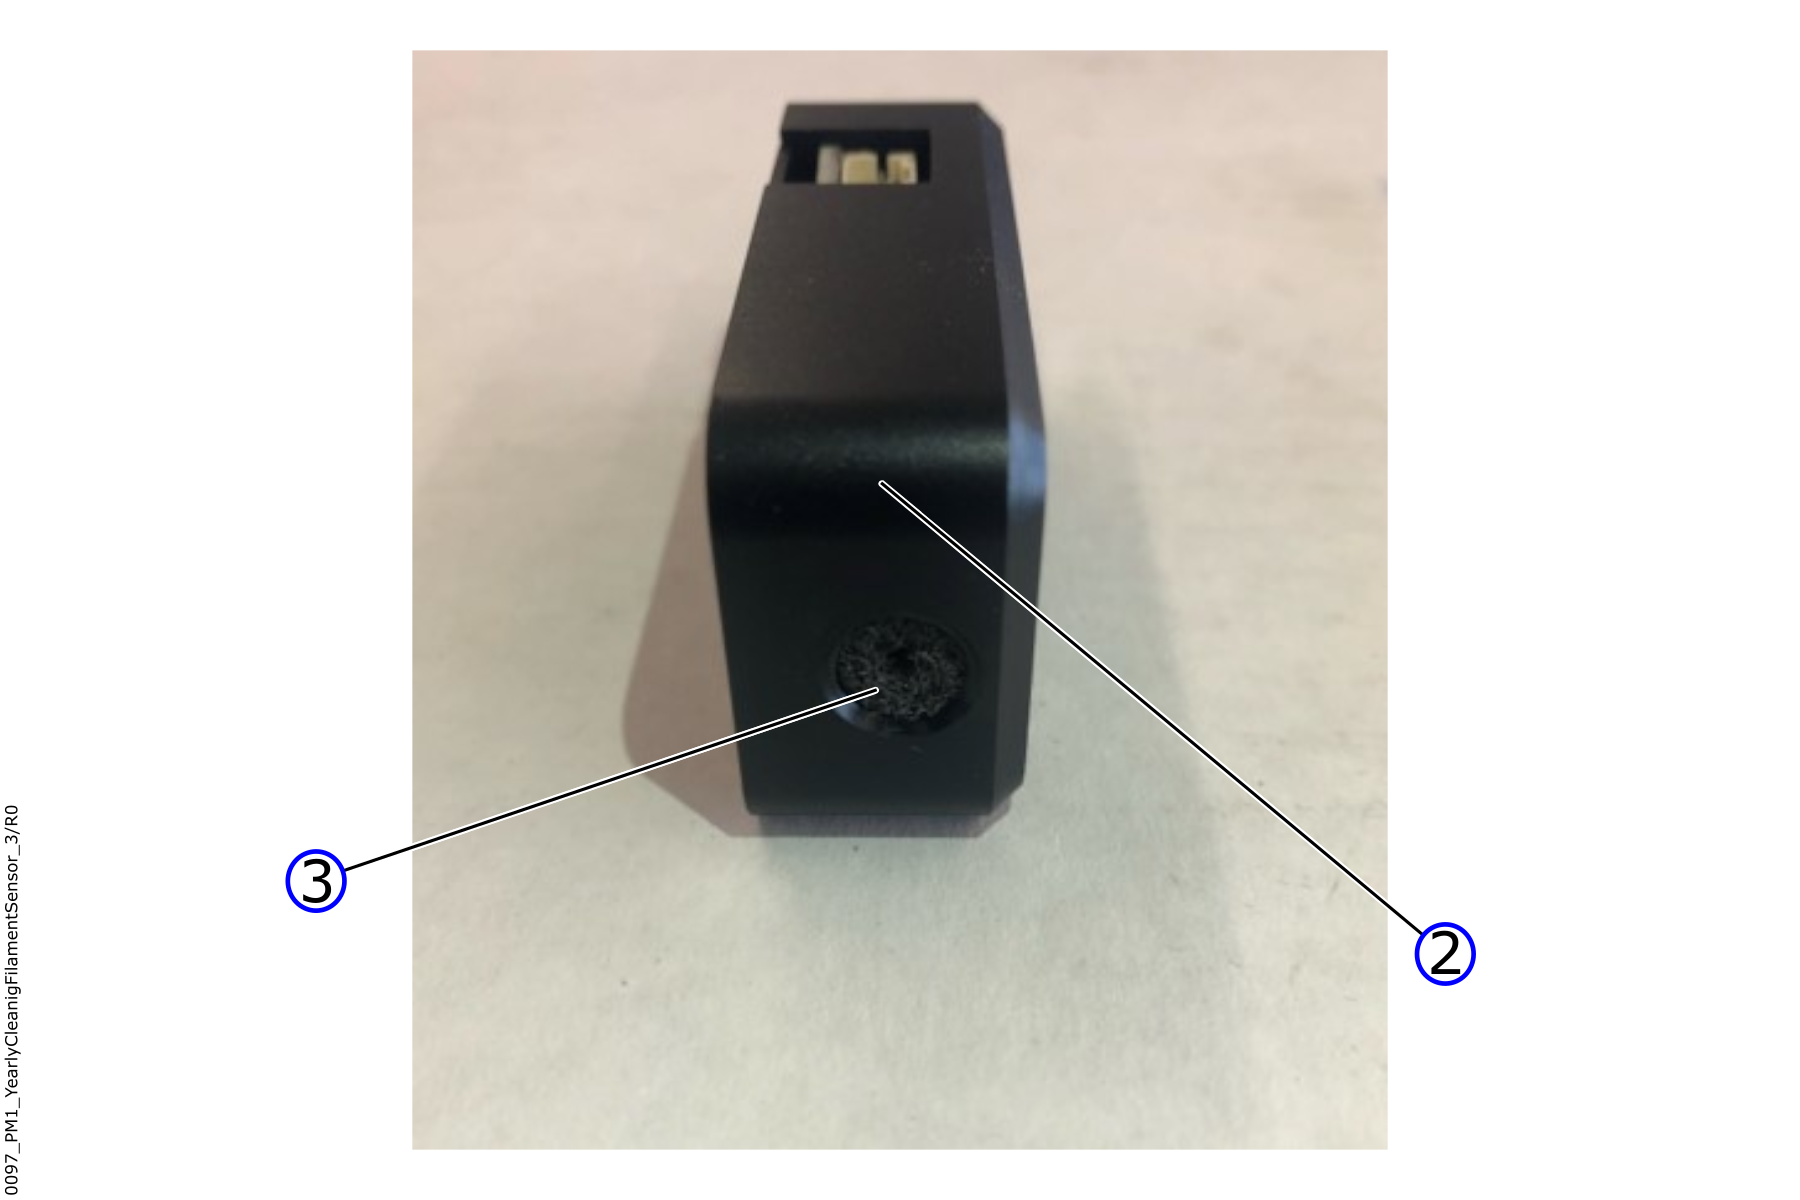
The filament sensor is a fragile component. Use a non-conductive tool to move the foam filter. Failure to do so can damage the filament sensor.
- Use the non-conductive tweezers to carefully remove the foam filter (3) from the filament sensor housing (2).
- Use a maximum of 15 psi of compressed air to clean the foam filter (3). Do not use solvents to clean the foam filter (3).
- If the foam filter (3) is damaged, replace it with a new one.
Reach out to our Customer Success team at help@aon3d.com for genuine AON3D replacement part(s) inquiries.
- Do the steps 1 to 4 for the adjacent filament sensor, if necessary.
Install Filament Sensor Foam Filter
Do not use a conductive tool to remove and/or install the foam filter (3). The filament sensor is a fragile component. Failure to do so can cause damage to the filament sensor.
- Use the non-conductive tweezers to install the foam filter (3) into the filament sensor housing (2).
- Make sure that the foam filter (3) is in the correct position inside the filament sensor housing (2).
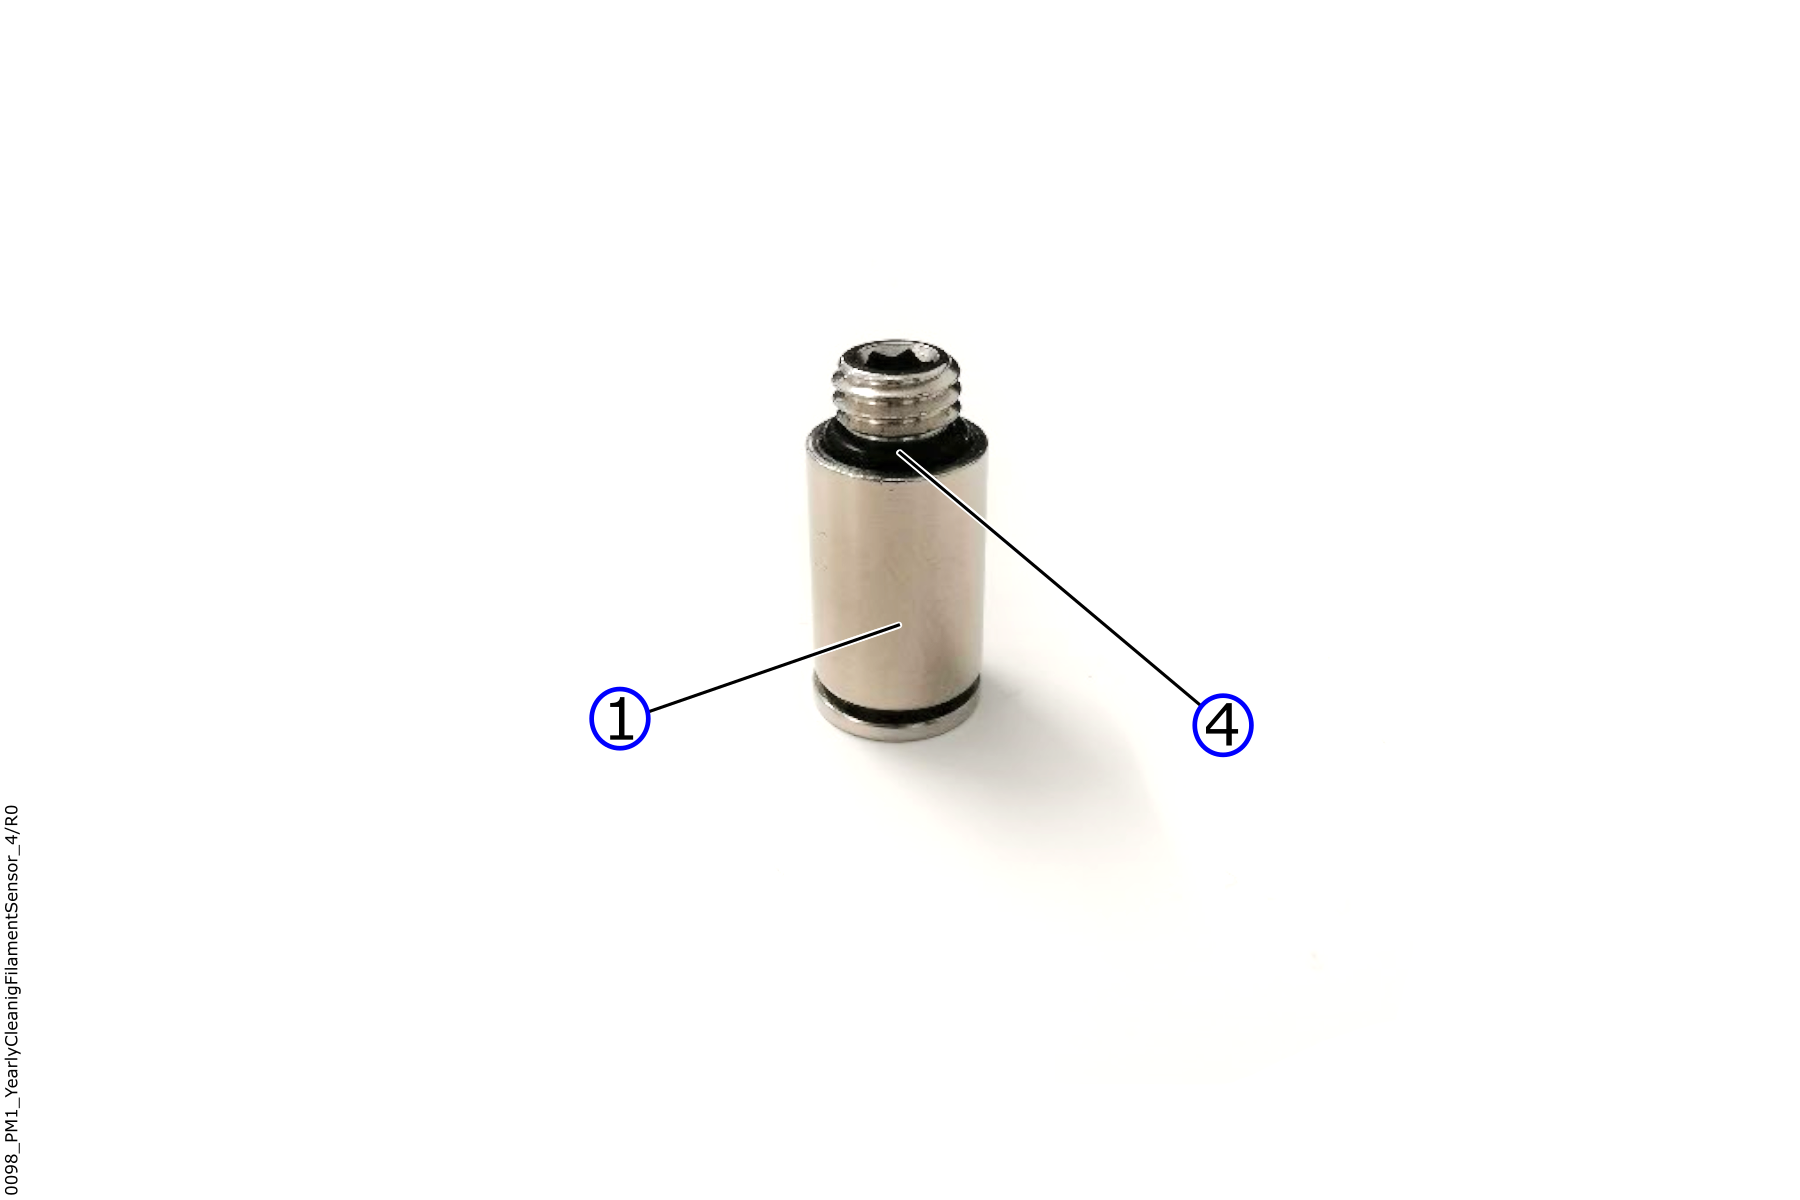
- Make sure that there is no damage on the O-ring (4), and that it is in the correctly installed on the fitting (1).
In order for the foam filter (3) to function correctly, the PTFE tube is put into the filament sensor housing (2) by a total length of 17 mm (0.67 inch). If the PTFE tube length is longer, it will compress the foam filter (3).
- Manually install the fitting (1) onto the filament sensor housing (2). Do not tighten the fitting (1) with the use of a tool.
- Use the tape measure, or ruler, and the fine tip marker, to identify a length of 17 mm (0.67 inch) on the PTFE tube.
- Put the PTFE tube into the fitting (1) to the 17 mm (0.67 inch) indicator mark.
- Load the filament in the feed path. Refer to Load Filament.
- Do the steps 1 to 7 for the adjacent filament sensor, if necessary.
Test and Return to Service
- Release the E-stop button.
- Home XYZ.