Replace Hot End
| Model | [•] Hylo.01 | ||
| Category | [ ] Installation | [•] Operation | [ ] Maintenance |
Summary
The procedure that follows gives the instructions on how to replace the hot end on the Hylo machine.
Estimated time: 20 minutes
Tools
| Qty | Description | Specification |
|---|---|---|
| 1 | Hex Key | 3 mm |
Parts Information
| Qty | Part Number | Description |
|---|---|---|
| 1 | A-000414 | Hylo - Toolhead |
| A/R | A-000454 | Hot End With 0.4 mm Tungsten Carbide Nozzle |
| A/R | A-000455 | Hot End With 0.6 mm Tungsten Carbide Nozzle |
Personal Protective Equipment
| Qty | Description | Minimum Specification |
|---|---|---|
| 1 | Safety Eyewear | ANSI/ISEA Z87.1 |
| 1 | Heat-resistant Gloves | EN 407-2004 |
Prepare the Machine
- Unload the filament from the extruder. Refer to Replace Filament.
- Home XYZ.
- Lower the Z-axis by 300 mm.
- Open the build chamber door.
- Push the E-stop button.
- Turn the power OFF with the ON/OFF switch found on the front panel of the machine.
- Turn the main disconnect button in the OFF (O) position.
- Wait until the build chamber, build platform, and hot ends are at room temperature.
- Press the cold plenum hood release button located on the right side of the machine.
- Open the cold plenum hood.
Replace Toolhead Components
Wait until all machine components are at room temperature before you continue. Some machine components can be hot if the machine was recently used. Failure to do so can cause injuries.
Remove the Toolhead
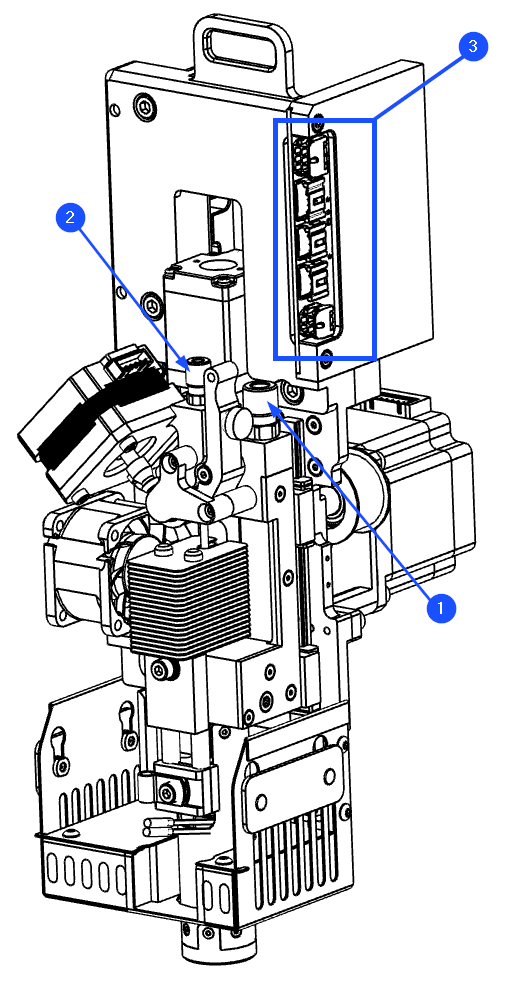
- Disconnect the PTFE tube (1) found at the top of the extruder body. Press down on the fitting with one hand and carefully pull out the PTFE tube with the other hand.
- Disconnect the air cooling circuit PTFE tube (2) found at the top of the toolhead. Press down on the fitting with one hand and carefully pull out the PTFE tube with the other hand.
- Disconnect the connectors (3) from the board.
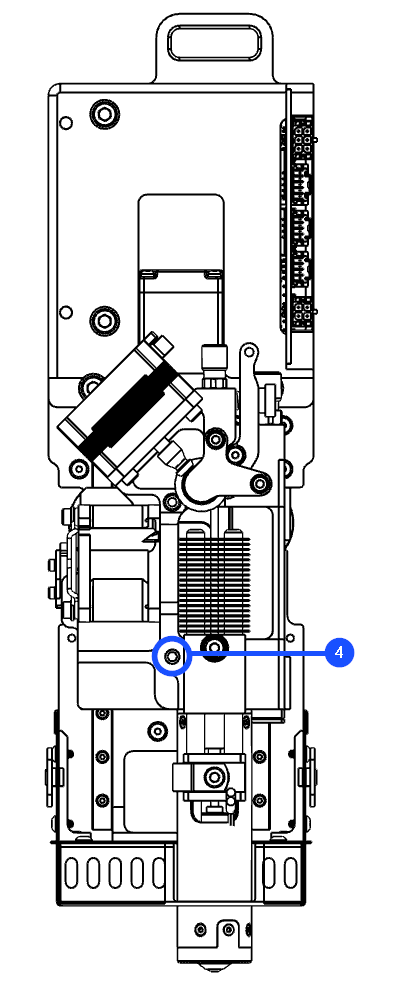
- Use the 3 mm hex key to loosen the flat end set screw (4).
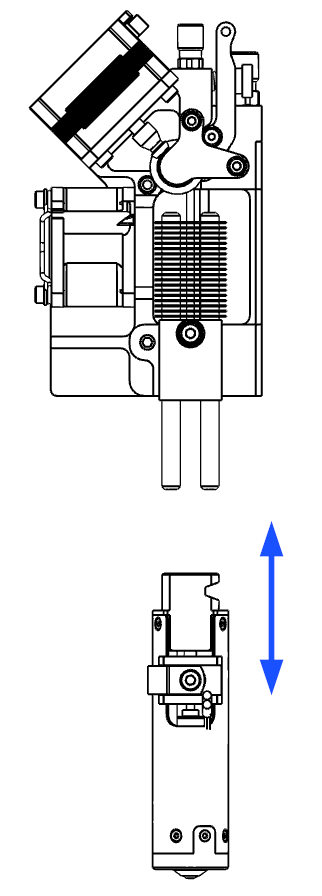
- Slide up the toolhead assembly to remove it from the machine.
Remove the Hot End
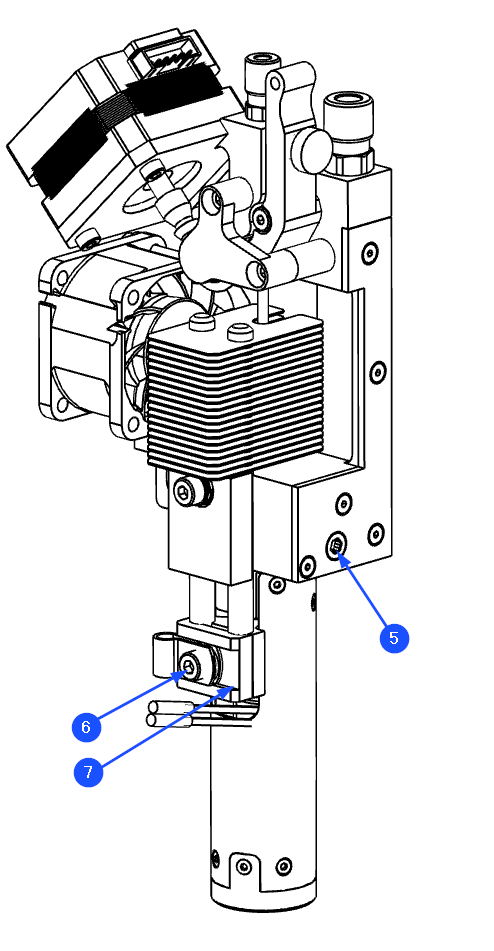
- Use the 3 mm hex key and rotate the left-handed wedge screw (5) clockwise to loosen the hot end wedge.
- Use the 3 mm hex key to remove the clamp screw (6) and cooling block cap (7).
- Separate the hot end assembly from the toolhead.
Install the Hot End
Use a different hot end for low-temperature and high-temperature materials. If not possible, use polycarbonate filament as transition material to purge the hot end when switching from low to high temperatures material or from high to low temperature materials. Failure to follow instruction may result in permanent nozzle clog or leak.
- Install the new hot end assembly onto the toolhead.
- Use the 3 mm hex key to install the clamp screw (6) and cooling block cap (7).
- Use the 3 mm hex key and rotate the left-handed wedge screw (5) counterclockwise to tighten the hot end wedge.
Install the Toolhead
- Slide down the toolhead assembly to install it into the machine.
- Use the 3 mm hex key to tighten the flat end set screw (4).
- Connect the connectors (3) to the board.
- Install the PTFE tube into the air cooling circuit fitting (2).
- Install the PTFE tube into the extruder fitting (1).
Test and Return to Service
- Close the cold plenum hood.
- Make sure that you remove all the tools from the machine enclosure.
- Close the build chamber door.
- Turn the main disconnect button in the ON (1) position.
- Turn the power ON with the ON/OFF switch found on the rear panel of the machine.
- Release the E-stop button.
- Home XYZ.
- Load the filament. Refer to Replace Filament.