Install Build Platform
| Model | [•] Hylo.01 | ||
| Category | [ ] Installation | [•] Operation | [ ] Maintenance |
Summary
The procedure that follows gives instructions on how to install the build platform onto the vacuum chuck.
Estimated time: 2 minutes
Tools
| Qty | Description | Specification |
|---|---|---|
| A/R | Rags | Lint-free |
| A/R | Isopropyl Alcohol | 99% |
| 1 | Vacuum Cleaner, Shop | N/A |
Parts Information
| Qty | Part Number | Description |
|---|---|---|
| A/R | P-001378 | PPSU Build Sheet |
| A/R | P-001268 | Reusable Garolite G10 Build Plate |
| A/R | P-001115 | Reusable CF PEEK Build Plate |
AON3D offers a wide selection of build platform materials (and gauges) applicable to all material requirements. Reach out to our Customer Success team at help@aon3d.com for genuine AON3D build platform options.
Personal Protective Equipment
| Qty | Description | Minimum Specification |
|---|---|---|
| 1 | Safety Eyewear | ANSI/ISEA Z87.1 |
| A/R | Gloves | Work |
Available Build Platforms
The build platforms available are as follows:
- PPSU Build Sheet
- Reusable Garolite G10 Build Plate
- Reusable CF PEEK Build Plate.
Prepare the Machine
- Lower the Z-axis by 300 mm.
- Turn the heaters power OFF:
- Chamber heater
- Bed heater
- Extruders heater.
Replace the Build Platform
Wait until all machine components are at room temperature before you continue. Some machine components can be hot if the machine was recently used. Failure to do so can cause injuries.
Remove the Build Platform
- Open the build chamber door.
- Remove the loose printed part(s) from the build platform.
- Use the Graphical User Interface (GUI) to turn the vacuum pump power OFF.
- Lift up the front edge of the build platform.
- Carefully remove the build platform from the build chamber.
- Lightly bend the build platform to remove the part(s), if any.
Inspect and Clean the Build Platform
Do not apply isopropyl alcohol directly onto the hot vacuum chuck. The direct use of isopropyl alcohol on the hot vacuum chuck can cause personal injuries.
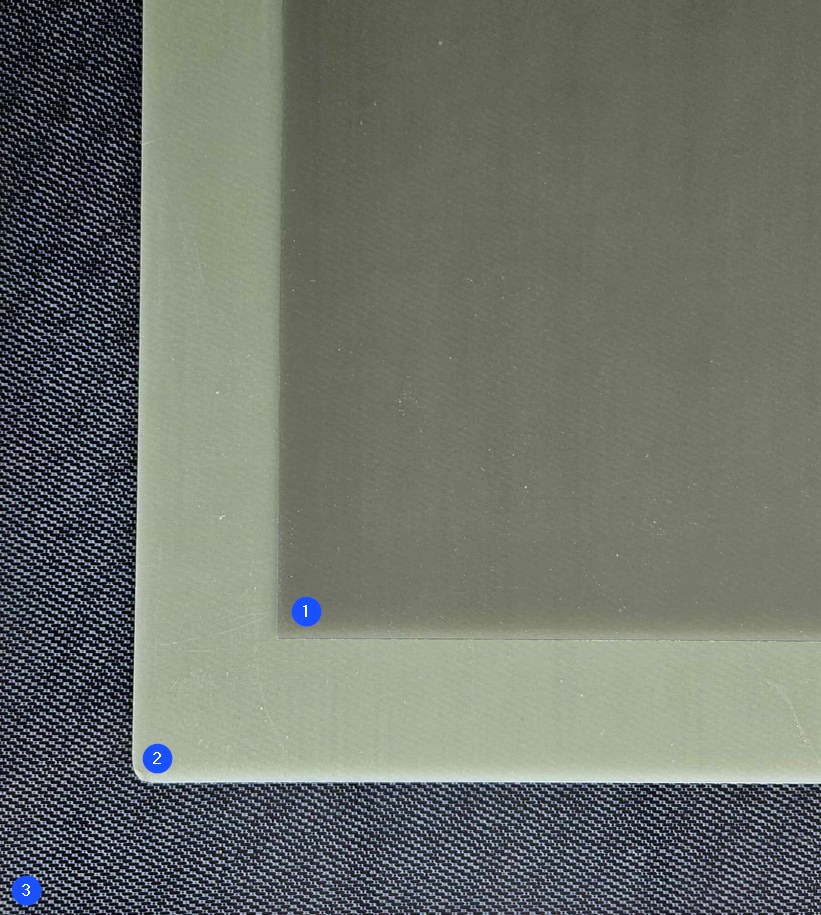
- Inspect the build platform for damages such as holes and/or bent corners. Small scratches on the print surface are acceptable. Replace if necessary.
- Make sure that the vacuum chuck surface is clean of solvents and/or unwanted materials:
- Apply a small quantity of isopropyl alcohol onto a clean lint-free rag to clean the vacuum chuck, if necessary.
- Let the vacuum chuck surfaces dry for two minutes.
- Use the shop vacuum cleaner to clean unwanted material from the vacuum bed channels, if necessary.
- Make sure that the build platform surfaces are clean of solvents and/or unwanted materials. Use a lint-free rag and isopropyl alcohol to clean all surfaces, if necessary.
- Let the build platform surfaces dry for two minutes.
- The Nano Polymer Adhesive can be applied to increase build platform adhesion. Refer to table on the Validated Materials page to confirm if the Nano Polymer Adhesive is required.
Install the Build Platform
Make sure that the vacuum chuck is at room temperature. This will help the build platform seal onto the vacuum chuck. Higher temperatures may deform the build platform during installation.
- Close the build chamber door.
- Home XYZ.
- On the machine graphical user interface (GUI), navigate to the Home ⌂ tab.
- Under BASIC CONTROLS select
INSTALL BUILD SURFACEto lower the the vacuum chuck. - Open the build chamber door.
- Put the build platform into position onto the vacuum chuck. Make sure that the rear corners of the build platform are seated equally against the two build platform stoppers found at the rear corners of the vacuum chuck.
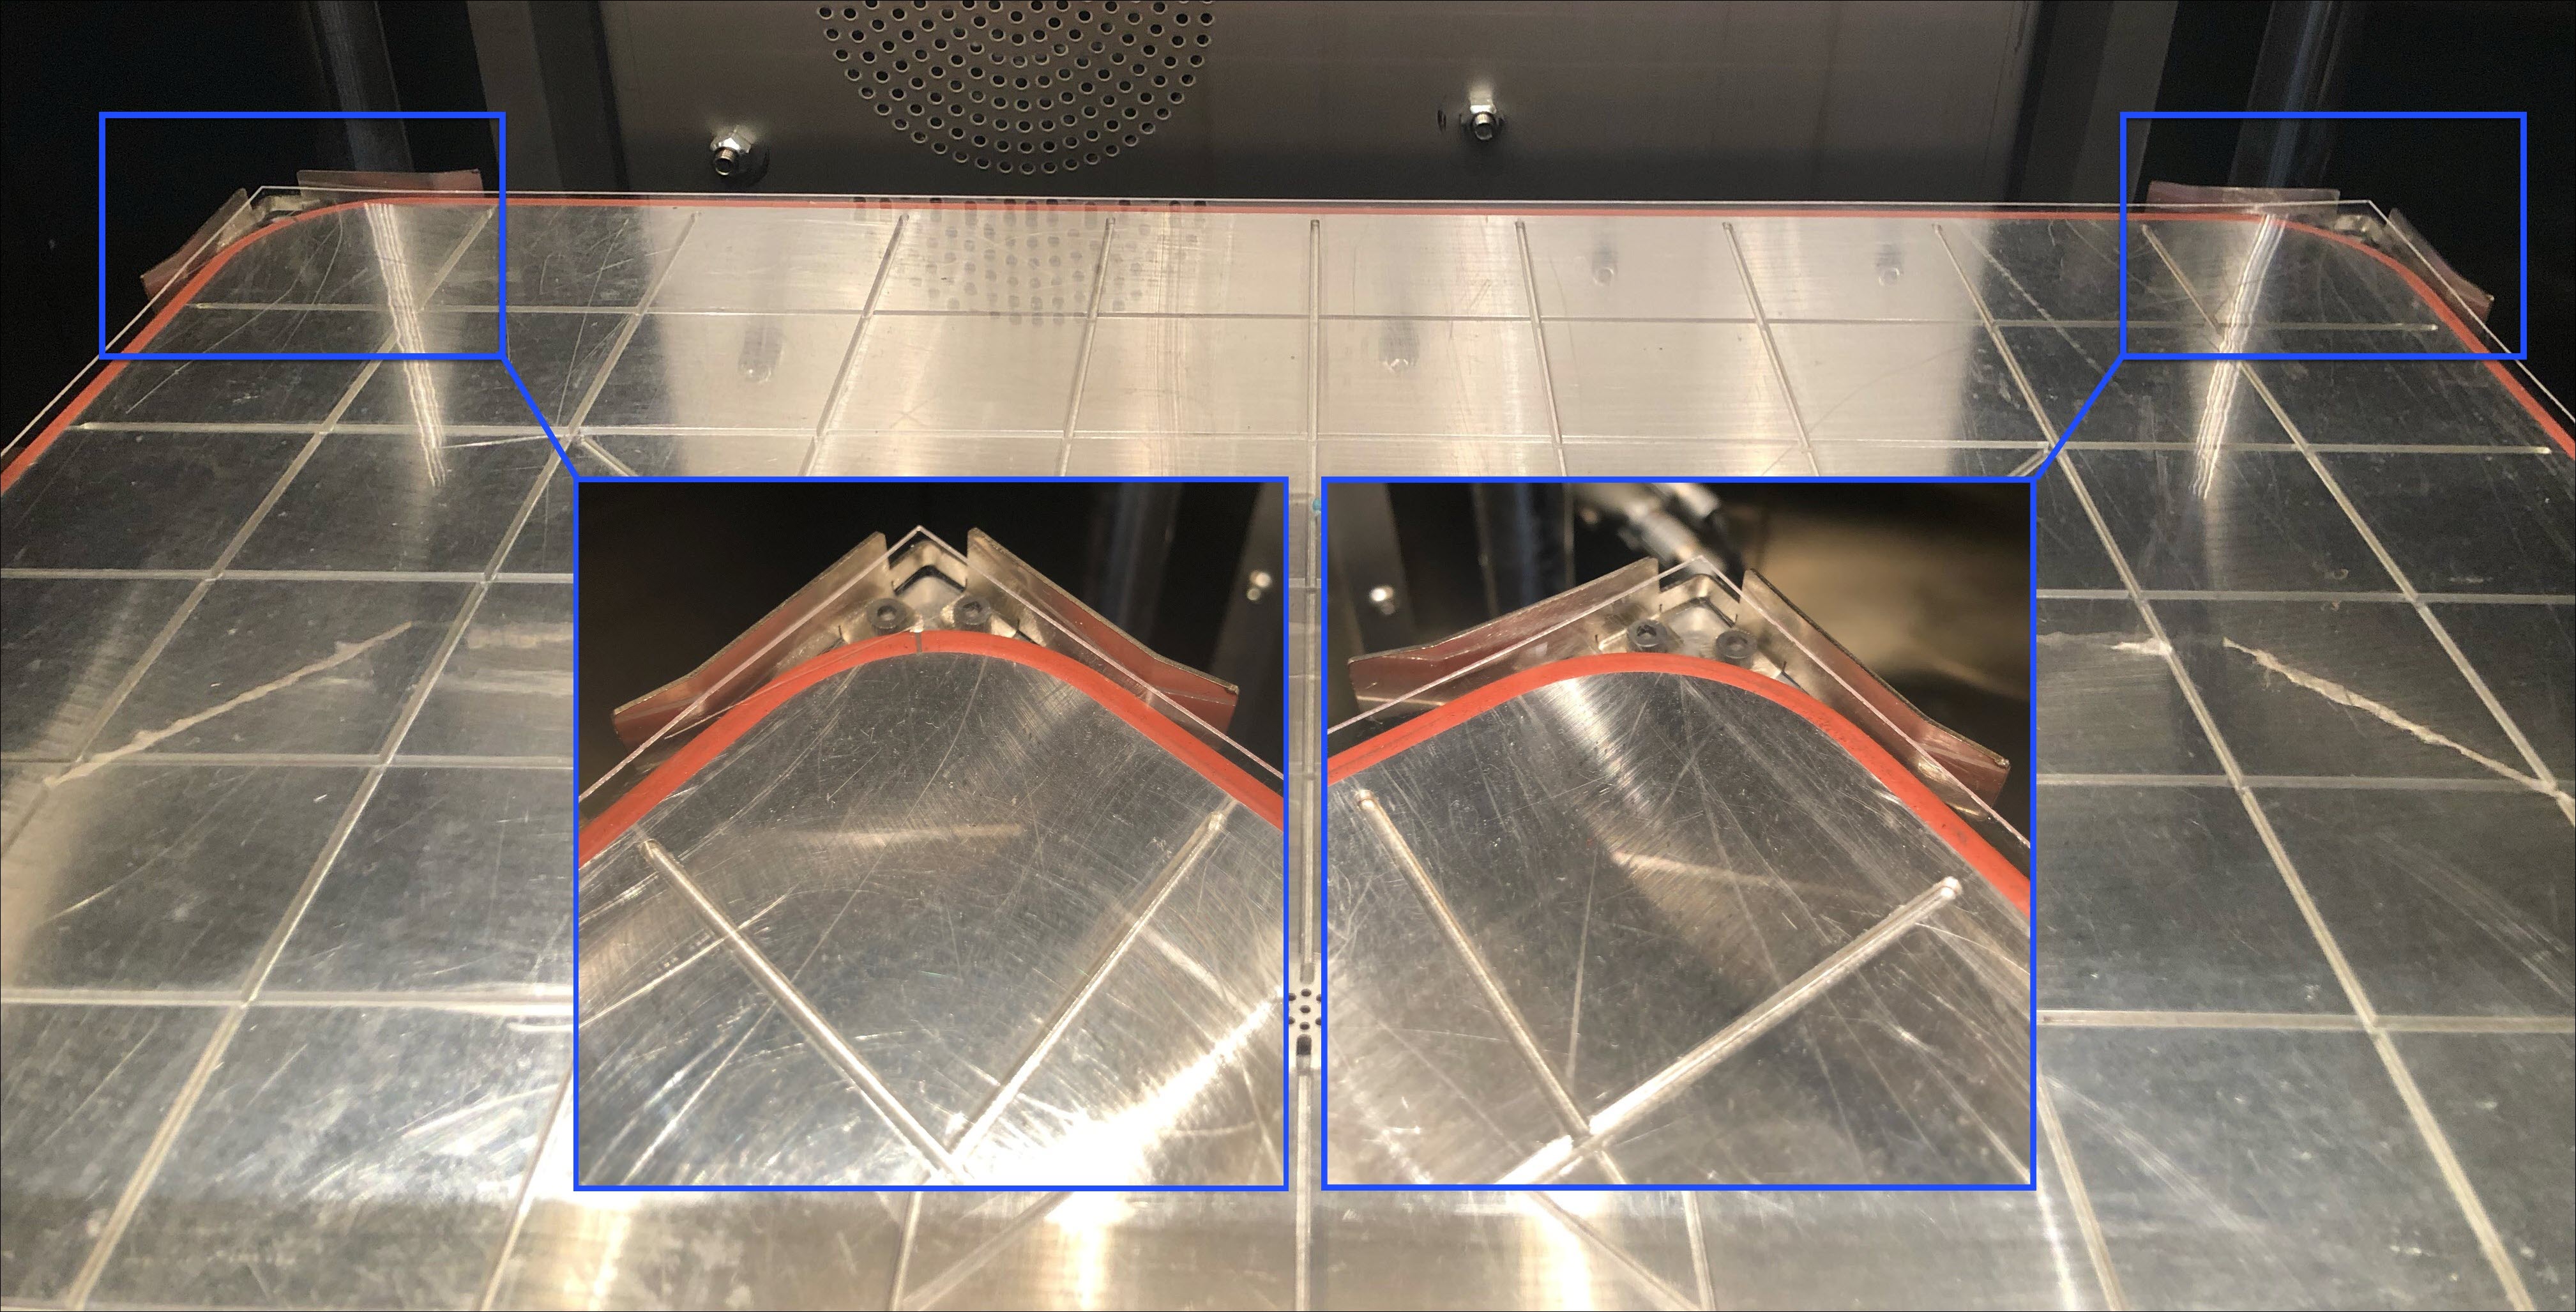
- Make sure that the full outer perimeter of the build platform is in contact with the vacuum chuck outer perimeter seal.
- Close the build chamber door.
- Use the GUI to select
START VACUUMto power ON the vacuum pump to seal the build platform onto the vacuum chuck. - The GUI will show a check mark in the status bar next to Vacuum when the build platform is correctly sealed onto the vacuum chuck.
PPSU build sheets are not meant to be reused as removal of the printed parts may damage the surface and prevents the build platform to correctly seal onto the vacuum chuck
The user must power ON the vacuum pump to seal the build platform onto the vacuum chuck. The user has a ten-second window to correctly put the build platform onto the vacuum chuck. After ten seconds, the vacuum pump will automatically power OFF if no seal between the build platform and the vacuum chuck has been detected.
Vacuum Seal Troubleshooting
If the build platform is not correctly sealed onto the vacuum chuck within ten seconds from when the vacuum pump is powered ON, the GUI will illustrate a No Vacuum symbol, and the vacuum pump will power OFF automatically.
- Open the build chamber door and apply light hand pressure to the center of the build platform, if necessary.
- Use the reusable CF PEEK build plate to apply even pressure on the build platform.
- Close the build chamber door.
- Select
Startto power ON the vacuum pump. - Do the steps that follow if vacuum is not achieved:
- Open the build chamber door.
- Inspect the outer perimeter of the build platform and vacuum chuck surfaces. Lightly push on the outer perimeter of the build platform to help it seal onto the vacuum chuck.
- Select
Startto power ON the vacuum pump. - When the build platform is correctly sealed onto the vacuum chuck, the GUI/web browser will show a check mark in the status bar, next to Vacuum.
- Open the build chamber door.
- Remove the reusable CF PEEK build plate.
Test and Return to Service
- Make sure that you remove all the tools from the build chamber.
- Close the build chamber door.
- Home XYZ.
- Calibrate the Z-axis. Refer to the XYZ-Axes Offset Calibration procedure.