Power Up the Machine
| Model | [•] Hylo.01 | ||
| Category | [•] Installation | [ ] Operation | [ ] Maintenance |
Summary
The procedure that follows gives instructions on how to power ON the AON3D Hylo machine.
Estimated time: 15 minutes
Tools
None required.
Parts Information
None required.
Personal Protective Equipment
| Qty | Description | Minimum Specification |
|---|---|---|
| 1 | Safety Eyewear | ANSI/ISEA Z87.1 |
Install Power Cord
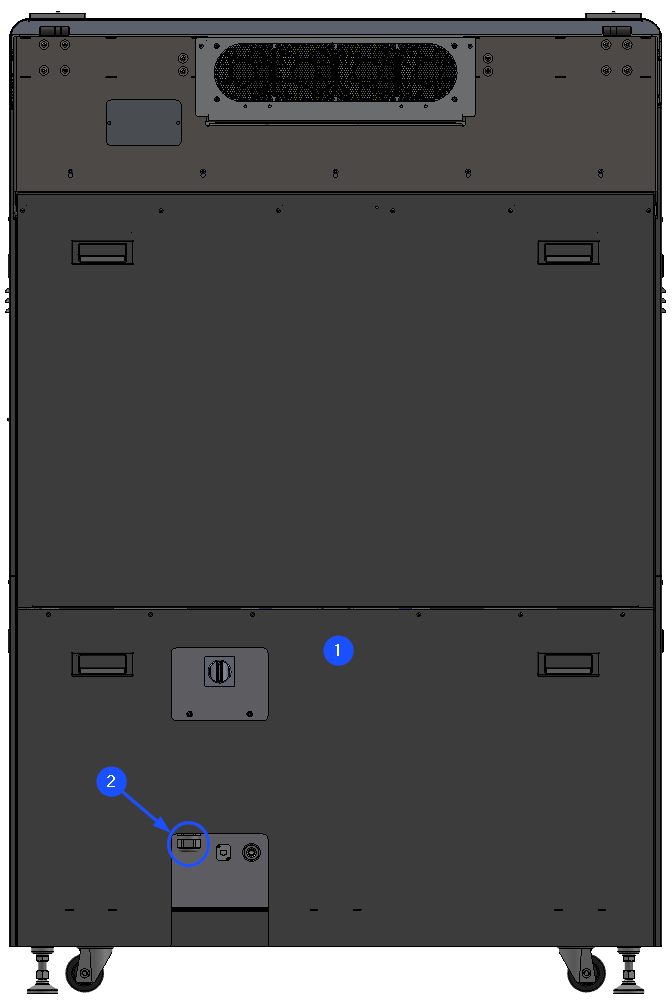
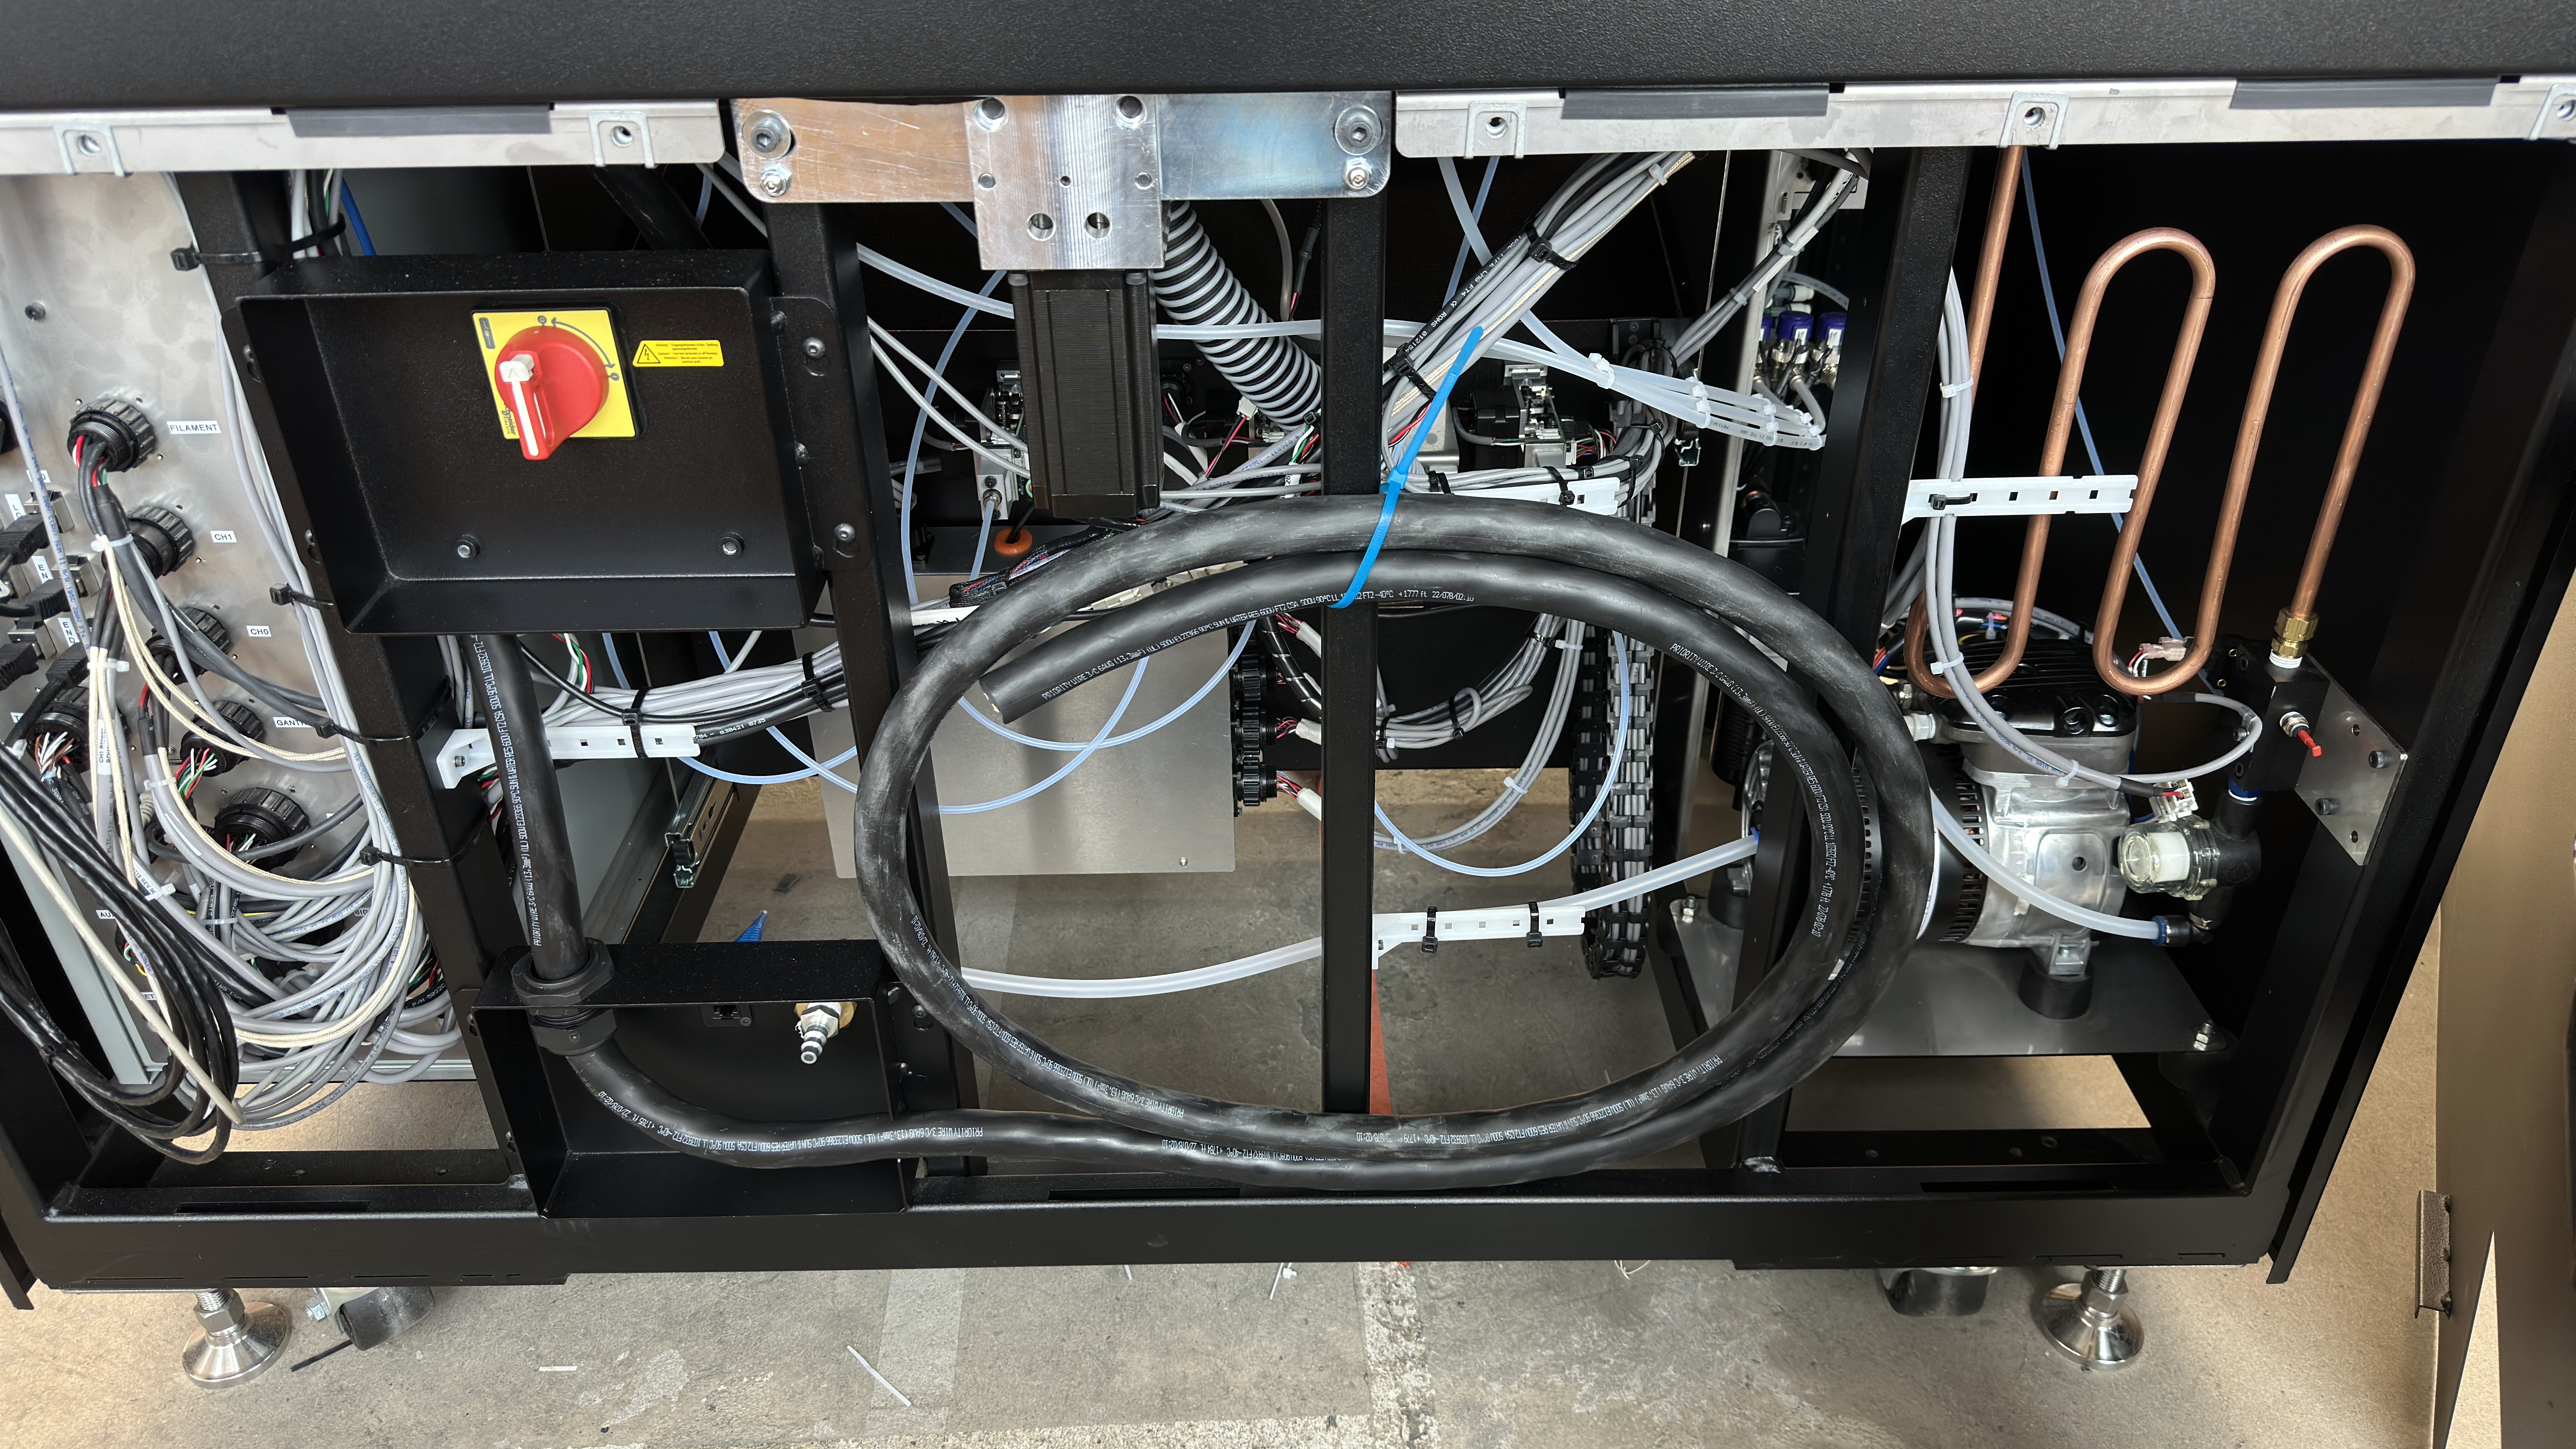
- Remove the lower rear panel (1). Refer to the Remove Body Panels page.
- Cut the cable tie securing the power cord to the machine frame.
- Remove the power cable from the machine.
- Install the lower rear panel. Refer to the Remove Body Panels page.
- Connect power to the machine (2) from the local supply disconnecting device. Refer to the Power Requirements page.
Install Compressed Air Supply
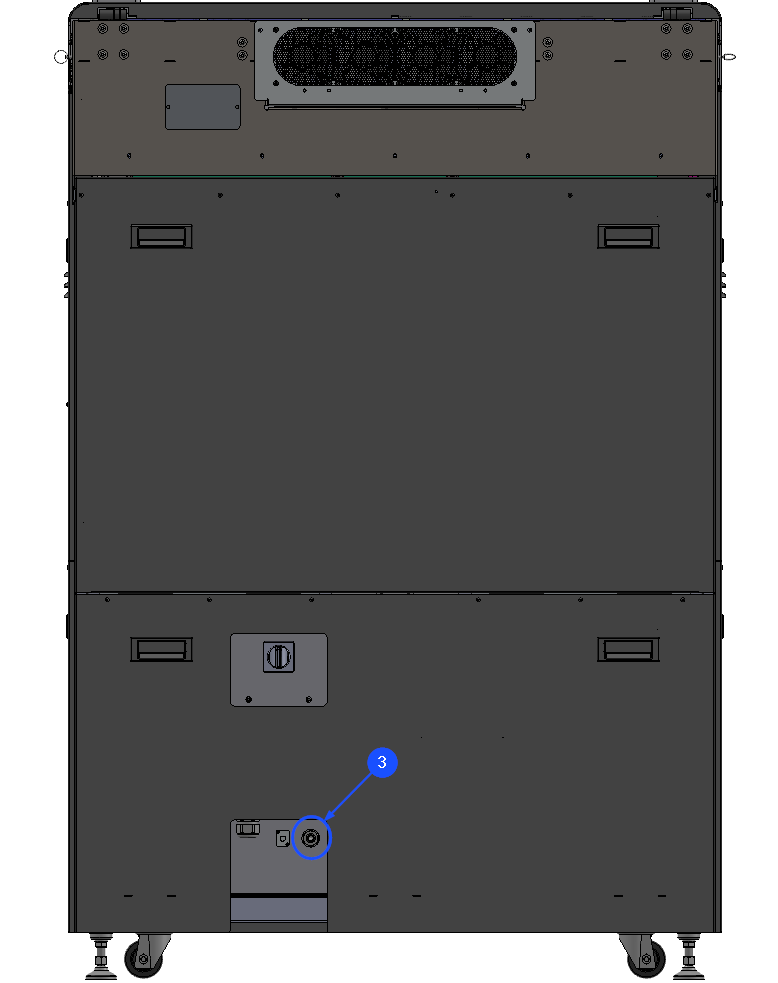
- Refer to the Power Requirements for compressor sizing information.
- Insert the male connector into the 3/8 in NPT fitting (3) at the back of the machine.
Power-Up the Machine
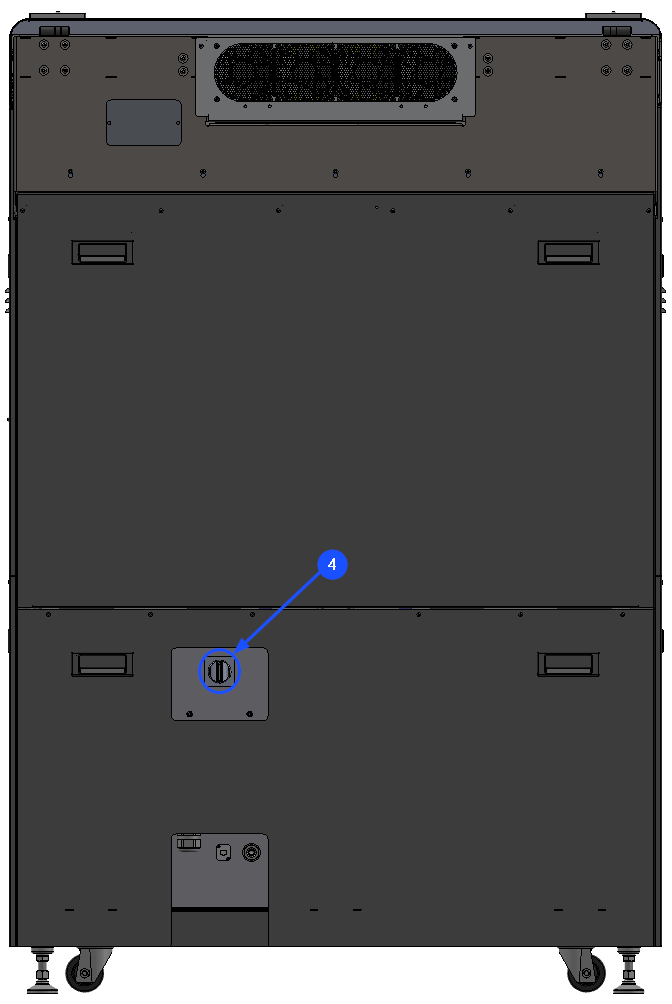
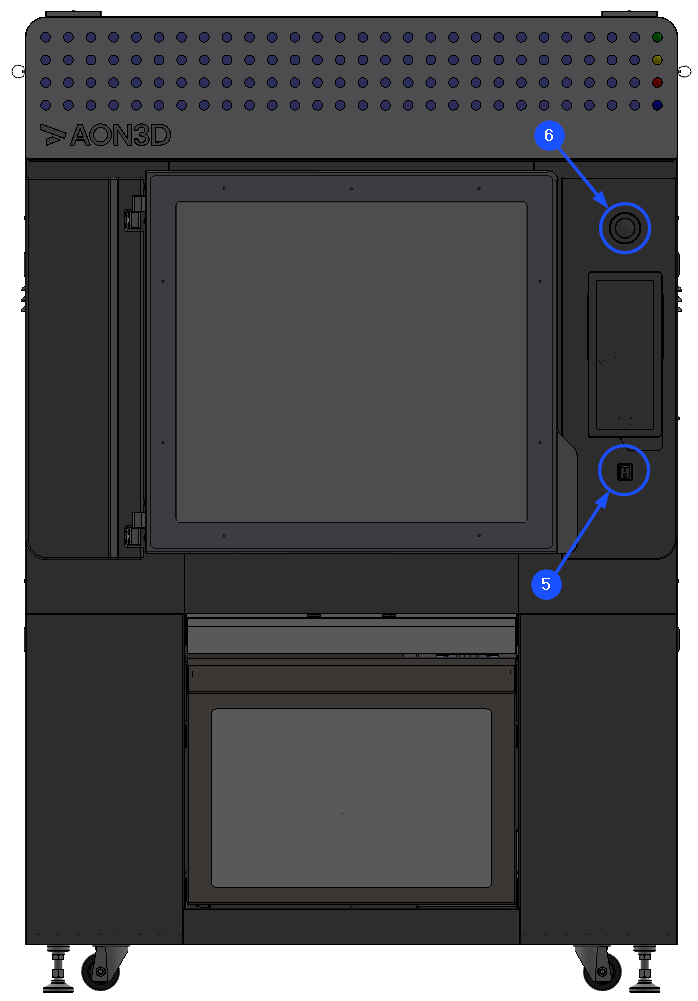
- Turn the main disconnect button (4) in the ON (1) position.
- Turn the machine main power ON at the ON/OFF switch (5) found on the front panel.
- Release the E-stop button (6).
Checklist
- Is the machine powered ON?
- Do the cold plenum enclosure fans run?
- Are the build chamber lights powered ON?
- Is the Graphical User Interface (GUI) powered ON and loaded with the AON3D logo?
Reach out to our Customer Success team at help@aon3d.com if there are any questions in regards to the installation procedure.